Starting procedure – Shindaiwa X7502864301 User Manual
Page 10
10
Starting Procedure
IMPORTANT!
Engine ignition is controlled by a two-position on-off switch mounted on the throttle body. This switch is typically labeled “I”
for ON and “O” for OFF.
NOTE:
The blade cover is used for transportation and storage.
Remove blade cover before using the unit.
WARNING!
Never start the engine from the operating
position.
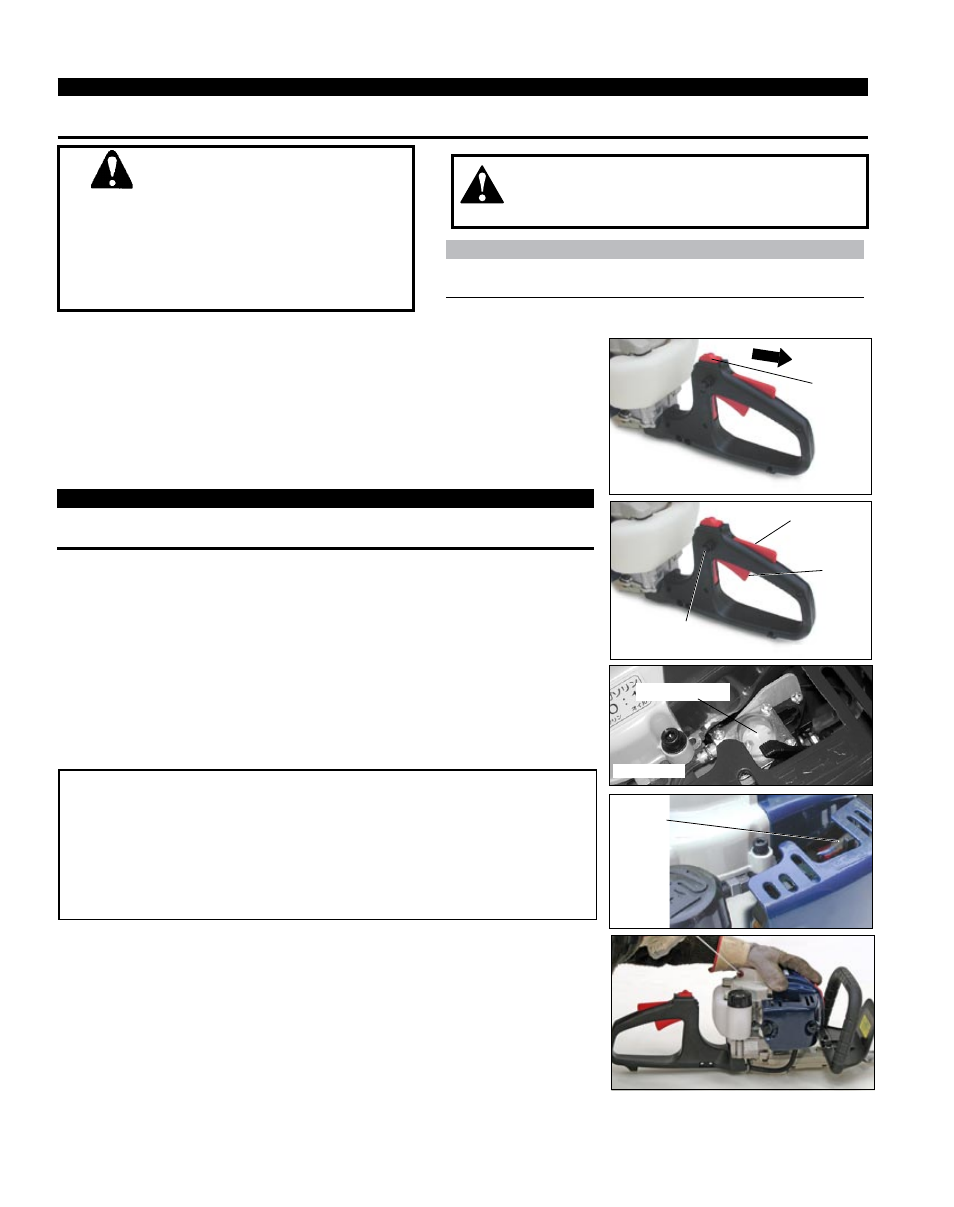
Slide the ignition switch to the “I” (ON) position
1.
. See Figure 4.
Set the throttle trigger to the “fast idle”:
2.
Ignition ON
Ignition
Switch
IMPORTANT!
The primer system only pushes fuel through the carburetor. Repeatedly pressing the
primer bulb will not flood the engine with fuel.
Place the unit on the ground. Grip the engine cover with your left hand and the
1.
starter handle with your right hand (shown).
Pull the starter handle slowly toward you until you feel the starter mechanism
2.
engage.
Start the trimmer by pulling the starting handle rapidly outward.
3.
Cranking the Engine
CAUTION!
The recoil starter can be easily
damaged by abuse!
Always engage the starter before attempting to crank the engine.
■
Never pull the starter cord to its full length.
■
Always rewind the starter cord slowly.
■
Choke
Closed
Figure 7
Throttle
Trigger
Throttle
Lock
Fast Idle
Button
Figure 8
Primer Bulb
Figure 6
Depress and hold the throttle lock, then squeeze the throttle trigger.
a.
Depress and hold the fast idle button.
b.
Release the throttle trigger and throttle lock, then release fast idle button.
c.
Prime the carburetor by repeatedly depressing the carburetor primer bulb until
3.
clear fuel can be seen flowing through the transparent primer bulb.
Figure 4
Figure 5
WARNING!
The attachment will operate immediately when the
engine starts, and could result in possible serious
injury. Keep movable parts of the attachment away
from objects that could become entangled or thrown,
and surfaces that could cause loss of control.
(Cold engine only)
4.
Choke the engine by moving the choke lever forward to the closed” position.
See Figure 7.