Backup footage, Connecting cameras and power adapter – Swann DVR4-1000 User Manual
Page 7
18
18
Backup Footage
The DVR4-1000™ has a backup feature via the USB port on the front of the
DVR. The DVR accepts fl ash drives or thumbdrives up to 2GB in size. Follow the
steps below to backup footage:
1. Insert a USB fl ash drive / thumbdrive (not included) to the USB port.
2. Press Play to enter playback mode or use the Time Search feature to fi nd a
recording.
3. Pause playback at the start of the footage you would like to backup.
4. Press the Menu / File button to display the USB Backup Mode.
5. Press the CH1 button to
designate the start of a backup
recording.
6. Play and fi nd the end of the
footage you want to backup
and press Pause.
7. Press the CH2 button to
indicate the end of a backup
recording.
8. When you are happy with
the Start and End time of
the recording press the CH4
button to continue.
9. The Backup to USB screen will appear
with details of the USB device inserted, size
requirements and fi le name. Press CH4 to
begin copying.
10. When the backup is complete press the
Stop button and remove the USB device.
WARNING: Do not connect the DVR directly to a computer. Do not
remove the USB Flash Drive while the DVR is copying footage. Damage
may occur to attached devices if used improperly.
7
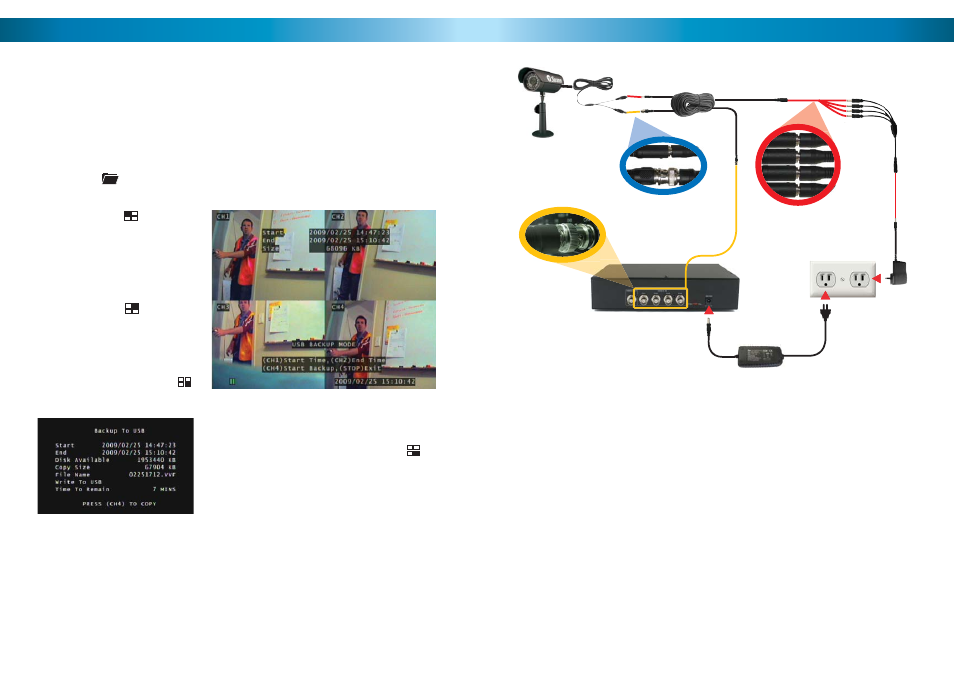
Connecting Cameras and Power Adapter
1. Connect the Power and BNC ends of the Security Camera to an
Extension Cable.
2. Connect the BNC end of the Extension Cable to the back of the DVR.
3. Connect the power end of the Extension Cable to the Power Splitters.
4. Connect the Power Splitter to the Camera Power Adapter.
5. Plug in the Camera Power Adapter and the DVR Power Adapter to mains
power outlets.
1
2
3
4
5
Cameras and
accessories optional