14 info, 15 input selection, 16 cleaning and maintenance – Sim2 Multimedia HT 250 User Manual
Page 21: English, Fig. 48). fig. 48
HT 200/250
23
ENGLISH
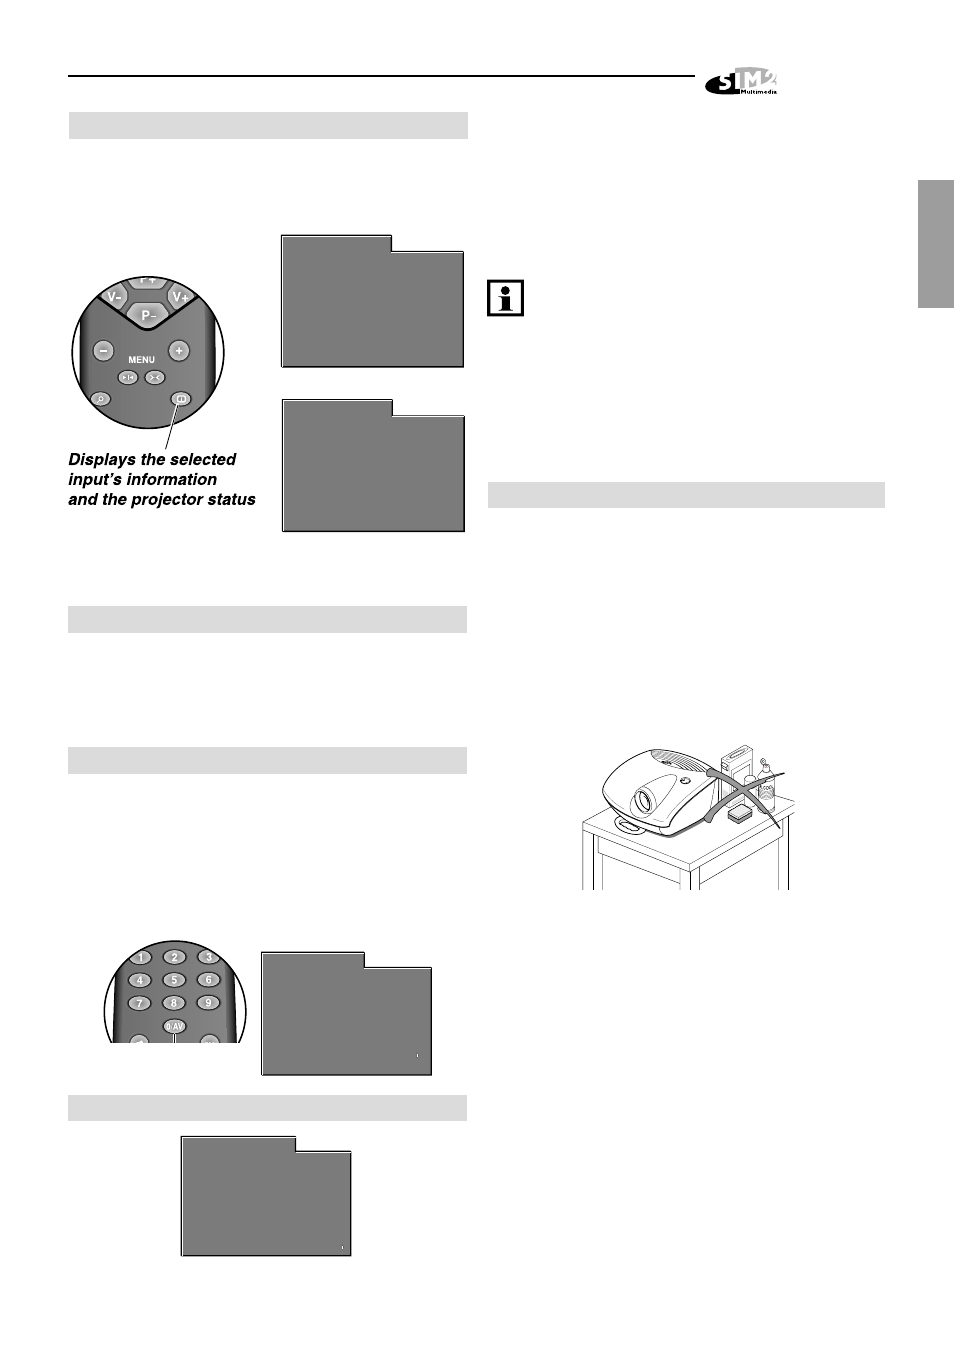
14 INFO
This function displays the current status of the projector,
input type, input frequency, etc.
Info
Input
Horz. Frequency
Vert. Frequency
Resolution
Orientation
Aspect
Color Temperature
Lamp Hour Meter
Software Version
Graphics RGB
56,5 kHz
70 Hz
1024 x 768
Floor
Normal
Low
352
07.00
Info
Input
Video Standard
Video Type
Orientation
Aspect
Color Temperature
Lamp Hour Meter
Software Version
Video
PAL M
Normal
Floor
Normal
Low
352
07.00
VIDEO
RGB
15 INPUT SELECTION
The Input Selection menu is recalled by pressing the key: O/
AV of the remote control. During normal display, press UP
arrow key and DOWN arrow key of the keyboard pad. The
input selected will be highlighted in yellow.
15.1 PROJECTOR INPUTS
This menu allows access to the available inputs, at the
rear of the projector.
Use UP and DOWN arrow keys to browse inputs.
RIGHT arrow to select input.
LEFT arrow key to auto select the appropriate input.
Alternatively, use the remote control to directly select
the required input (1 to 7).
Source Selection
1
2
3
4
5
6
7
0
Video
S-Video
RGBS 15 kHz
YCrCb 15 kHz
RGBS 32 kHz
YCrCb 32 kHz
Graphics RGB
RI2 inputs
Input selection
menu
15.2 REMOTE INPUTS (RI2)
Source Selection / RI2
1
2
3
4
5
6
7
8
Video 1
Video 2
S-Video 1
S-Video 2
RGBS 15 kHz
YCrCb 15 kHz
RGBS 32 kHz
YCrCb 32 kHz
9
Graphics RGB
0
Projector Inputs
This menu lists the available inputs on the Remote Input
Interface (RI2). The interface is automatically recognised
by the projector during the power on sequence (red
flashing LED).
The Remote Control and the keyboard pad on the
projector can select the inputs available on the Remote
Input Interface. The 0 key allows switching between the
list of projector’s inputs and the list of Remote Input
Interface.
If a single signal is applied to the projector and
that source was selected, the image coming
from that input will be projected.
If signals are applied to several inputs, you can
select the desired input by one of the following
methods:
- browsing the Source Selection menu, by re-
mote control or rear key pad
- pressing the remote control's digit key
corresponding to the desired input
16 CLEANING AND MAINTENANCE
The projector does not require internal cleaning. There
are no user serviceable parts inside the projector. Please
refer all service requirements to qualified personnel.
Cleaning the projector’s cover:
Use a soft slightly damp cloth. Do not use abrasive
cleaners, solvents or other harsh chemicals, as this will
damage the finish of the cover. Avoid direct cleaning of
the rear panel’s screen-printing
(Fig. 48).
Fig. 48
Cleaning the lens:
The lens may be cleaned with a very soft, non-abrasive
small brush, in order to remove dust particles.
Alternatively, use a soft dry cleaning cloth (of the type
used for camera lens cleaning) to remove fingerprints and
grease marks.
The projector’s lens system is completely sealed; internal
cleaning is not needed.