Inspecting the firewall, Configuring the access ports, Setting access port defaults – Symbol Technologies WS 2000 User Manual
Page 100
Retail Use Cases
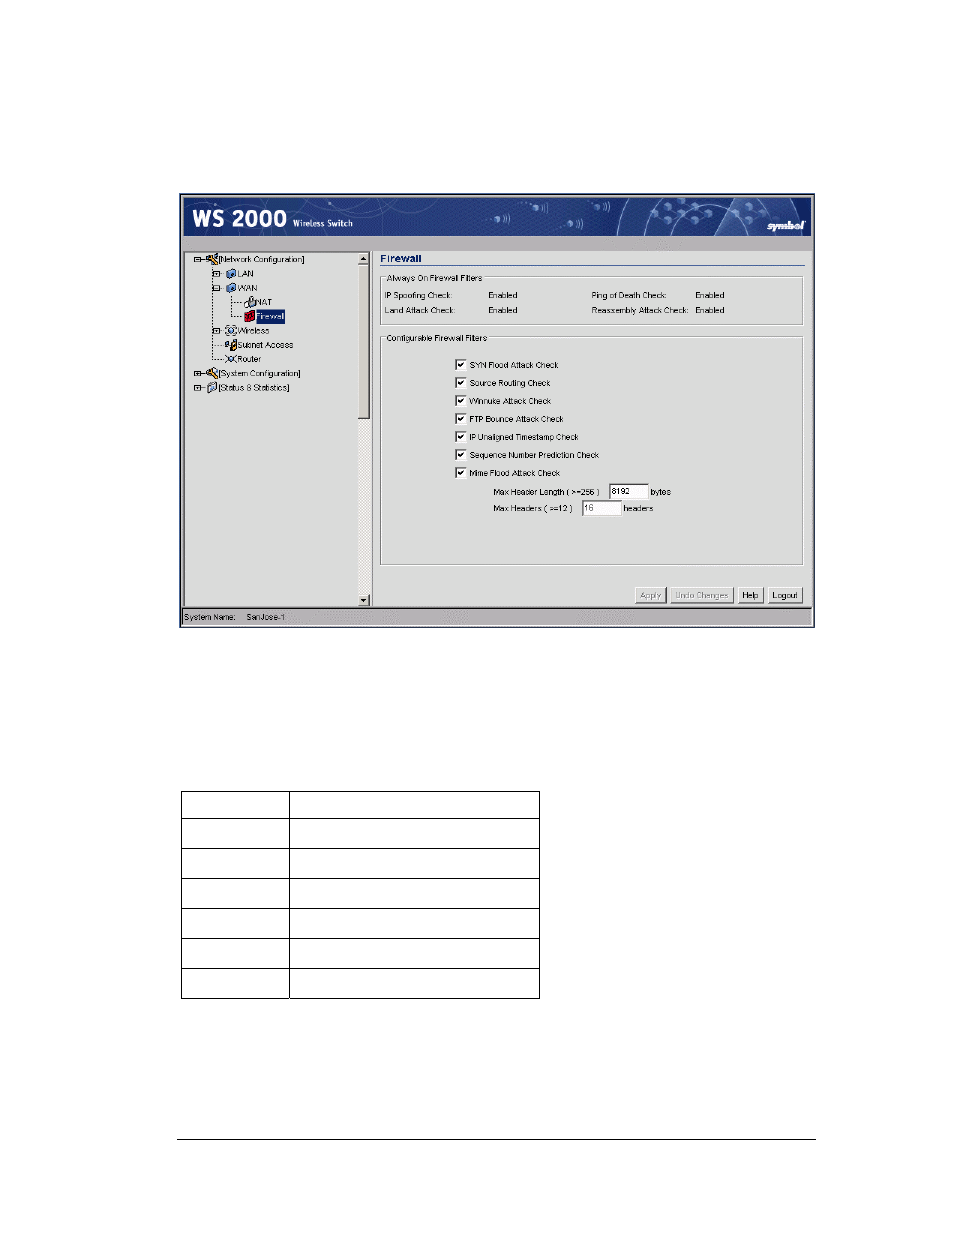
Inspecting the Firewall
Clarisa selects the Firewall item in the left menu. Each of the checkbox items represents a
type of attack the WS 2000 can filter out. She checks to see that all of the options are
enabled.
Clarisa clicks the Apply button to confirm that all attacks listed will be filtered.
Configuring the Access Ports
So far, Clarisa has been operating with the WS 2000 connected only to her laptop. To
configure the Access Ports, she will need to connect them to the switch. She plans to use
switch ports as follows:
Switch Port
Connected to
Port 1
Access port for the POS WLAN
Port 2
Access port for the Printer WLAN
Port 3
Access port for the Cafe WLAN
Port 4
Wired POS terminal #1
Port 5
Wired POS terminal #1
Port 6
In-store server
Setting Access Port Defaults
The WS 2000 allows the user to specify the default settings for Access Ports. Clarisa
expands the Access Ports node in the left menu and selects the 11b Defaults node. Clarisa
has only 802.11b Access Ports.
Copyright © 2004 Symbol Technologies, Inc. All Rights Reserved
100
WS 2000 Wireless Switch: 1.0 Date of last Revision: March 2004