Mixing fuel, Assembly (continued) – Shindaiwa Articulated Hedge AHS254 User Manual
Page 10
10
WARNING!
Alternative fuels, such as E15 (15% ethanol), E-85 (85% ethanol) or any fuels not meeting Shindaiwa
requirements are NOT approved for use in Shindaiwa gasoline engines. Use of alternative fuels may cause
performance problems, loss of power, overheating, fuel vapor lock, and unintended machine operation, including,
but not limited to, improper clutch engagement. Alternative fuels may also cause premature deterioration of fuel
lines, gaskets, carburetors and other engine components.
Mixing Fuel
The throttle trigger free play should
be approximately 4 - 6 mm. Make
sure that the throttle trigger oper-
ates smoothly without binding. If it
becomes necessary to adjust the trig-
ger free play, follow the procedures and
illustrations that follow.
1. Loosen the air cleaner cover
knob(s) and remove the air cleaner
cover.
2. Turn the cable adjuster in or out as
required to obtain proper free play
4 - 6 mm.
3. Reinstall the air cleaner cover.
Throttle trigger free play
Cable
Adjuster
4 - 6 mm
Throttle trigger free play
Assembly (continued)
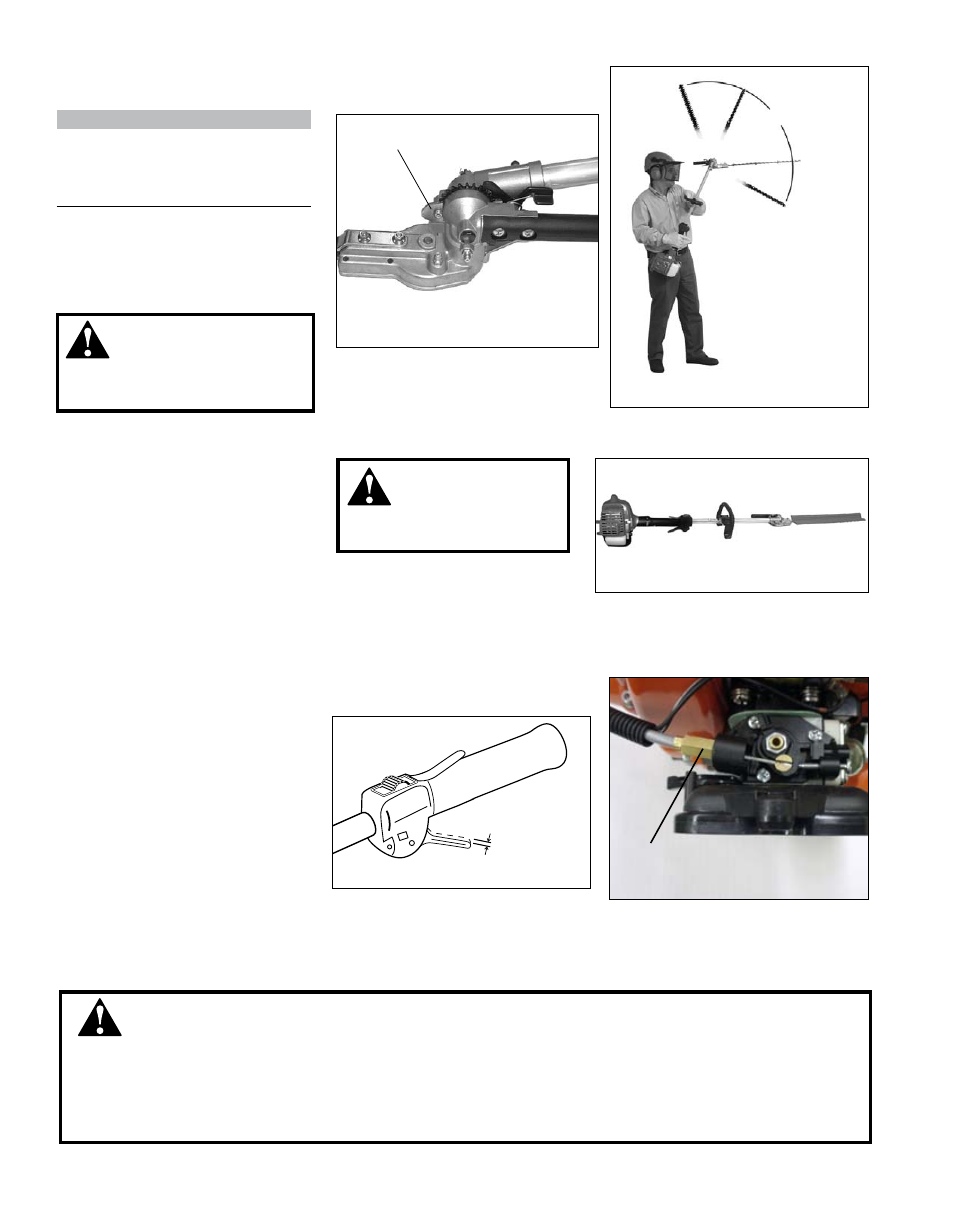
Travel Limiter
The cutter assembly can be adjusted to
10 different positions ranging from 90°
to 225° from the outer tube as shown.
Always make sure the latch lock is
securely locked after each adjustment.
nOTE:
This articulated hedge trimmer is
equipped with a travel limiter that pre-
vents the cutter assembly from rotat-
ing outside of the 90°- 225° range.
The travel limiter prevents the cutter
assembly from rotating outside of the 90°-
225° range
The cutter assembly can be adjusted to 10
different positions
Travel limiter and adjustment range
wARnInG!
Always make sure the latch
lock is securely locked after each
adjustment
Various
positions
possible
225°
135°
90°
Adjusting cutter assembly for storage or transportation
1. With the engine off, install the blade
cover onto the blade.
2. Using the procedures described
above, rotate the cutter assembly so
it is parallel to the tube. Make sure
the latch lock and the latch release
return securely to a locking position.
3. Make sure the blade cover is in
place on the blade before storing or
transporting.
wARnInG!
Never run the engine
when adjusting the cutter
assembly.
Make sure the blade cover is in place before
storing or transporting
Transport / storage position