English – Shure THE TWIN PRO 27C8642 User Manual
Page 7
5
ENGLISH
Transmitter Battery Installation
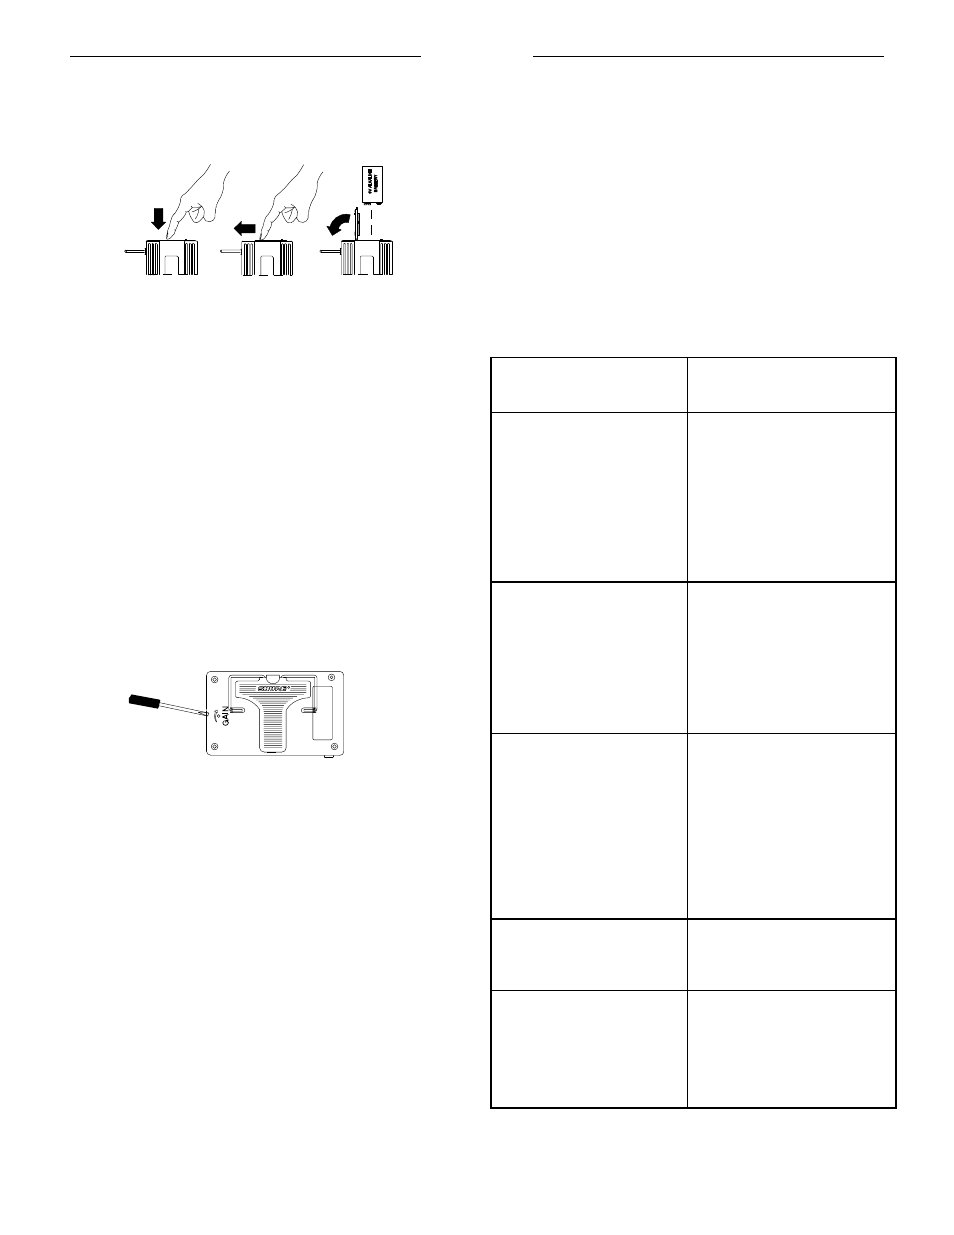
1. Slide the transmitter ON/OFF switch to the OFF position.
2. Press down on the OPEN side of the battery compartment
cover, slide it back and flip it open, as shown in Figure 11.
FIGURE 11
3. Insert a fresh 9V alkaline battery into the battery compartment
as shown in Figure 11 (Duracell MN1604 recommended and
included with the system). A fresh 9V alkaline battery should
typically provide 18 hours of performance time. A fully
charged 8.4V NiCad battery should provide 2 hours of perfor-
mance time. When the red LOW BATTERY light on the trans-
mitter glows, you have 1 hour or less of useful battery life
remaining; change the battery at your first opportunity.
IMPORTANT: Carbon-zinc and zinc-chloride batteries will not
provide adequate power and are not recommended.
4. Replace the battery cover.
Transmitter audio gain adjustment
The transmitter audio gain control has been factory preset to
provide satisfactory output. However, if the PEAK light on the T88
receiver is constantly on or never on, the transmit audio level may
require adjustment. Use the gain controls as follows to adjust the
equipment for the best sound quality.
FIGURE 12
To adjust the audio gain, locate the transmitter audio gain con-
trol and use the supplied screwdriver to adjust the control.
• If the PEAK light is always on, decrease the audio gain by
turning the gain control counter-clockwise (while the vocalist
is singing or the musical instrument is being played) until the
PEAK light on the receiver flickers only occasionally.
• If the PEAK light is never on, increase the audio gain by turn-
ing the gain control clockwise (while the vocalist is singing or
the musical instrument is being played) until the PEAK light
on the receiver flickers only occasionally.
TIPS AND TROUBLESHOOTING
Tips for getting the best performance
• Maintain a line-of-sight between the transmitter and receiver
antennas.
• Keep the receiver and antennas away from large metal ob-
jects.
• Avoid placing the receiver near computers or other RF gen-
erating equipment.
• Point the receiver antennas straight up.
• Avoid placing the receiver in the bottom of an equipment rack
unless the antennas are remotely located.
Troubleshooting
Some common problems and their solutions are identified in the
table below. If you are unable to solve a problem, contact your
dealer.
ı
ˇ
С
С
С
С
С
С
С С
С
СС
С
С
С
С
С
Problem
Solution
No sound; RF light(s)
not glowing.
• Make sure the transmitter
POWER switch is ON and the
receiver is plugged into a power
source.
• Check battery.
• Check receiver squelch setting.
• Check receiver antenna
connection(s).
• Make sure antennas are in line of
sight of transmitter.
No sound; RF and Audio Level
meter lights glowing.
• Turn up receiver audio VOLUME
control.
• Check for proper connection
between receiver and karaoke
unit.
• Talk into microphone and observe
receiver audio level lights. If they
glow, the problem is elsewhere in
the sound system.
Received signal is noisy or con-
tains extraneous sounds with
transmitter on.
• Check battery.
• Remove local sources of RF
interference.
• If using a guitar or other
instrument, check connections.
• Two transmitters may be operating
on the same frequency. Locate
and turn one off.
• Signal may be too weak.
Reposition antennas. If possible,
move them closer to transmitter.
Noise from receiver with transmit-
ter off.
• Adjust receiver squelch control.
• Remove local sources of RF
interference.
• Reposition receiver or antennas.
Momentary loss of sound as trans-
mitter is moved around performing
area.
• Reposition receiver and perform
another “walkthrough” test and
observe the RF indicators. If audio
dropouts persist, mark these
“dead spots” in performing area
and avoid them during
performance.