Spirit EL255 User Manual
Page 9
EL255 Elliptical
8
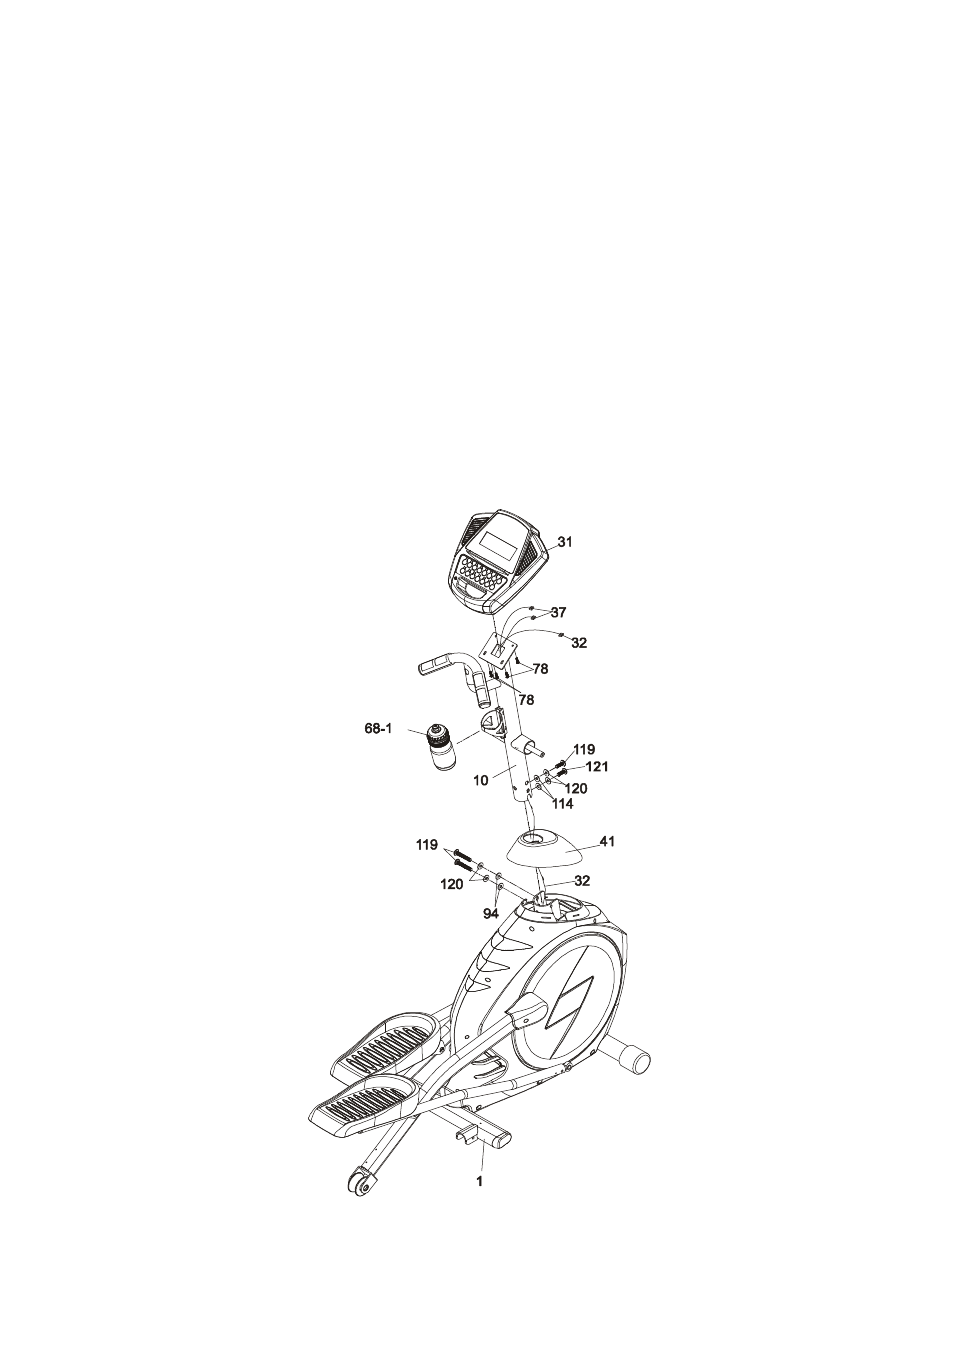
STEP 1: CONSOLE MAST ASSEMBLY
•
Locate the Console Mast (10) and Console Mast Cover (41) and slide the Cover onto the Mast as far as
it will go. Make sure the Console Mast Cover is facing the correct way.
•
At the top opening of the Main Frame (1) there is a Computer Cable (32) attached to a guiding wire.
Unravel the wire and feed the Computer Cable into the bottom of the Console Mast tube and out of the
top opening.
•
Install the Console Mast (10) into the receiving bracket on the top of the Main Frame. Pull slightly on the
computer cable at the top of the mast while installing, this will ensure the cable does not get pinched and
shorted during mast assembly.
•
Install two 3/8" Split Washers (120) and two 3/8” Curved Washers (114) onto one of the 3/8" x 3" Hex
Head Bolt (119) and the
3/8" x 3/4" Hex Head Bolt (121)
, then install through the front of the Console
Mast; just hand tighten for now. Install two 3/8” Flat Washers (94) and two 3/8" Split Washers (120) onto
two 3/8" x 3" Hex Head Bolts (119). Install them through the left side of the receiving bracket into the
Console Mast. Now tighten all 3 bolts as tight as possible and snap the console mast cover into place.
•
There are three connectors at the top opening of the Console Mast; two Hand pulse wires (37) and one
Computer Cable (32). Connect these to the mating connectors on the back of the Console Assembly
(31). Store the excess wiring back into the Console Mast (10) as you carefully install the Console
Assembly (31) onto the mounting plate of Console Mast. Secure the console with four M5 Phillips Head
Screws (78).