Sharp DT-300 User Manual
Page 35
-34
Placement of the Pro-
jected Image Using the
Keystone Correction
Place the projector at a distance from the
screen that allows images to be projected onto
the screen by referring to “Adjusting the Pro-
jection Distance” on pages 26 and 27.
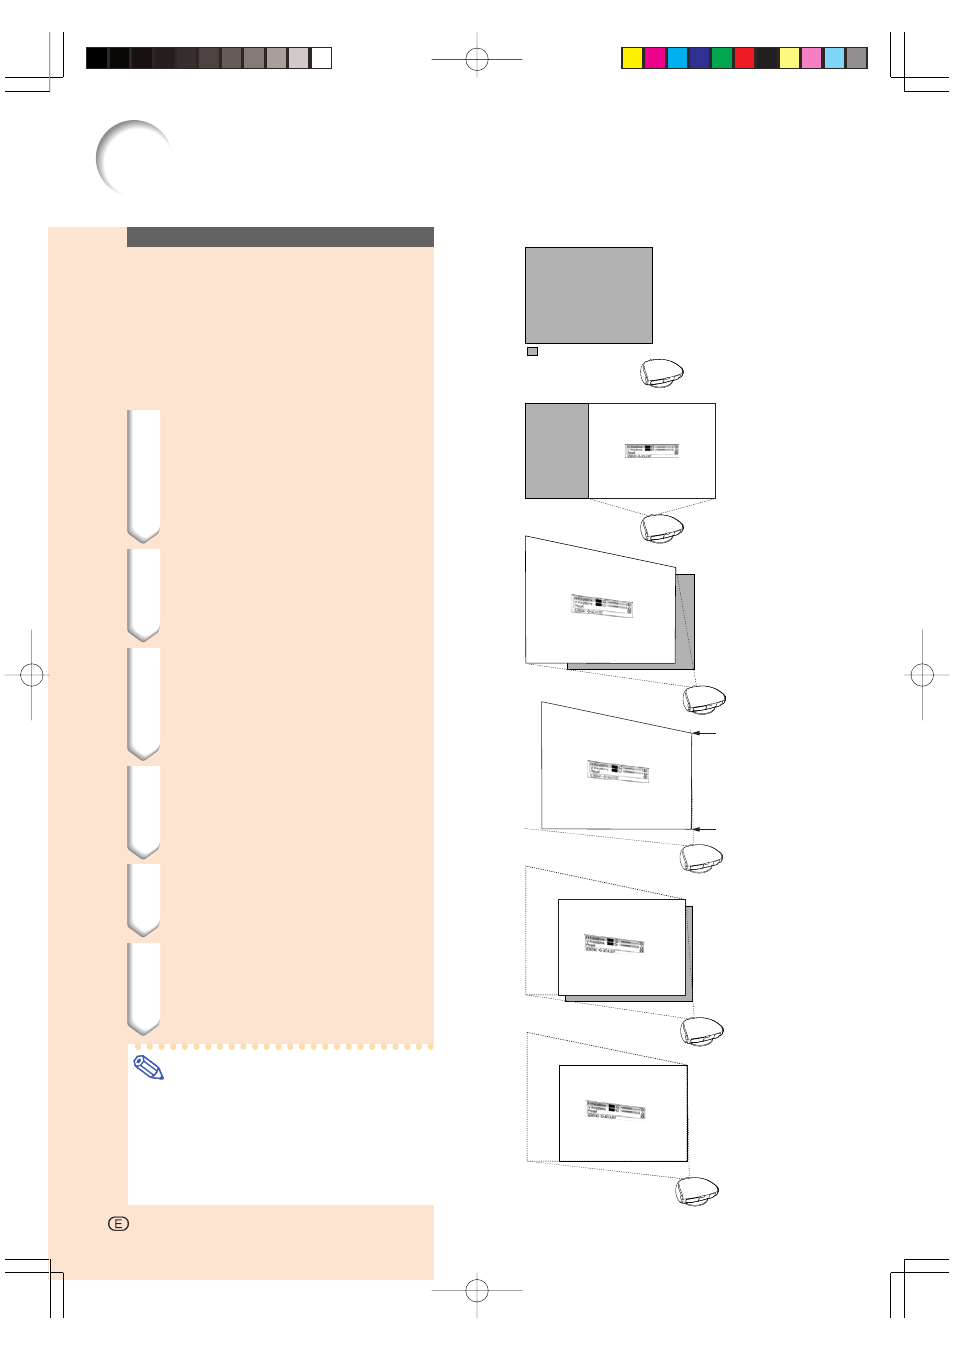
1
Project the test pattern of the
Keystone correction function
onto the screen. Rotate the Fo-
cus ring until the image on the
screen comes into focus. (See
page 25.)
2
Change the projection angle
using the Swivel Stand to prop-
erly project images onto the
screen. (See page 23).
3
Align the edge of the screen
closest to the projector with
the test pattern by adjusting
the zoom and the Swivel Stand.
(See pages 23 and 25.)
4
Adjust the Keystone function
so that the size of the projected
image matches the screen
size. (See page 33.)
5
Align the image on the screen
by adjusting the zoom function
and the Swivel Stand.
6
Adjust the focus so that the
projected image is in focus at
the center of the screen. (See
page 25.)
Note
• The aspect ratio of the projected image
shifts slightly when the lens shift is at a
position other than the top position.
• The aspect ratio of the projected image
also shifts slightly when the “H Keystone”
and “V Keystone” functions are adjusted
simultaneously.
: Screen area
Image Projection
-34
03.10.29, 2:42 PM
Page 34