Step 1 connection and installation, Attaching a lens, Preparations (step 1 connection and installation) – JVC VN-C10 User Manual
Page 12
12
(a)
(b)
F
RESET
IRIS
3
4
2
1
3.
2.
1
3
2
4
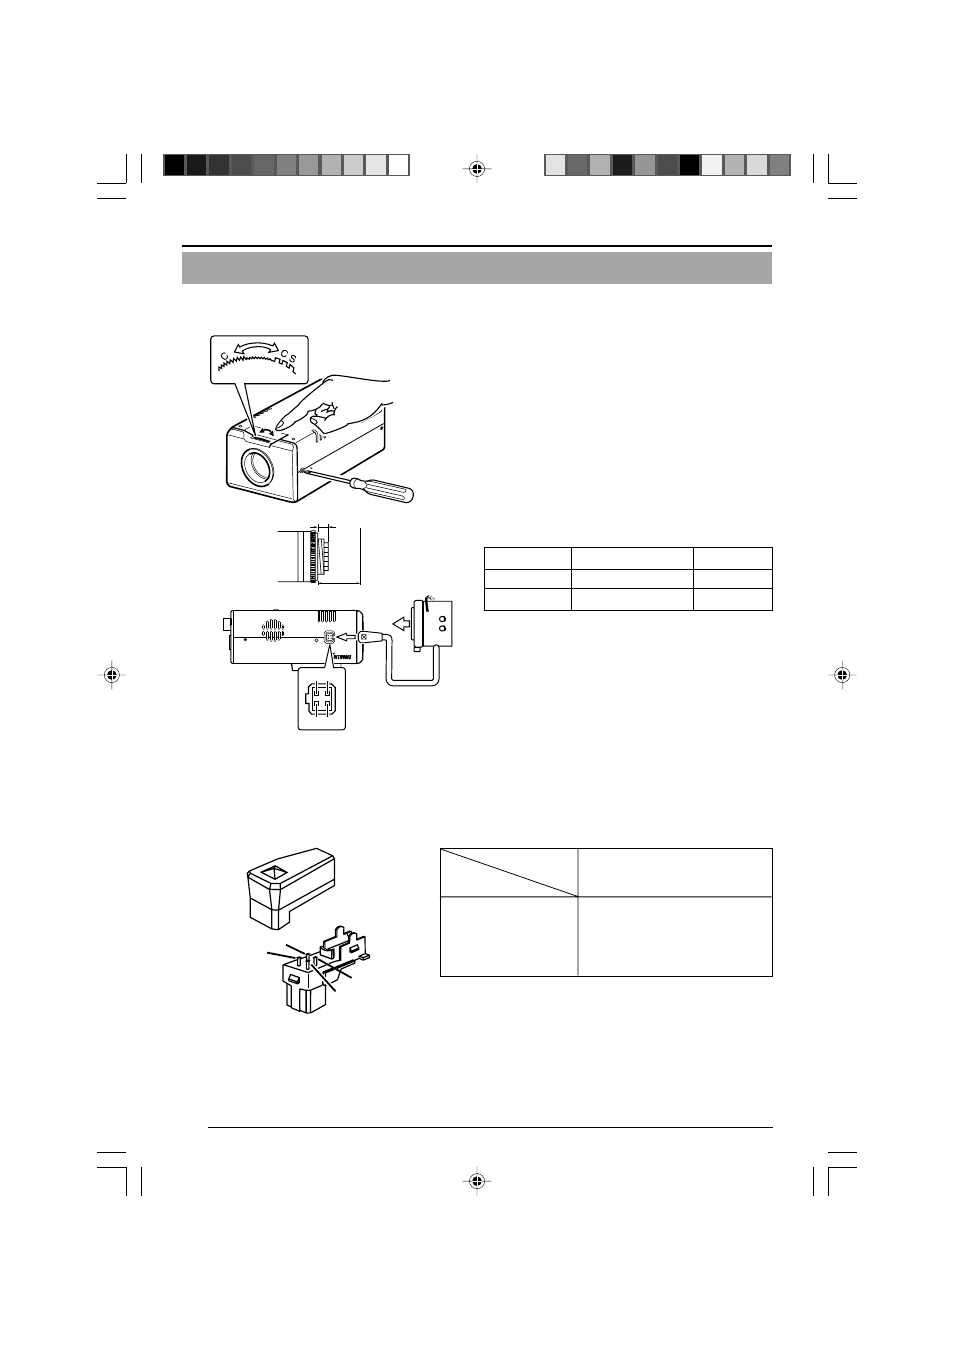
Attaching a Lens
Attach a lens in the following procedure.
1.
Before attaching a lens, check the mount
method of the lens.
VN-C10 is set for CS-mount at the factory. For
attaching a C-mount lens, loosen the back-
focus locking screw using a screwdriver and
turn the back-focus adjustment ring to change
the mount method accordingly with a finger
or a pointed tool like a screwdriver.
To attach a lens, observe the length shown
as (a). Do not use a lens with a length longer
than (a) as it may cause damage to the inter-
nal parts of the camera and proper lens at-
tachment would not be possible.
2.
Attach the lens to the camera securely by turn-
ing it clockwise.
3.
In the case of a DC IRIS lens, connect the
lens cable to the socket while examining the
pin arrangement.
4-Pin Plug
1
Damping d
2
Damping e
3
Driving e
4
Driving d
Pin No.
DC IRIS Lens
(Without a built-in EE amplifier)
Lens
Lens
Flange-back distance (b)
Length (a)
C-mount lens
17.526mm
10 mm max.
CS-mount lens
12.5mm
5.5 mm max.
Preparations (Step 1 Connection and Installation)
VN-C10_E_01-24.pm65e
14/04/03, 9:31 AM
12