Wb-s681u pendant mount – JVC WB-S681U User Manual
Page 4
4
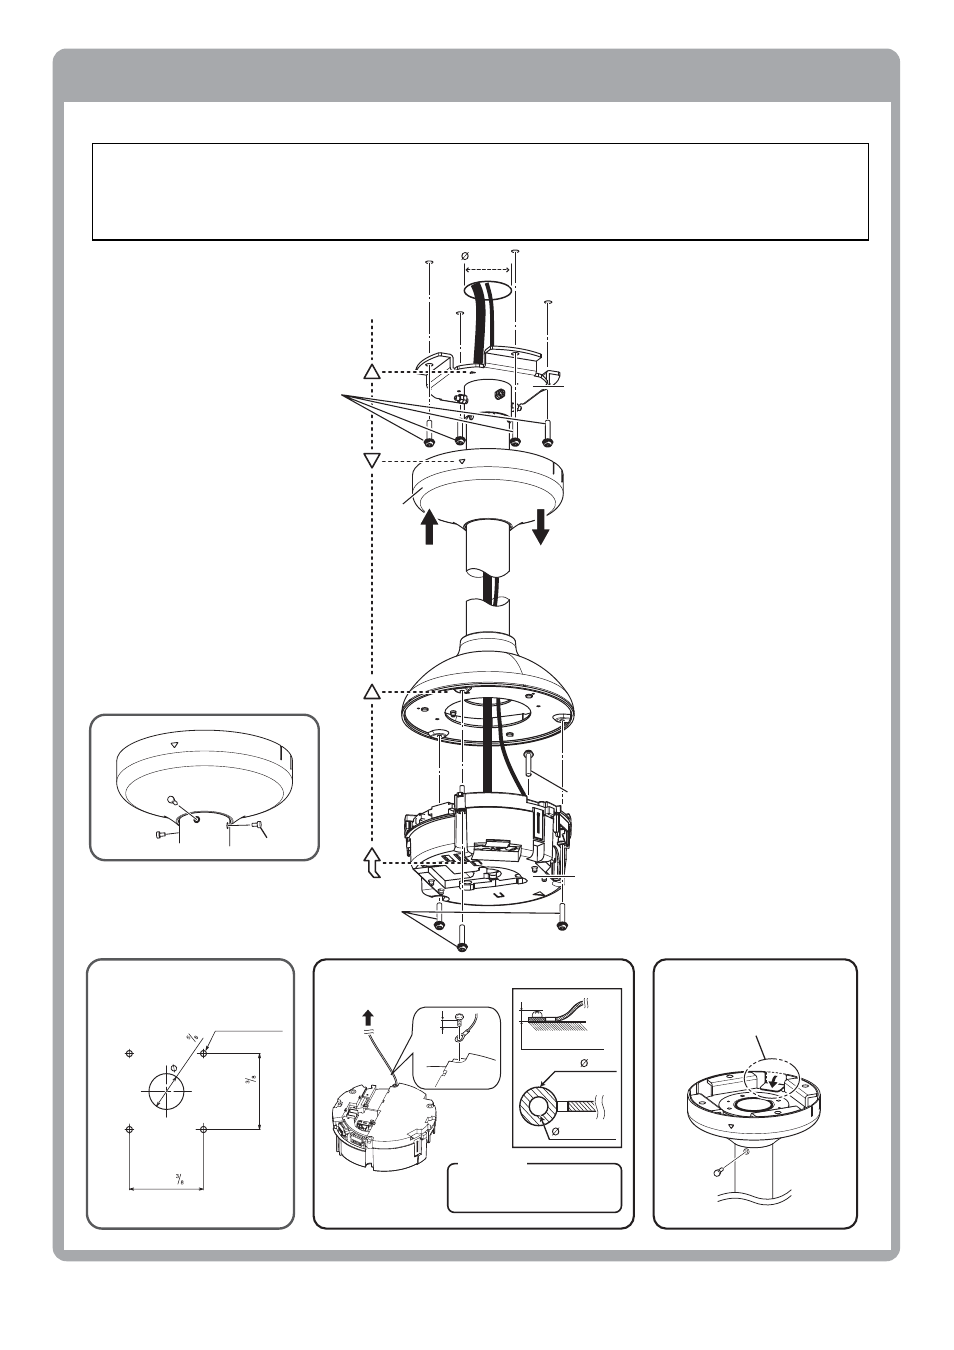
Screw Location
x 4
6 mm
Wire rope
Always use the provided wire
rope.
CAUTION
1.
Make a hole in the ceiling.
Making a hole in
the ceiling
3.
Shift the cover in the
direction of the arrow (
Q).
5.
Fix the cover back to its
original position with the
provided rivets. (x3)
6.
Install the wire rope. (x1)
(For details, refer to the
Instruction Manual of the camera.)
2.
Thread the cable and
wire rope.
7.
Connect the cable.
Connect the cable to the
terminal block of the ceiling
attachment fitting.
(For details, refer to the
Instruction Manual of the camera.)
8.
Mount the ceiling
attachment fitting on
WB-S681U using the
provided screws.
(3 locations)
9.
Install the camera.
(For details, refer to the
Instruction Manual of the camera.)
4.
Mount the ceiling bracket
on the ceiling. (4 locations)
When a hole cannot be
made in the ceiling
Fold in the direction of the arrow
rivet
Screw (M4)
Front side of camera
Bolts (M5~M6)
Cover
Ceiling
bracket
Ceiling
attachment
fitting
Screws (M4)
(Accessory)
1.
2.
3.
4.
5.
6.
7.
8.
40 mm
40 (1-
)
below 6 mm
below 9 mm
4~5.5 mm
85 (3-
)
85 (3-
)
Notes on Installation
● Check that the installation location is able to withstand the total weight of the camera, which is about 3.7 kg, before
you install. If the location is not strong enough, reinforce with a reinforcing board.
● Always use a wire rope to install.
● Screws to secure WB-S681U to the ceiling are not provided. Use the appropriate screws based on the materials,
structure and total weight of the installation location.
● Conform to the local standards during the installation or construction.
WB-S681U Pendant Mount