Setările bluetooth, Bluetooth settings, English 36 – JVC KD-BT22 User Manual
Page 38: Creating your own color—user color
ENGLISH
36
3
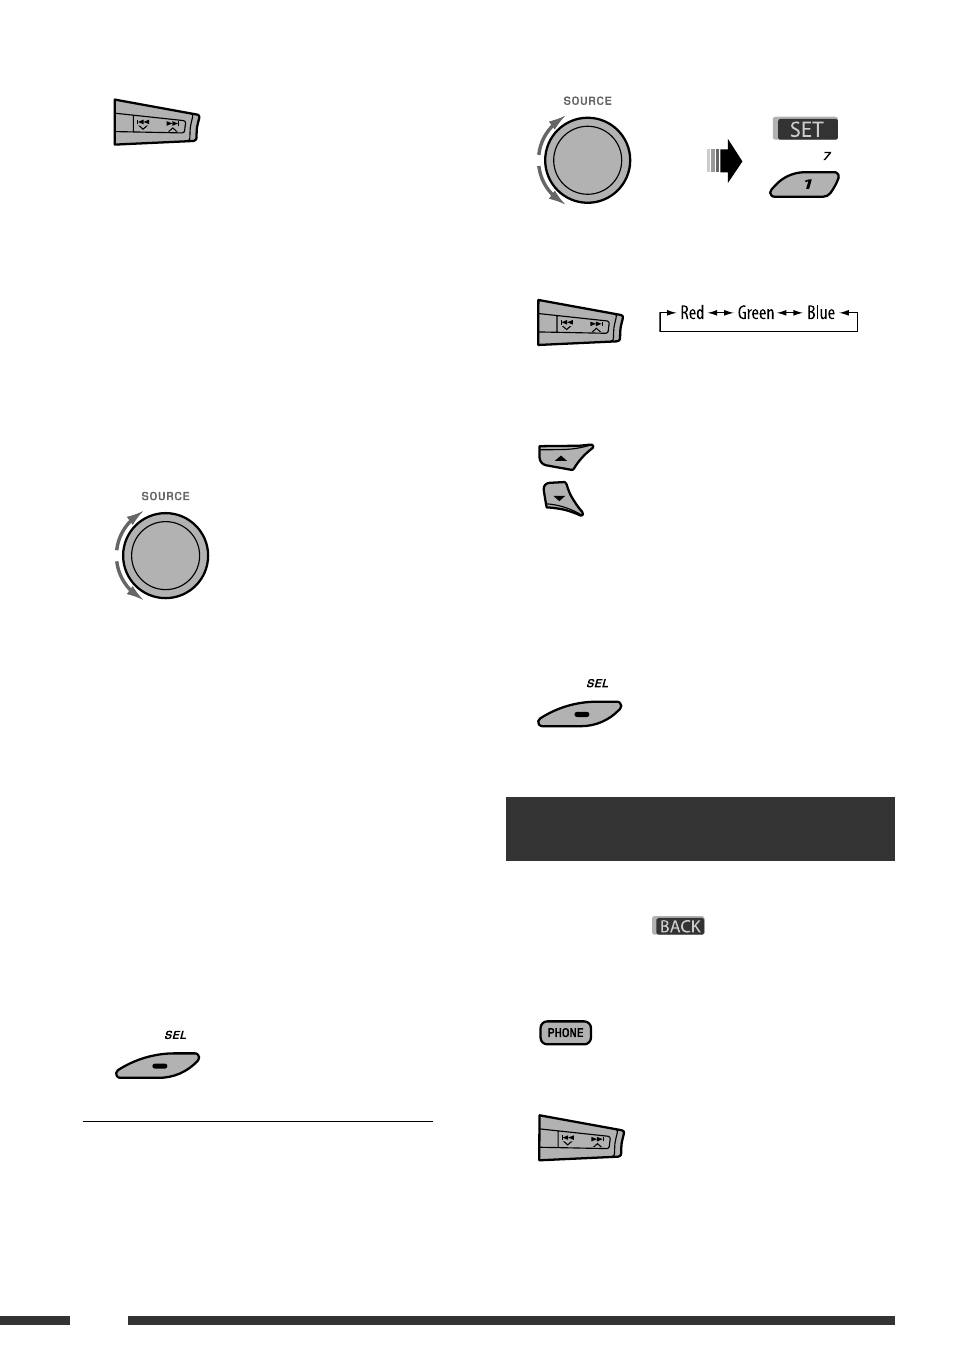
Select a source.
All Source *
1
Ô
CD
Ô
Changer *
3
(or
Ext In *
2
)
Ô
USB *
3
Ô
FM
Ô
AM
Ô
DAB *
3
Ô
iPod *
3
Ô
Aux In
Ô
BT Audio
Ô
(back to the beginning)
*
1
When you select “All Source,” you can use the
same color for all the sources.
*
2
Depends on the “Ext Input” setting, see page 34.
*
3
Displayed only when the target component is
connected.
4
Select a color.
Pale
Ô
Aqua
Ô
Sky
Ô
Sea
Ô
Leaves
Ô
Grass
Ô
Apple
Ô
Rose
Ô
Amber
Ô
Honey
Ô
Violet
Ô
Grape
Ô
Every *
4
Ô
User *
5
Ô
(back to the beginning)
*
4
The color changes every 2 seconds.
*
5
The user-edited colors—“Day Color” and
“NightColor” will be applied (see the right
column for details).
5
Repeat steps 3 and 4 to select the color for
each source (except when selecting “All
Source” in step 3).
6
Exit from the setting.
Creating your own color—User Color
You can create your own colors—“Day Color” or
“NightColor.”
1
Follow steps 1 to 3 on page 32.
• In step 2, select “COLOR.”
• In step 3, select “Color Set.”
2
Select “Day Color” or “NightColor.”
3
Select a primary color.
4
Adjust the level (00 to 11) of the selected
primary color.
5
Repeat steps 3 and 4 to adjust other primary
colors.
6
Exit from the setting.
Bluetooth settings
You can change the settings listed on page 37 according
to your preference.
• When
is shown on the display, you can
move back to the previous screen by pressing number
button 3.
1
2
Select “Settings.”
Selectaţi o sursă.
All Source *
1
(Toate sursele) CD Changer *
3
sau
Ext In *
2
(Schimbător) USB *
3
FM AM
DAB *
3
iPod *
3
Aux In BT Audio (înapoi
la început)
*
1
Când selectaţi opţiunea „All Source” puteţi utiliza
aceeaşi culoare pentru toate sursele.
*
2
Depinde de setarea „Ext Input”, vezi pagina 34.
*
3
Este afişat numai când componenta ţintă este
conectată.
Selectaţi o culoare.
Pale (Deschisă) Aqua Sky Sea Leaves
Grass Apple Rose Amber Honey
Violet Grape Every *
4
User *
5
(Utilizator)
(înapoi la început)
*
4
Culoarea se schimbă la fiecare 2 secunde.
*
5
Pentru culorile editate de utilizator se vor aplica
opţiunile „Day Color” şi „NightColor” (vezi coloana din
dreapta pentru detalii).
[Rotiţi]
Repetaţi etapele 3 şi 4 pentru a selecta culoarea
pentru fiecare sursă (cu excepţia cazului în care
se selectează „All Source” în etapa 3).
Ieşire din setare.
Crearea propriei culori —Culoarea utilizatorului
Vă puteţi crea propriile culori —„Day Color” (Culoare
pentru zi) sau „NightColor” (Culoare pentru noapte).
Parcurgeţi etapele 1 - 3 de la pagina 32.
• În etapa 2, selectaţi opţiunea „COLOR”.
• În etapa 3, selectaţi opţiunea „Color Set”
(Setarea culorii)
Selectaţi opţiunea „Day Color” sau „NightColor.”
Culoare pentru zi Culoare pentru noapte
[Rotiţi]
Selectaţi o culoare primară.
Reglaţi nivelul (00 - 11) al culorii primare
selectate.
Repetaţi etapele 3 şi 4 pentru a regla alte culori
primare.
Ieşire din setare.
Setările Bluetooth
Puteţi schimba setările de la pagina 37 în funcţie de
preferinţe.
• Când pe afişaj apare
ENGLISH
9
OPERATIONS
FM station automatic presetting
— SSM (Strong-station Sequential
Memory)
You can preset up to six stations for each band.
1
While listening to an FM station...
2
3
Local FM stations with the strongest signals are
searched and stored automatically in the selected
FM band.
Manual presetting
Ex.: Storing FM station of 92.5 MHz into preset number
4 of the FM1 band.
Using the number buttons
1
2
3
Using the Preset Station list
• When
is shown on the display, you can
move back to the previous screen by pressing number
button 3.
1
Follow steps 1 and 2 of “Using the number
buttons” on the left column.
• By holding
5
/
∞
, the Preset Station List will
also appear (go to step 4).
2
3
Display the Preset Station List.
4
Select the preset number you want to store
into.
• You can move to the lists of the other FM bands
by pressing number button 5 (
) or
6 (
) repeatedly.
5
Store the station.
Preset number flashes for a while.
Continued on the next page
, puteţi reveni la meniul
anterior dacă apăsaţi tasta numerică 3.
Selectaţi opţiunea „Settings” (Setări).