Connections, Rear panel – JVC DT-R17L4D User Manual
Page 8
8
1
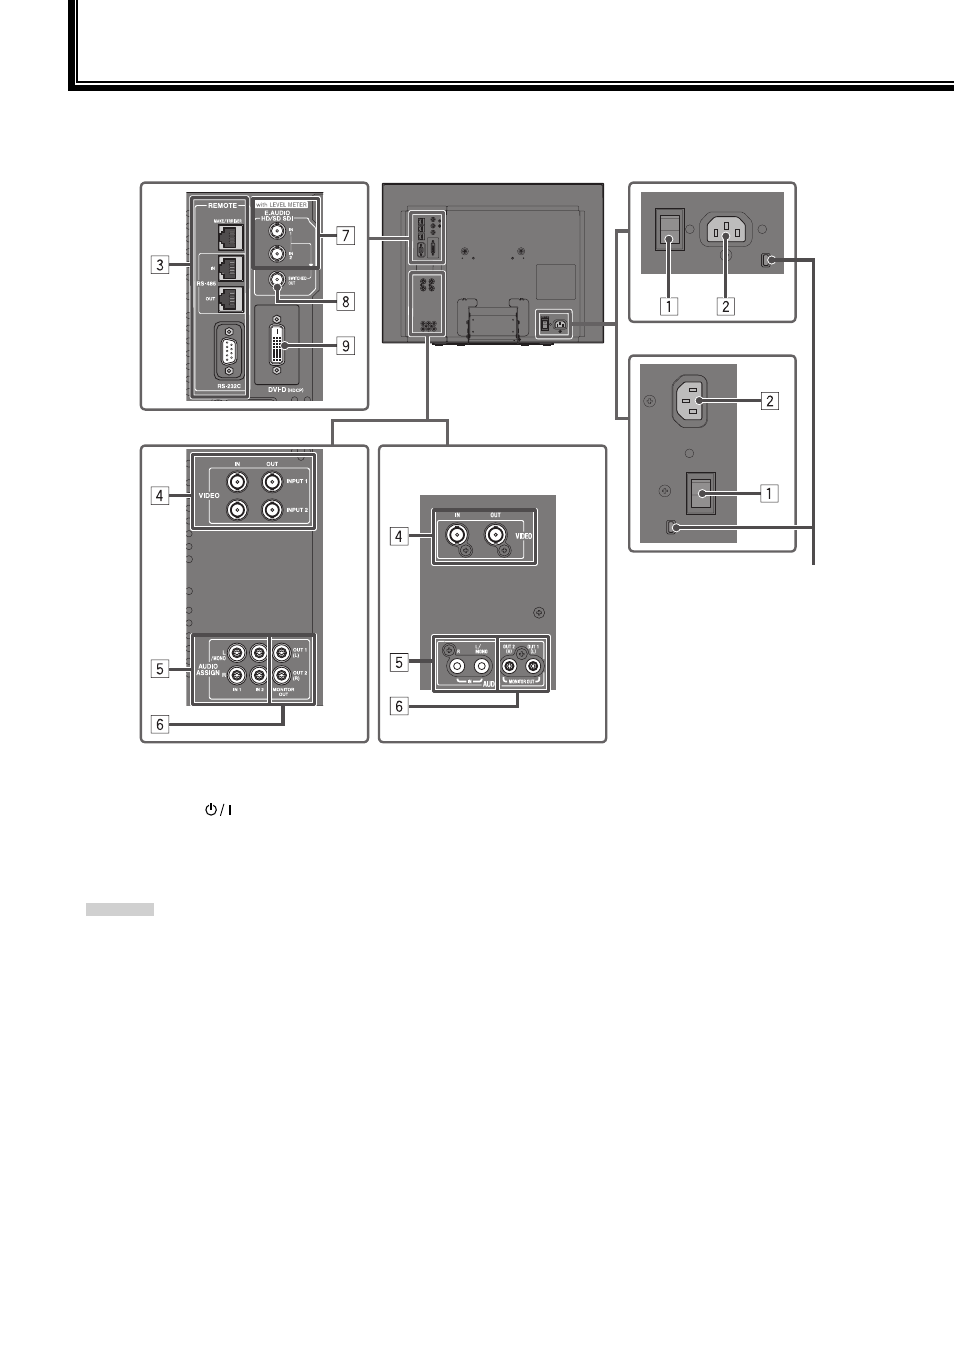
POWER switch
Turns AC power on or off.
You need to press
button (
☞ t on page 10) to use the monitor after turning on the POWER switch.
2
AC IN terminal
AC power input connector.
Connect the provided AC power cord to an AC outlet.
Attach the provided power cord holder to prevent accidental disconnection of the AC power cord (
☞ “Attaching the power cord holder” on
page 9).
CAUTION
Do not connect the power cord until all other connections are completed.
3
REMOTE terminal
Terminal for controlling the monitor by an external control (
☞ “External Control” on page 18).
4
For DT-R24L4D: VIDEO (INPUT 1/INPUT 2) terminals (BNC) / For DT-R17L4D: VIDEO terminals (BNC)
Input (IN) and output (OUT) terminals for the composite signals.
5
For DT-R24L4D: AUDIO ASSIGN (IN 1/IN 2) terminals (pin jack) / For DT-R17L4D: AUDIO (IN) terminals (pin jack)
Input terminals for the analog audio signals.
Use this terminal for the analog audio connection of the SDI. When a superimposed signal (EMBEDDED AUDIO signal on an SDI signal) is
input, analog audio signals cannot be input.
For DT-R24L4D: Select the video input to assign the audio signal in “AUDIO1 ASSIGN.” or “AUDIO2 ASSIGN.” (
☞ “AUDIO SETTING” on
page 14).
•
•
•
•
Rear panel
Connections
The illustration of the monitor
is of DT-R24L4D.
Security slot
Attach a security wire to this slot.
DT-R24L4D
DT-R17L4D
DT-R17L4D
DT-R24L4D