Warning – Jet Tools JWBS-20 User Manual
Page 7
7
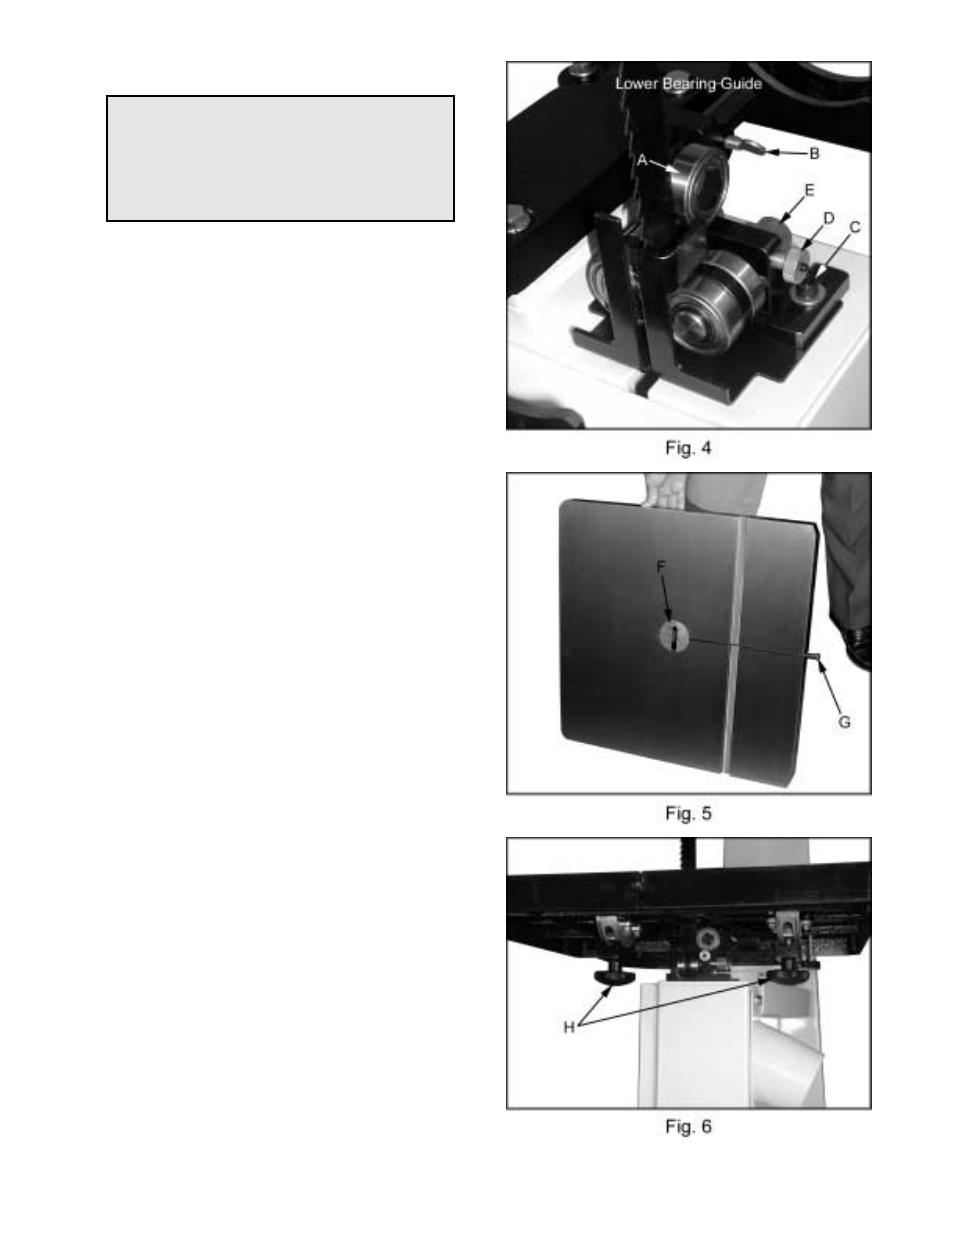
Lower Bearing Guide Adjustment
WARNING
Disconnect machine from the power source,
unplug before making any adjustments!
Blade teeth are sharp! Use care when
working near the saw blade.
Failure to comply may cause serious injury!
1. Disconnect the machine from the power
source, unplug.
2. Blade tension must be properly adjusted
prior to bearing guide setup, see “Adjusting
Blade Tension” page 13.
3. Adjust the back-up bearing (A, Fig. 4) so
that it is 0.003” away from the back of the
blade, about the thickness of a piece of
paper.
To make this adjustment loosen
thumb screw (B, Fig. 4) and slide the
bearing, and bearing post into position.
Tighten thumb screw.
4. Loosen the socket head cap screw (C, Fig.
4) and slide the bearing assembly until the
bearing guides rest just behind the gullet of
the blade teeth. You may need to readjust
the back-up bearing.
Tighten socket head
cap screw.
5. Loosen the thumb screw (D, Fig. 4) and turn
adjusting screw (E, Fig. 4) clockwise or
counter-clockwise until the bearing is 0.003”
away from the side of the blade, about the
thickness of a piece of paper.
6. Adjust the opposite side bearing.
7. Tighten thumb screw (D, Fig. 4). Check to
make
sure
the
adjustments
have
not
changed and the bearing guides do not
pinch the blade.
Mounting the Table
1. With help from another person mount the
table.
Remove the table insert (F, Fig. 5)
and table pin (G, Fig. 5).
2. Slide saw blade through slot in table where
the table pin was located. Rotate the table
90 degrees so that the miter slot is parallel
to the blade, and to the right of the blade
when facing the bandsaw.
3. Line up the trunnions so that the bolts feed
through
the
trunnion
support
bracket.
Secure the table with two lock knobs (H, Fig.
6). Reinstall the table insert and table pin.