Select scenes, Pg. 43), Editing – JVC GR-D220 EN User Manual
Page 43
EDITING
EN
43
MasterPage: Advan_Right
Select Scenes
6
Press PLAY (U) and then press R.A.EDIT ON/OFF on
the remote control.
● The Random Assemble Editing
Menu appears.
7
If using a Wipe/Fader at the
beginning of the scene, press
FADE on the remote control.
● Cycle through the effects by
pressing repeatedly, and stop
when the one you want is
displayed.
● You cannot use a Picture Wipe/
Dissolve at the beginning of Program 1.
8
At the beginning of the scene, press EDIT IN/OUT on
the remote control. The Edit-In position appears in the
Random Assemble Editing Menu.
9
At the end of the scene, press EDIT IN/OUT. The Edit-
Out position appears in the Random Assemble Editing
Menu.
10
If using a Wipe/Fader at the end of the scene, press
FADE.
● Cycle through the effects by pressing repeatedly, and stop
when the one you want is displayed.
● If you select a Wipe/Fader effect for an Edit-Out point, the
effect is automatically applied to the following Edit-In point.
● You cannot use a Picture Wipe/Dissolve at the end of the
last scene.
● When you use Fader/Wipe effects, that time is included in
the total time (this does not apply to Picture Wipe/Dissolve).
11
If using Playback Special Effects, press EFFECT.
12
Repeat steps
8 through 11 to register additional
scenes.
● To change previously registered points, press CANCEL on
the remote control. The registered points disappear, one at
a time, from the most recently registered point.
● If you are not using Wipe/Fader or Program AE with special
effects, repeat steps
8 and 9 only.
NOTES:
● When choosing a scene, set Edit-In and Edit-Out points so
that there is a relatively large difference between them.
● If the search time for an in-point exceeds 5 minutes, the
recording deck’s Record-Standby mode will be cancelled
and editing will not take place.
● If there are blank portions before or after the Edit-In and
Edit-Out points, a blue screen may be included in the edited
version.
● Turning off the camcorder’s power erases all registered
Edit-In and Edit-Out points.
● If you select Sepia or Monotone mode from Program AE
with special effects, you cannot use the Dissolve or Black &
White Fader. In this case the Dissolve or Black & White
indicator begins blinking. Once the next Edit-In point is
registered, the effect is turned off. To combine these
effects, use Sepia or Monotone during recording, then use
the Dissolve or Black & White Fader during Random
Assemble Editing.
● It is not possible to use Wipe/Fader effects and Program AE
with special effects during Random Assemble Editing using
a DV cable.
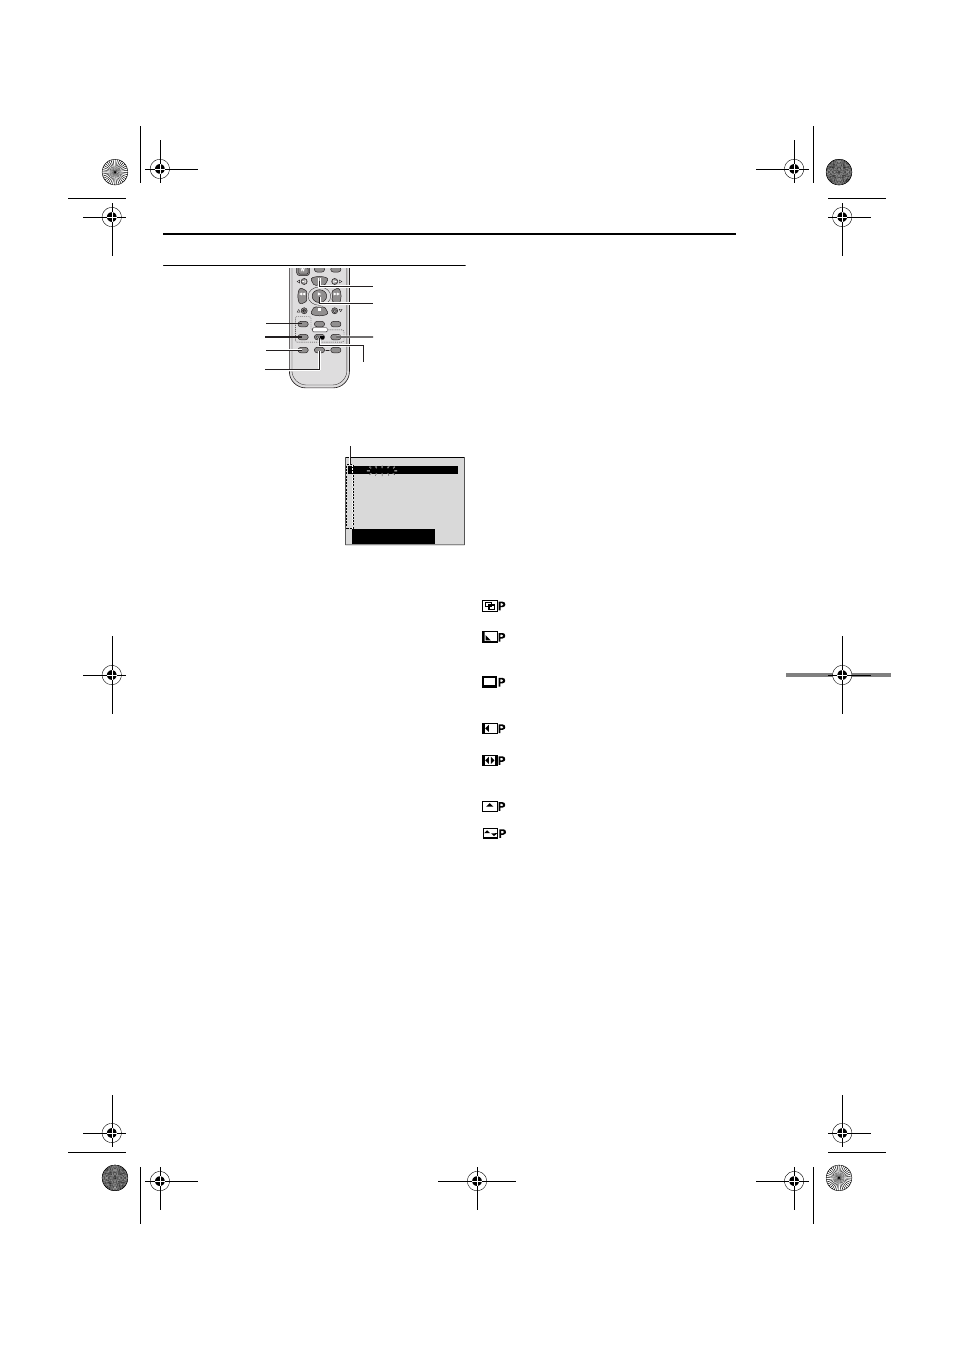
Picture Wipe And Dissolve Menu (available only for
Random Assemble Editing)
You can use not only the wipe/fader effects on page 34
but also the picture wipe and dissolve effects below.
DISSOLVE: The new scene gradually appears as
the old one gradually disappears.
WIPE–CORNER: The new scene wipes in over the
previous one from the upper right corner to the lower left
corner.
WIPE–WINDOW: The next scene gradually wipes
in from the centre of the screen toward the corners,
covering the previous scene.
WIPE–SLIDE: The next scene gradually wipes in
over the previous one from right to left.
WIPE–DOOR: The previous scene wipes out from
the centre to the right and left, like a door being pushed
open to reveal the next scene.
WIPE–SCROLL: The new scene wipes in over the
last one from the bottom of the screen to the top.
WIPE–SHUTTER: The new scene wipes in over
the previous one from the centre toward the top and
bottom of the screen.
PLAY
CANCEL
R.A.EDIT
ON/OFF
FADE
EFFECT
EDIT IN/OUT
VCR REC STBY
PAUSE
1
2
3
4
5
6
7
8
– – : – – ~
~
~
~
~
~
~
~
– – : – –
0 : 00
0
– –
TOTAL
CODE
T I ME
N
I
OUT
MODE
Selected parameter
GR-D231PAL.book Page 43 Thursday, January 22, 2004 2:57 PM