English – JVC RX-6008VBK User Manual
Page 24
21
English
Adjusting the 3D-PHONIC Modes
Once you have adjusted the 3D-PHONIC modes, the adjustment is
memorized for each 3D-PHONIC mode.
Before you start, remember...
• Make sure that you have set the speaker information correctly
(see page 12).
• There is a time limit in doing the following steps. If the setting is
canceled before you finish, start from step 1 again.
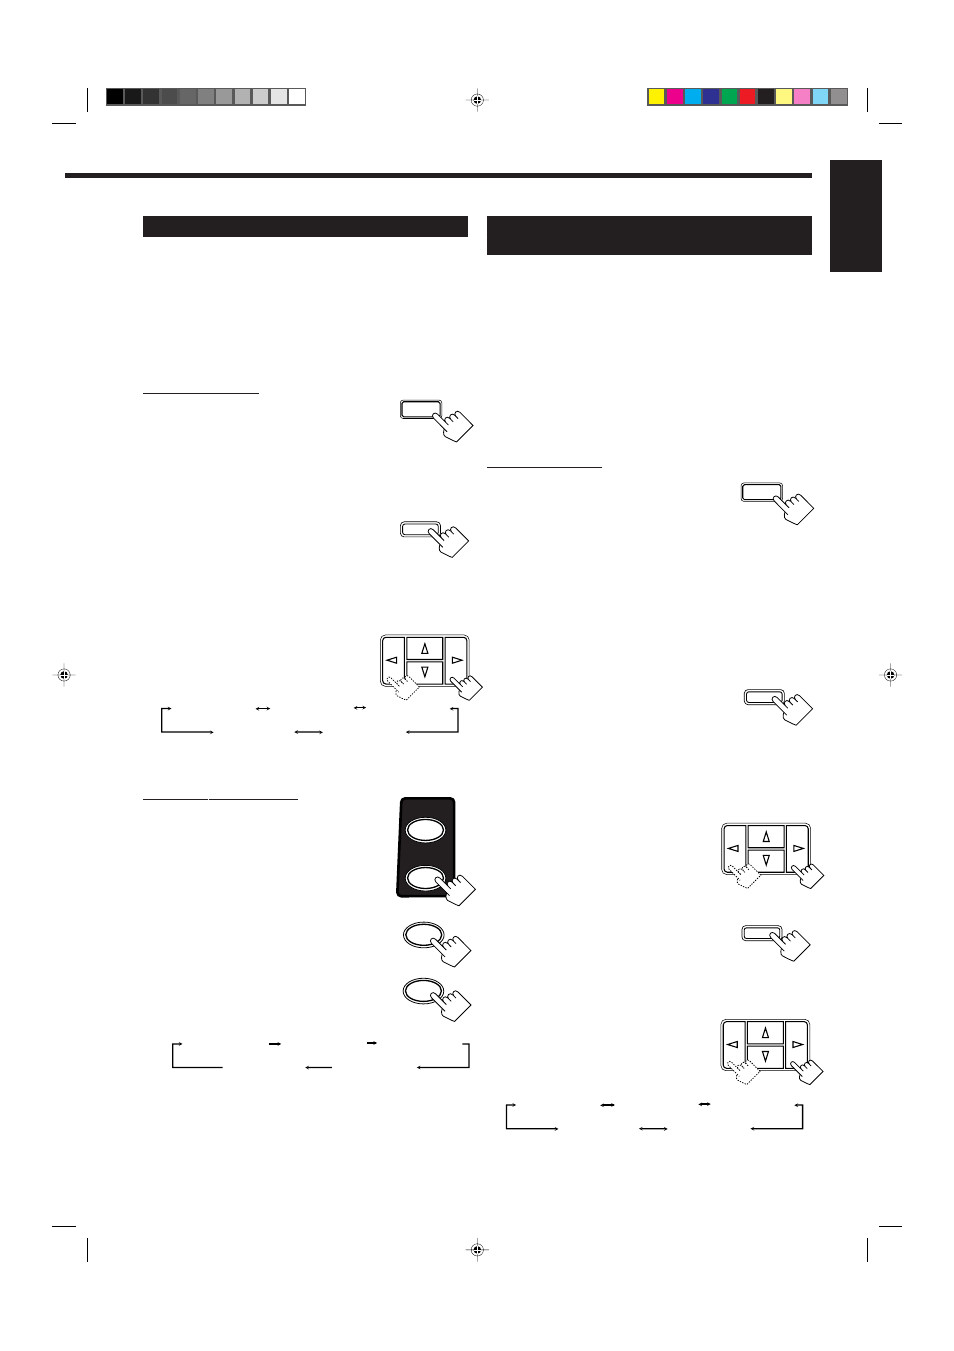
On the front panel:
1. Press DSP MODE repeatedly until
“3D ACTION” or “3D
THEATER” appears on the
display.
The 3D-PHONIC, DSP, and
Ÿ PRO LOGIC indicators also
light up on the display.
2. Adjust the effect level.
1) Press ADJUST repeatedly until “DSP
EFFECT” appears on the display.
• Once you have pressed ADJUST,
MULTI CURSOR
% / fi can be also
used for selecting “DSP EFFECT.”
• The display changes to show the
current setting.
2) Press MULTI CURSOR
@ / # to
select the effect level.
• As you press it, the effect level
changes as follows:
As the number increases, the selected 3D-PHONIC mode
becomes stronger.
From the remote control:
1. Press SURROUND MODE
repeatedly until “3D ACTION” or
“3D THEATER” appears on the
display.
The 3D-PHONIC, DSP, and
Ÿ PRO LOGIC
indicators also light up on the display.
2. Press SOUND.
The 10 keys are activated for sound adjustments.
3. Press EFFECT to select an effect
level you want.
• Each time you press the button, the effect
level changes as follows:
As the number increases, the selected 3D-PHONIC mode
becomes stronger.
Adjusting the DAP Modes and
Headphones mode
Once you have adjusted the DAP modes, the adjustment is
memorized for each DAP mode.
Before you start, remember...
• Make sure that you have set the speaker information correctly
(see page 12).
• There is a time limit in doing the following steps. If the setting is
canceled before you finish, start from step 1 again.
• You cannot adjust the rear speaker output level when you have set
“REAR SPK” to “NONE.” See page 12.
• You cannot make any adjustment for the headphones mode..
On the front panel:
1. Press DSP MODE repeatedly until
the DAP mode — LIVE CLUB,
DANCE CLUB, HALL,
PAVILION, or HEAD PHONE —
appears on the display.
The DSP indicator also lights up on the display. (When the
HEAD PHONE is selected, HEAD PHONE indicator lights up,
instead of the DSP indicator .)
• When you have set “REAR SPK” to “NONE,” the 3D-
PHONIC indicator also lights up. (Except for “HEAD
PHONE.”)
2. Adjust the speaker output levels.
1) Press ADJUST repeatedly until one of
the following indications appears on
the display.
“REAR L LEVEL”:
To adjust the left rear speaker level.
“REAR R LEVEL”:
To adjust the right rear speaker level.
• Once you have pressed ADJUST, MULTI CURSOR
% / fi
can be also used for selecting the speaker.
2) Press MULTI CURSOR
@ / # to
adjust the selected speaker output
level (from –10 dB to +10 dB).
3) Repeat 1) and 2) to adjust the other
speaker output level.
3. Adjust the effect level.
1) Press ADJUST repeatedly until “DSP
EFFECT” appears on the display.
• Once you have pressed ADJUST,
MULTI CURSOR
% / fi can be also
used for selecting “DSP EFFECT.”
• The display changes to show the
current setting.
2) Press MULTI CURSOR
@ / # to
select the effect level.
• As you press it, the effect level
changes as follows:
As the number increases, the selected DAP mode becomes
stronger.
DSP MODE
ADJUST
MULTI CURSOR
DSP EFFECT 1
DSP EFFECT 2
DSP EFFECT 3
DSP EFFECT 4
DSP EFFECT 5
SURROUND
SURROUND
MODE
SOUND
DSP EFFECT 1
DSP EFFECT 2
DSP EFFECT 3
DSP EFFECT 4
DSP EFFECT 5
4
EFFECT
DSP MODE
MULTI CURSOR
DSP EFFECT 1
DSP EFFECT 2
DSP EFFECT 3
DSP EFFECT 4
DSP EFFECT 5
ADJUST
MULTI CURSOR
ADJUST
EN18_25.RX-6000V[J]
99.12.16, 1:10 PM
21