Installing the fan tray – Juniper Networks Juniper MX-series MX480 User Manual
Page 6
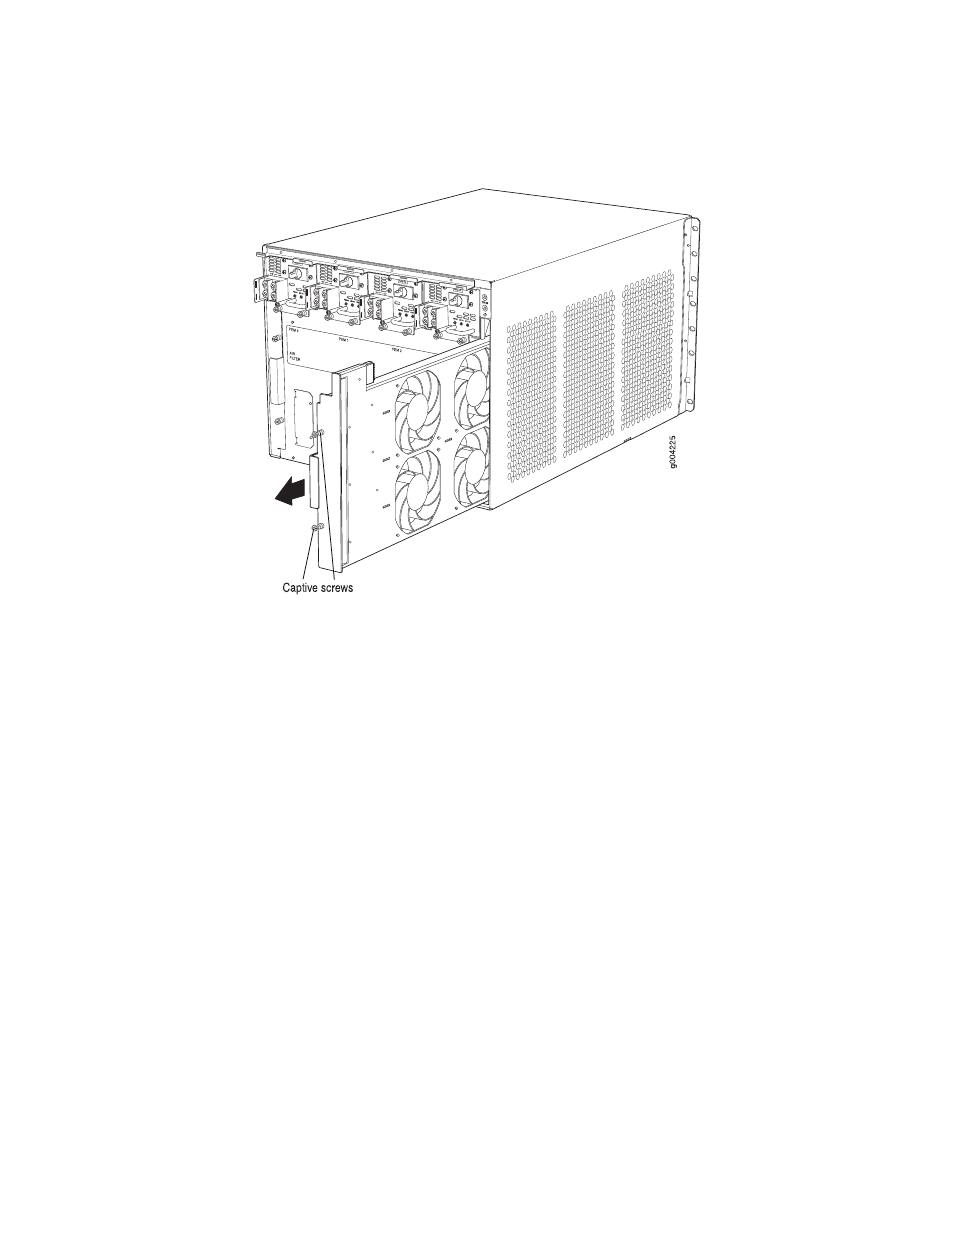
Figure 8: Removing the Fan Tray from an MX480 Router
Installing the Fan Tray
To install the fan tray (see Figure 9 on page 7 and Figure 10 on page 7):
1.
Attach an electrostatic discharge (ESD) grounding strap to your bare wrist and
connect the strap to one of the ESD points on the chassis. For more information
about ESD, see “Preventing Electrostatic Discharge Damage” on page 9.
2.
Grasp the fan tray handle and insert it straight into the chassis. Note the correct
orientation by the
this side up
label on the top surface of the fan tray.
3.
Tighten the captive screws on the fan tray faceplate to secure it in the chassis.
6
■
Replacing the Fan Tray
MX240 and MX480 Ethernet Services Router Fan Tray Installation Instructions
This manual is related to the following products: