Installing rear leg extension options (figure 2) – Invacare 6266 User Manual
Page 3
3
Part No. 1089633
LEG EXTENSIONS AND
WHEELED WALKER ACCESSORIES
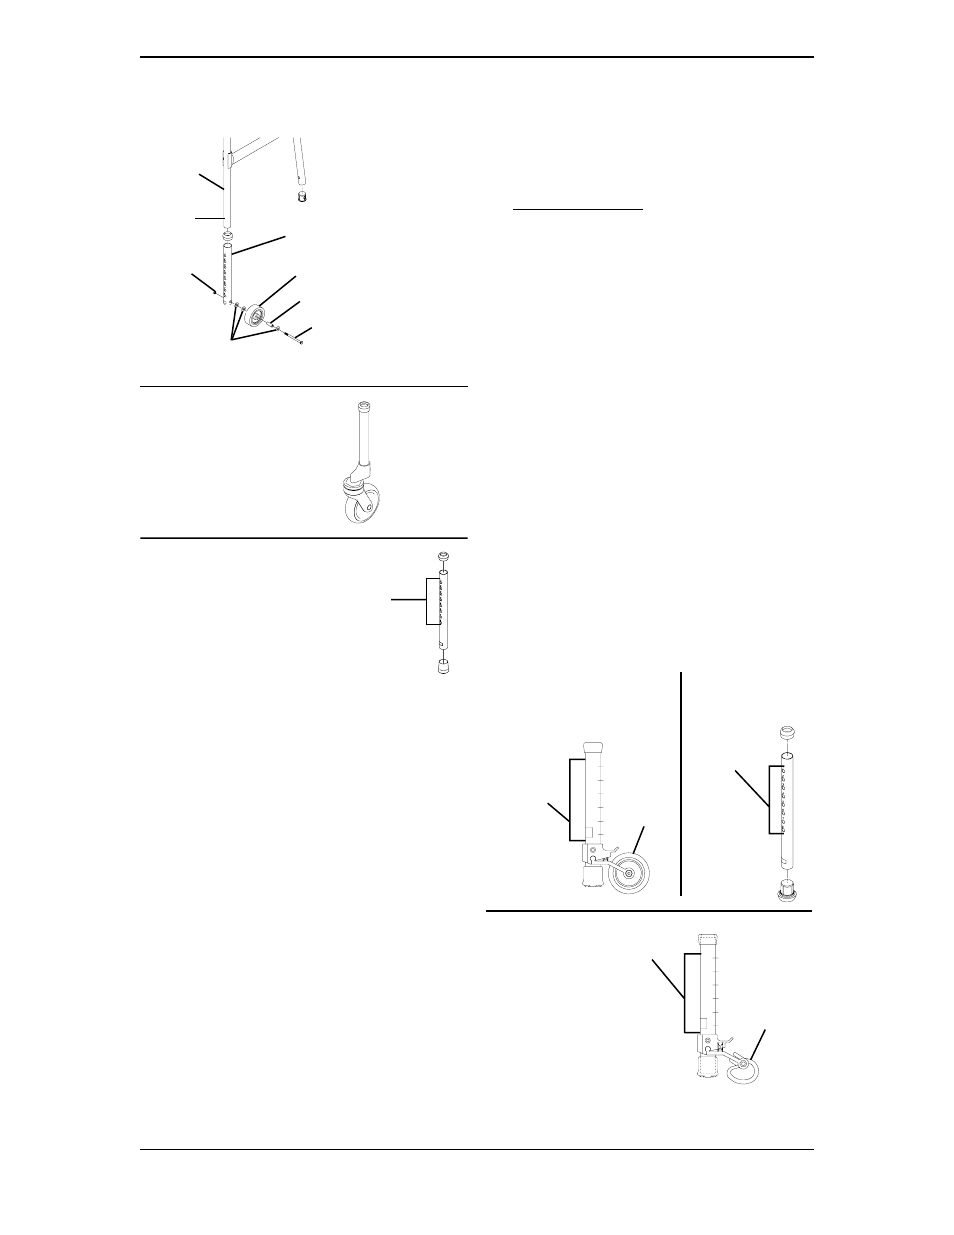
FIGURE 1 - INSTALLING WHEEL
ATTACHMENTS/LEG
EXTENSIONS
LEG EXTENSION
MODEL NOS.
6273 AND 6267
SWIVEL WHEEL
ATTACHMENT
MODEL NO. 6275
Walker
Frame
FRONT
REAR
MODEL NOS. 6270 AND 6271
Snap
Button
FIXED WHEEL ATTACHMENT
Leg Tube
Washers
Wheel
Locknut
Hex Screw
Bushing
Adjustment
Holes
INSTALLING REAR LEG
EXTENSION OPTIONS
(FIGURE 2)
NOTE: Refer to INSTALLATION WARNINGS in
the SAFETY SUMMARY of this instruction sheet.
1. Depress the snap buttons to remove the
two (2) EXISTING REAR leg extensions
from the walker.
NOTE: The REAR leg extensions will not be reas-
sembled to the walker when using the REAR wheel
attachments.
2. Depress the snap button on the walker
frame and install the NEW wheel attach-
ment/leg extension onto REAR leg of the
walker.
3. Repeat STEP 2 for remaining REAR leg.
4. Adjust the wheel attachment/leg exten-
sion to one (1) of the adjustment holes.
5. Repeat STEP 4 for remaining wheel
attachment/leg extension.
6. Ensure that the snap button of each leg
fully protrudes through the desired
adjustment hole and legs are adjusted so
the walker sits level.
FIGURE 2 - INSTALLING REAR LEG
EXTENSION OPTIONS
MODEL NOS.
6264 AND 6265
MODEL NOS.
6263 AND 6274
Brake
with
Wheel
Adjustment
Holes
MODEL NO.
6266
Adjustment
Holes
Sure
Glide
Adjustment
Holes