Autostar #497 handbo x, Aligning the lt series, Index – Meade Instruments LT SC Series User Manual
Page 9
INDEX
AutoStar #497 HANDBO
X
9
ALIGNING THE
LT
SERIES
9
Aligning the LT Series
As the Earth rotates beneath the night sky, the stars
appear to move from East to West. The speed at
which the stars move is called the sidereal rate. You
can setup your telescope to move at the sidereal
rate so that it automatically tracks the stars and
other objects in the night sky. If the telescope is not
tracking an astronomical object, the object will drift
out of the eyepiece fi eld of view. The tracking function
automatically keeps an object more or less centered in
the telescope’s eyepiece.
To automatically track and locate objects in the night
sky, the LT Series must fi rst be aligned on the sky.
It is best to set up the telescope in twilight or before
sunset the fi rst time you use the LT Series. Setup the
telescope in a large open area where you can see lots
of the night sky. Make sure the ground is stable and
approximately level. It is best to setup the scope away
from bright nighttime lighting. Bright lights will spoil your
night vision and impede you ability to see the sky.
The LT Series Home Position
Once the LT Series is fully assembled, you will fi rst
need to initialize AutoStar, set the telescope into the
home position, and perform the Easy Alignment in
order for the LT Series to successfully locate celestial
objects. The home position for the LT Series is with the
telescope optical tube level and pointed in the direction
of either True North or Magnetic North. See Figure 6.
Either North direction can be used and the LT Series
will prompt you to which North direction the optical
tube is pointing before beginning an alignment. Once
the telescope is fully assembled and outside under the
night sky, follow the steps below to correctly place the
telescope into the home position.
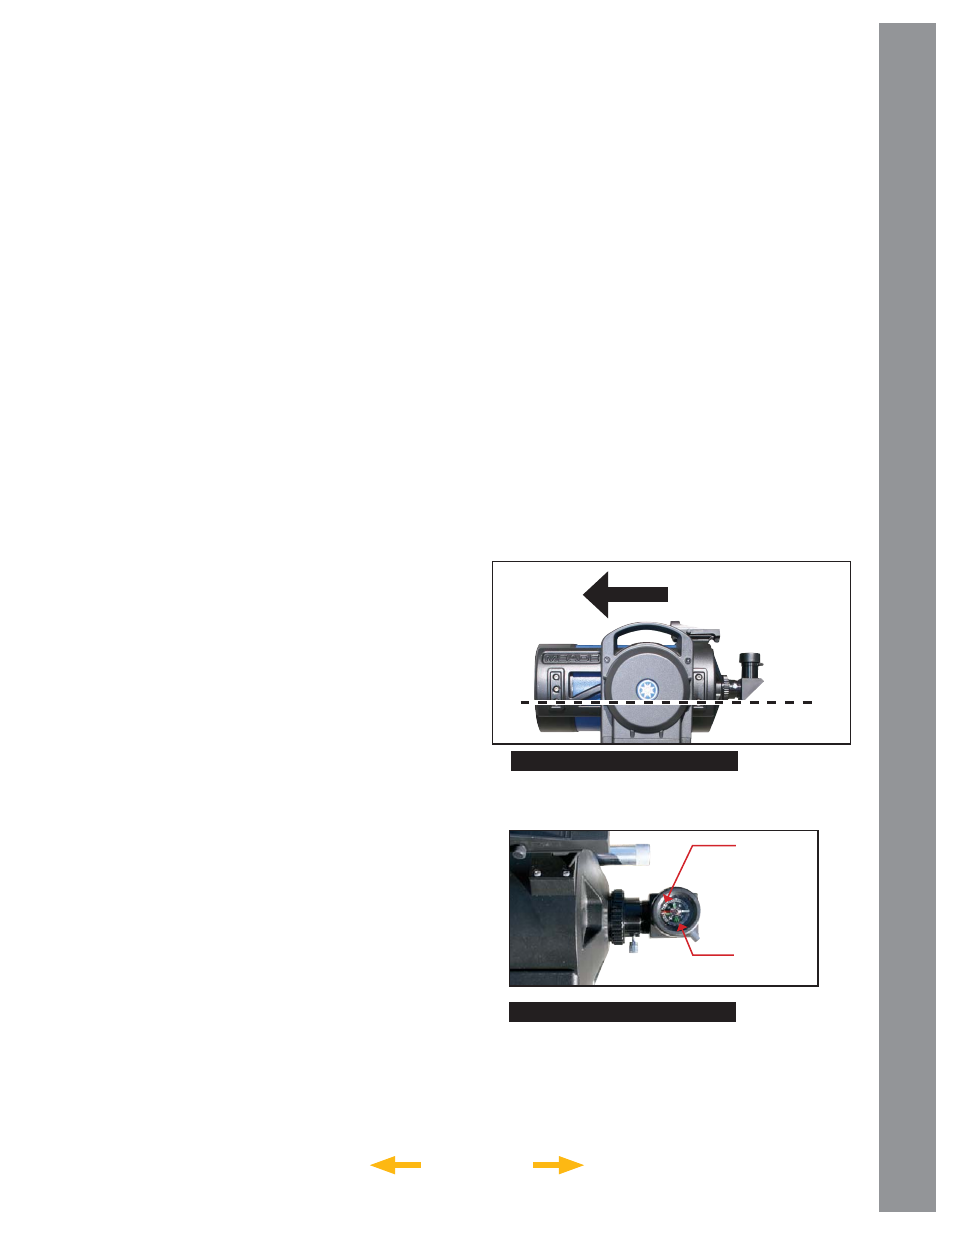
Magnetic North Home Position
1. Using the up/down arrow keys (pg. 19, Fig. 5, 5) on
the AutoStar controller, move the telescope so that the
optical tube is approximately level. Place the included
bubble level/compass into the diagonal prism and use
the AutoStar left/right arrow keys (pg. 19, Fig. 5, 5)
to move the telescope so the optical tube is lined up
with the compass needle. The telescope will then be
pointing in the direction of Magnetic North.
2. Now use the up/down arrow keys on the AutoStar
controller to level the optical tube using bubble level
feature to precisely level the optical tube.
3. The telescope is now in the Magnetic North Home
Position.
True North Home Position
1. Using the up/down arrow keys (pg. 19, Fig. 5, 5)
on the AutoStar controller, move the telescope so that
the optical tube is approximately level. Now use the
left/right arrow keys (pg. 19, Fig. 5, 5) to move the
telescope so the optical tube is pointing in the direction
of True North (the north star Polaris).
2. Now use the up/down arrow keys on the AutoStar
controller to level the optical tube. The included bubble
level/compass can be place into the diagonal prism
and has a built in bubble level feature that will aide in
leveling the optical tube if needed.
3. The telescope is now in the True North Home
Position.
Telescope
Tube is level
North
Compass
needle is
pointing to
Magnetic
North
Bubble is
centered
Figure 7: Bubble Level/Compass
Figure 6: Alt/Az Home Position