Audio controls with navigation – Mazda 2010 CX-9 User Manual
Page 12
Audio Controls With Navigation
21
22
1. Push
LOAD /
.
2. Select the CD on-screen
button.
3. Wait for the screen
to lower.
4. Insert the CD after “IN”
is displayed on the
Information Display.
The CD will begin playing
after the screen closes.
TO LOAD/PLAy A CD
POWEr On
Push the POWER/VOLUME button
to turn the radio on.
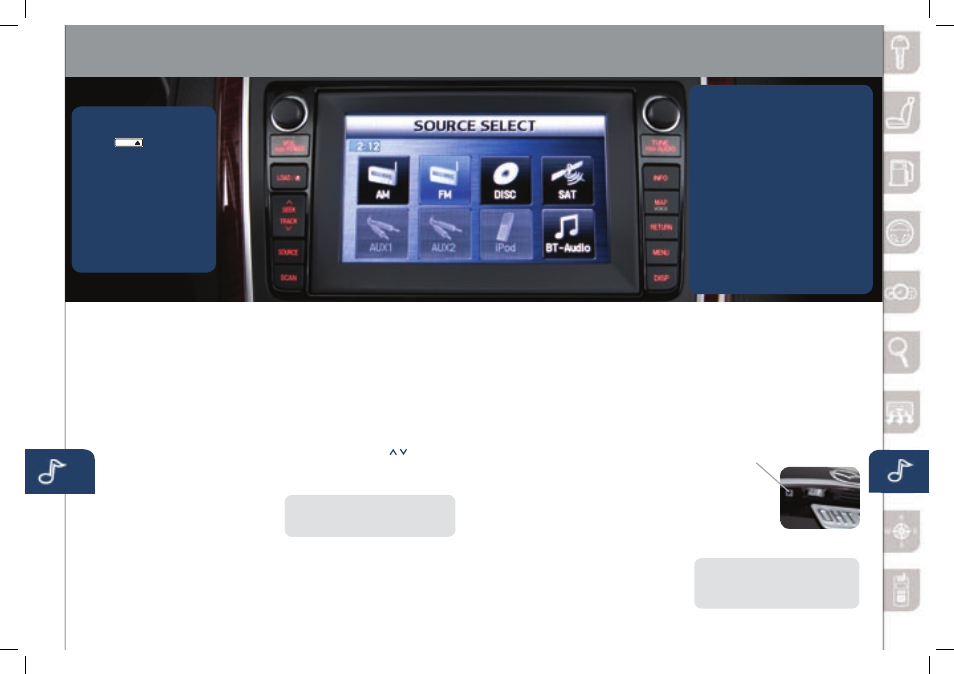
MEDIA SELECTIOn
Push the SOURCE button to select
the appropriate on-screen button:
radio: Select FM or AM button
for FM1, FM2, or AM band. The
selected band will be indicated in
the Information Display.
DISC: Select for CD player.
SAT: Select for SIRIUS
®
Satellite
radio. See the Owner’s Manual
for more details. If your vehicle is
equipped with Sirius XM Radio, your
new Mazda includes a six-month
introductory subscription. Vehicles
equipped with this feature will have a
satellite radio antenna located on the
roof or trunk lid. Call 888-539-7474
to activate your subscription!
AUX: Select to switch to AUX jack
input or Rear Seat Entertainment
System (RSES).
iPod: Select to play iPod.
BT-Audio: Select for
Bluetooth
®
Audio.
TUnInG
The radio has the following
tuning controls:
•
Manual: Turn the TUNE/
AUDIO dial to manually
change the frequency.
•
Seek/Track: Push and hold
the SEEK/TRACK buttons
to automatically seek a higher
or lower frequency or track,
depending on media selected.
nOTE:
If you continue to push and hold
the buttons, the frequency will continue
changing without stopping until released.
•
Scan: Push the SCAN button
to automatically sample strong
stations for seconds each. Push
again to cancel.
•
Preset Channel: Can be used
to store 8 AM, 16 FM and
18 SIRIUS
®
Satellite stations.
1
Push the SOURCE button.
2
Select AM/FM or SAT.
3
For FM, select FM1/2
button, for SAT, select
PRESETS button.
4
Tune to the desired station
using the SEEK/TRACK
button or by turning the
TUNE/AUDIO dial.
5
Select and hold any channel
preset on-screen button for
about two seconds until a
beep is heard.
• Repeat to store other stations.
•
Auto Memory Tuning:
Select and hold the AUTO-M
on-screen button until beep is
heard to store an additional 8
stations on each FM and AM
band without disturbing the
previously stored stations. This
is useful when driving in an area
where the local stations are not
known. Refer to the Owner’s
Manual for complete details.
InFO
Push to display the trip computer
in place of the clock on the
information display. The trip
computer can display:
• Current fuel economy
• Average fuel economy
• Approximate distance you can
travel on the available fuel in
your gas tank.
• Average vehicle speed.
rEAr VIEW MOnITOr
Placing the
gearshift lever
into Reverse
automatically
operates the Rear
View Parking
Camera and is viewable via the
navigation display screen.
nOTE:
When using the Rear View
Parking Camera, please check your
surroundings as objects may be
closer than they appear.
1. Push the MENU button.
2. Select the Set Clock tab.
3. Choose a 24-hour display or a
12-hour display.
4. Use the + hour and - hour tabs to
enter the correct hour.
5. Use the +1 min (minutes) and -1 min
to move minutes ahead or back.
nOTE:
• When Auto Time Zone is
switched ON, the time cannot
be adjusted manually.
• When Auto Time Zone is switched
OFF, the daylight saving time
on-screen button cannot be operated.
SETTInG yOUr CLOCK
193094_10a_CX-9_SSG_070109.indd 22-23
7/1/09 10:10:13 AM