What is smart drive, Rcx400 tips – Meade Instruments RCX400 User Manual
Page 73
73
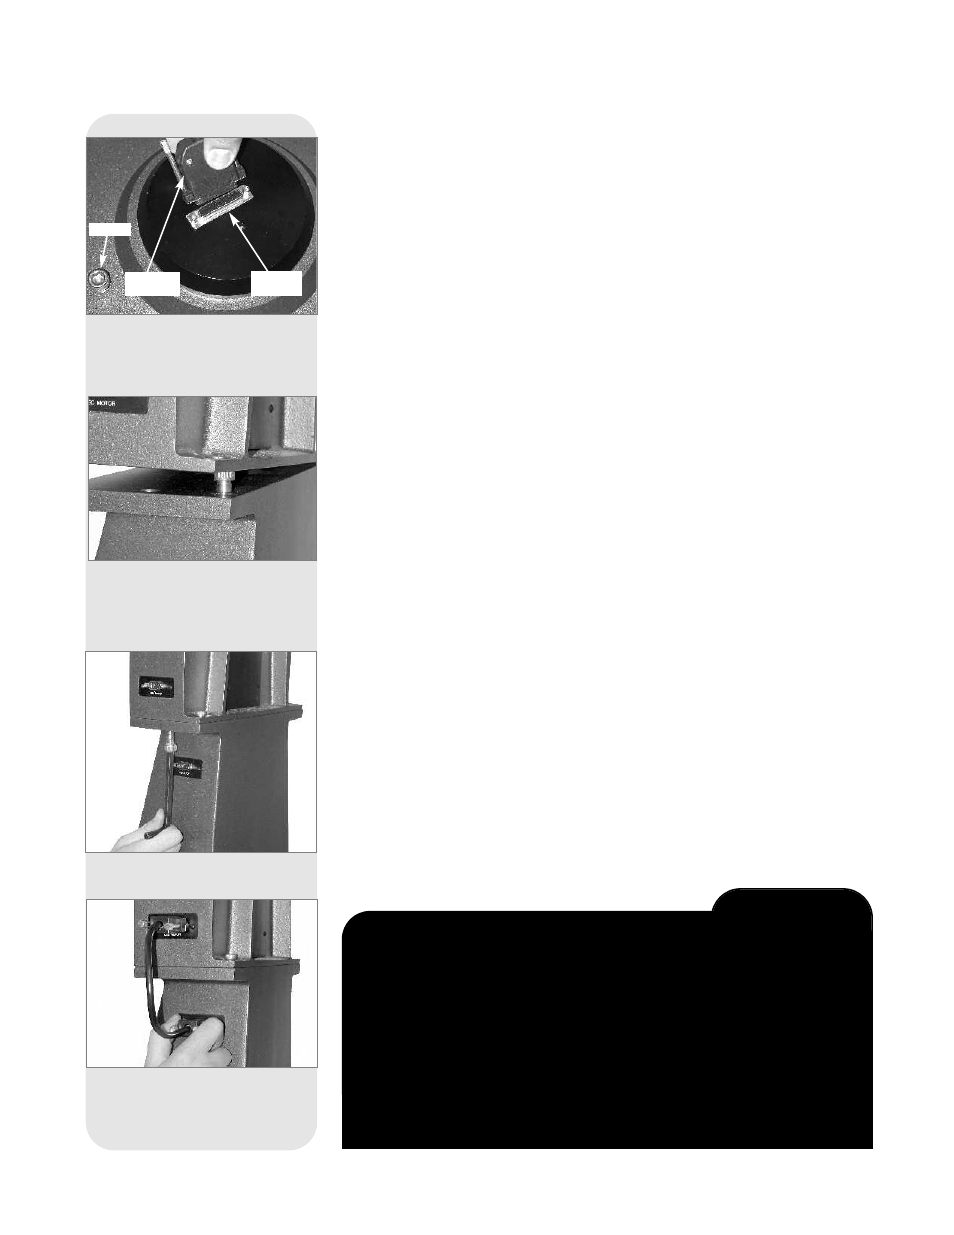
Fig. 65: View beneath plate (fork base
not shown for clarity sake): Thread-in
the fifth bolt and attach the DB-37
connector underneath the plate.
Fifth bolt
DB-37
Connector
Connector
thumbscrew
a. Located on the two top surfaces of the fork are two shoulder bolts. These two bolts
function as locating pins for the OTA. On the inside edge of the Dec. castings are
two matching holes (with slots). Before trying to mount the OTA, be sure to locate
these two bolts and holes. Notice that the bolts and holes are located on one side
of the castings, requiring the OTA to be mounted one way only.
b. Tighten the Dec. lock (
17, Fig. 1) to a firm feel only. With you on one side of the OTA
and your assistant on the other side, grasp the two handles on each side and lift
the OTA onto the top of the fork. Position the holes over the shoulder bolts. When
they are in place, slide the OTA back so that the shoulder bolts lock into the slots
(
Fig. 66).
c. Lock the OTA in place using the four 3/8”-16x3/4” bolts. Thread up the four bolts into
the bottom of the Dec. castings, two on each side. Using the supplied hex key, tight-
en to a firm feel only (
Fig. 53).
Attaching the Power and Data Cords
Several power and data cords are supplied with the 16”
RCX400
. These should all be
attached before powering up the telescope.
a. Confirm that the power switch on the power panel is in the OFF position. Connect
the power adapter to the 12vDC connector (
Fig. 57).
b. 2 short cords (8” long) with DB-9 and DB-25 connectors, are supplied. Plug into
the DB-9 and DB-25 connectors located at the top of the sides of the fork and the
Dec. casting (
Fig. 67).
c. Connect the Autostar II handbox to the HBX connector (
Fig. 57) on the control
panel.
Fig. 68: Plug in the DB-9 and DB-25
connectors to provide power from the
Dec. motor to the fork arms.
Fig. 67: Tighten the fork arm assem-
bly using the provided hex key.
Fig. 66: Position the holes over the
shoulder bolts. When they are in
place, slide the OTA back so that the
shoulder bolts lock into the slots.
What is Smart Drive?
Smart Drive is a feature that allows you to train almost all of the periodic error from
the R.A. and Dec. motor drive worm gears. Periodic error is brought about by tiny
gear imperfections. These imperfections exist in all manufactured worm gears.
These imperfections tend to ever so slightly speed up or slow down the drive track-
ing speed during each rotation of the worm gear. This inconsistency in the tracking
rate can have a negative effect on astrophotography. Smart drive lets you train your
telescope system to compensate for these inconsistencies and, as a result, perform
more accurate tracking during astrophotography. Smart Drive remembers the train-
ing even after the telescope is turned off.
If you'd like to learn more about about Periodic Error Correction, see page 44.
RCX400 TIPS