Adjusting the ln-11s1a lens, Setup – Marantz LN-11S1A User Manual
Page 15
11
B
EF
O
RE
U
SE
N
A
M
E
O
F
PA
RT
S
B
A
SI
C
O
PE
RA
TI
O
N
A
D
VA
N
CE
D
O
PE
RA
TI
O
N
RE
M
OT
E C
ON
TR
OL
LE
R
OP
ER
AT
IO
N
TR
OU
BL
ES
HO
OT
IN
G
O
TH
ER
S
SE
TU
P
ADJUSTING THE LN-11S1A LENS
To adjust the LN-11S1A lens, an adjustment method
that uses the remote controller included with a
VP11 or VP15 series projector is described here.
For details on the method of moving the anamorphic
lens, refer to “BASIC OPERATION” on page 3.
1.
Before starting LN-11S1A lens adjustment,
projector installation and initial settings
must be completely finished. Be sure to
complete initial settings and adjustment
of the projector itself, while referring to
the projector’s user’s guide. Turn on the
projector’s power and display the internally
generated cross-hatch test pattern.
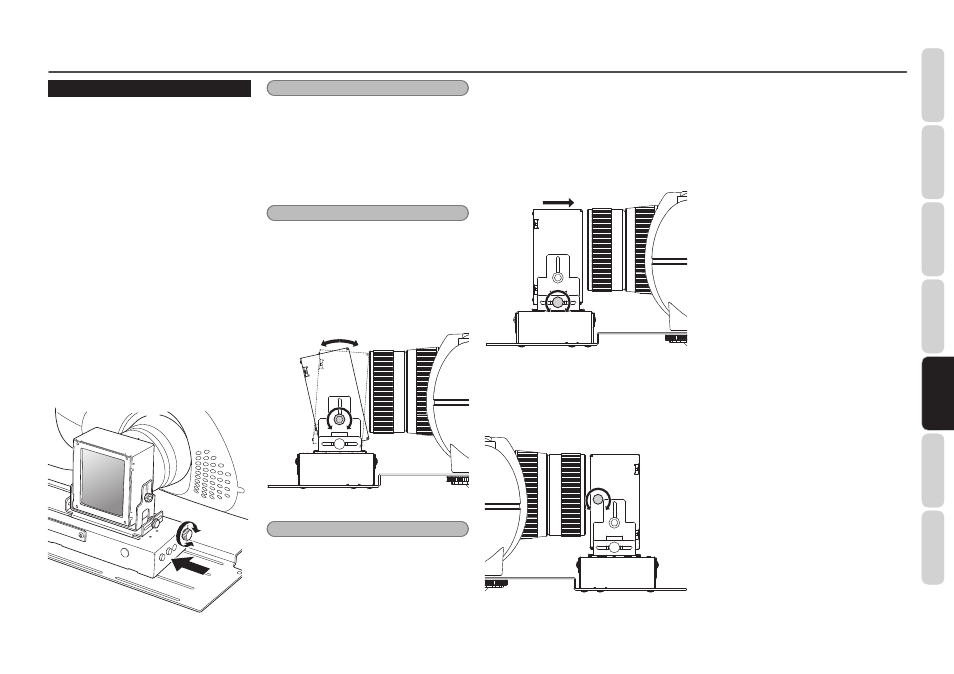
2.
Aim the remote controller included with the
VP11 or VP15 series projector at the remote
control receiver of the lens slider and press
the AUX1 button to move the anamorphic
lens to the operating position. Check that
the center of the LN-11S1A anamorphic
lens in the horizontal direction is aligned
with the center of the projector’s lens in
the horizontal direction. If the centers are
not aligned, adjust by turning the screws
shown in the figure to the right in the
direction of the arrow. Refer to Figure 27.
Figure 27
Note:
If the anamorphic lens and projector are not
adjusted correctly, the test pattern being projected
may be distorted.
You can easily align lens centers between
your projector and LN-11S1A and adjust
the tilt of LN-11S1A as well, if you mark a
certain position at your screen as a guide to
align.
Note:
When you mark the position, take care not to
blemish your screen.
3.
If the test pattern is distorted, adjust by
loosening the screw on the side of the
anamorphic lens so that the light being
projected passes through the center of
the anamorphic lens as much as possible.
Refer to Figure 28.
Figure 28
Note:
Never look directly into the lens. Always confirm
positioning from the side of the lens.
At the same time, adjust the tilt of the
anamorphic lens so that the outer edges of
the test pattern are straight. After adjusting
the height and tilt of the anamorphic lens,
securely tighten any loosened screws.
4.
In order to take full advantage of the
performance of the anamorphic lens, it
is important to keep the gap between the
anamorphic lens and projector’s lens is as
small as possible. Adjust the gap between
the anamorphic lens and projector’s lens
by loosening the screw located on the lens
slider. Refer to Figure 29. After adjustment,
securely tighten the loosened screw.
Figure 29
5.
This is the final adjustment. Using a
Phillips-head screwdriver, adjust the focus
of the anamorphic lens so that the test
pattern appears as sharp as possible. Refer
to Figure 30.
Figure 30
SETUP