Node editing – MACKIE FinalMix VST User Manual
Page 16

User’s Guide
16
User’s Guide
17
In general, the attack time should be much faster than the release time to get pleasing
results. If the attack time is set too quickly, you hear something resembling clipping on at-
tacks, especially with low-frequency signals. Leaving the attack a little bit longer also allows
more of the ‘snap’ of the attacks to pass through the compressor. Setting a release time too
fast can result in ‘buzzing’, especially on low notes. This occurs because the compressor gain
is actually following individual cycles of the incoming waveform.
If you set the attack time to 0 ms, the dynamics section actually behaves as a limiter. It
won't permit the signal to go over the end point value.
As a general rule of thumb, lower frequencies require longer release times than higher fre-
quencies. If a high- or mid-frequency band has a release time that is too long, you hear the
compressor ‘breathing’.
Threshold
Threshold sets the point at which compression (or expansion) starts to occur. Final Mix’s
threshold is displayed as the white line in the middle of the graph with the green “T” node
attached. You can adjust the threshold using your mouse to drag the line up or down. The
threshold level ranges from –48 dBfs to 0.0 dBfs. The Threshold can also be adjusted in the
Threshold window—use your mouse to scroll the values up or down.
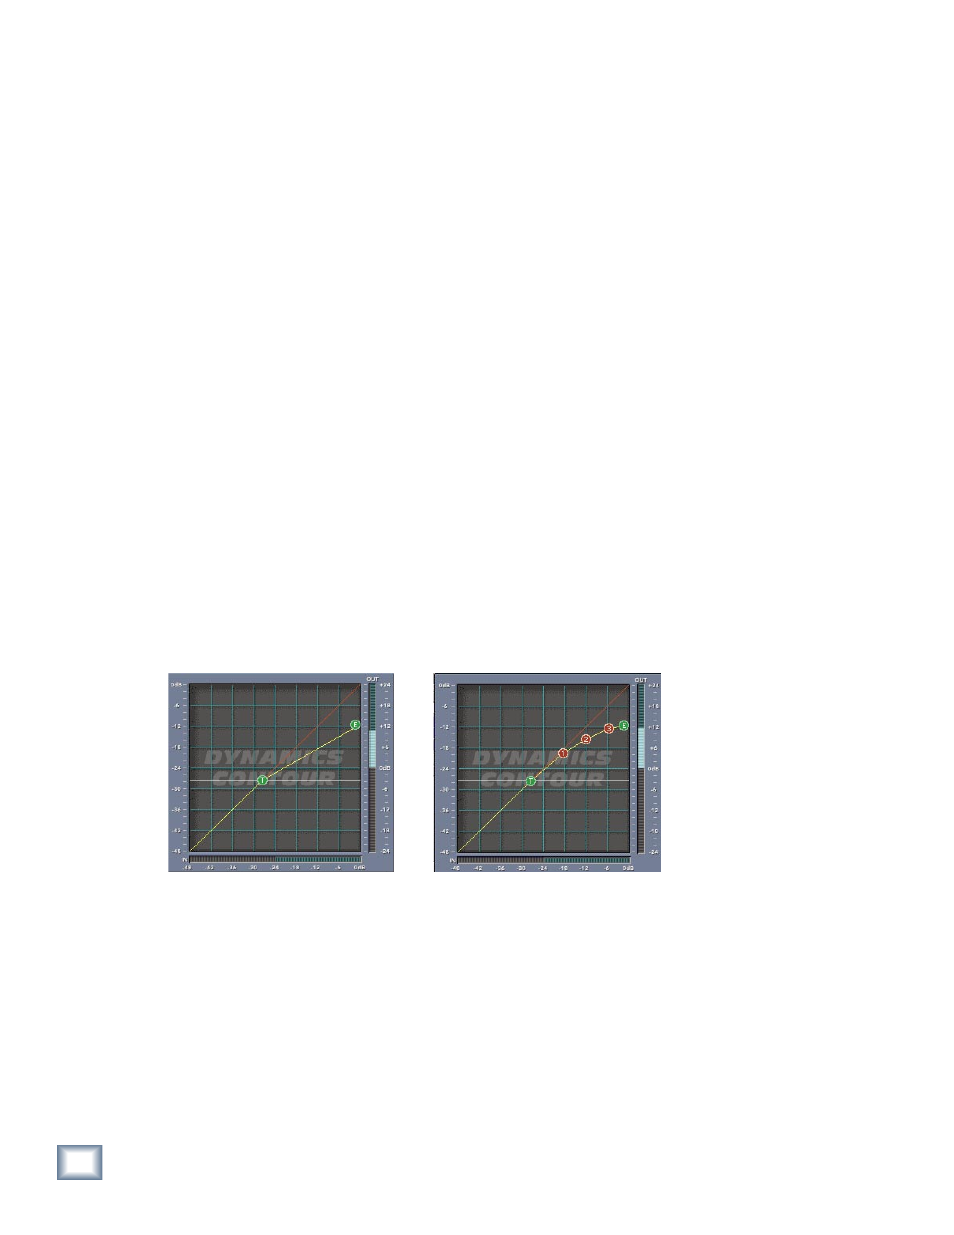
Node Editing
Final Mix’s Node Editing is a unique and powerful feature that goes far beyond the usual con-
cept of assigning a dynamics band’s ratio. The Contour Edit screen allows you to draw your
own curve between the threshold and the end point. Up to four nodes can be added to the
curve. This depth of editing is helpful in defining detailed nuances in your curve such as hard
knee, soft knee, and expansion. In the previous example we saw expansion combined with
compression to implement a leveling of the signal. This is where the quiet sections become
louder and louder sections become quieter. Below we see hard and soft knees drawn in.
Hard Knee curve
Soft Knee curve
Examples of Hard Knee and Soft Knee curves
About Hard Knee and Soft Knee Compression
The terms hard and soft do not refer to sound but rather the way that the compressor reacts
to incoming signal. The difference is somewhat subtle to hear but is more apparent at higher
compression ratios. A hard knee setting is well suited to lower ratios. When using higher
compression ratios, you may find it a little better sounding to draw in a smoother knee curve.
Look at the graphs above. A hard knee curve is represented as a straight line that connects
a point on the threshold to the end point or maximum output on the graph. A soft knee curve
has a smoother curve that connects the two points. This creates a more gradual transition
between non-compressed and compressed signals.
