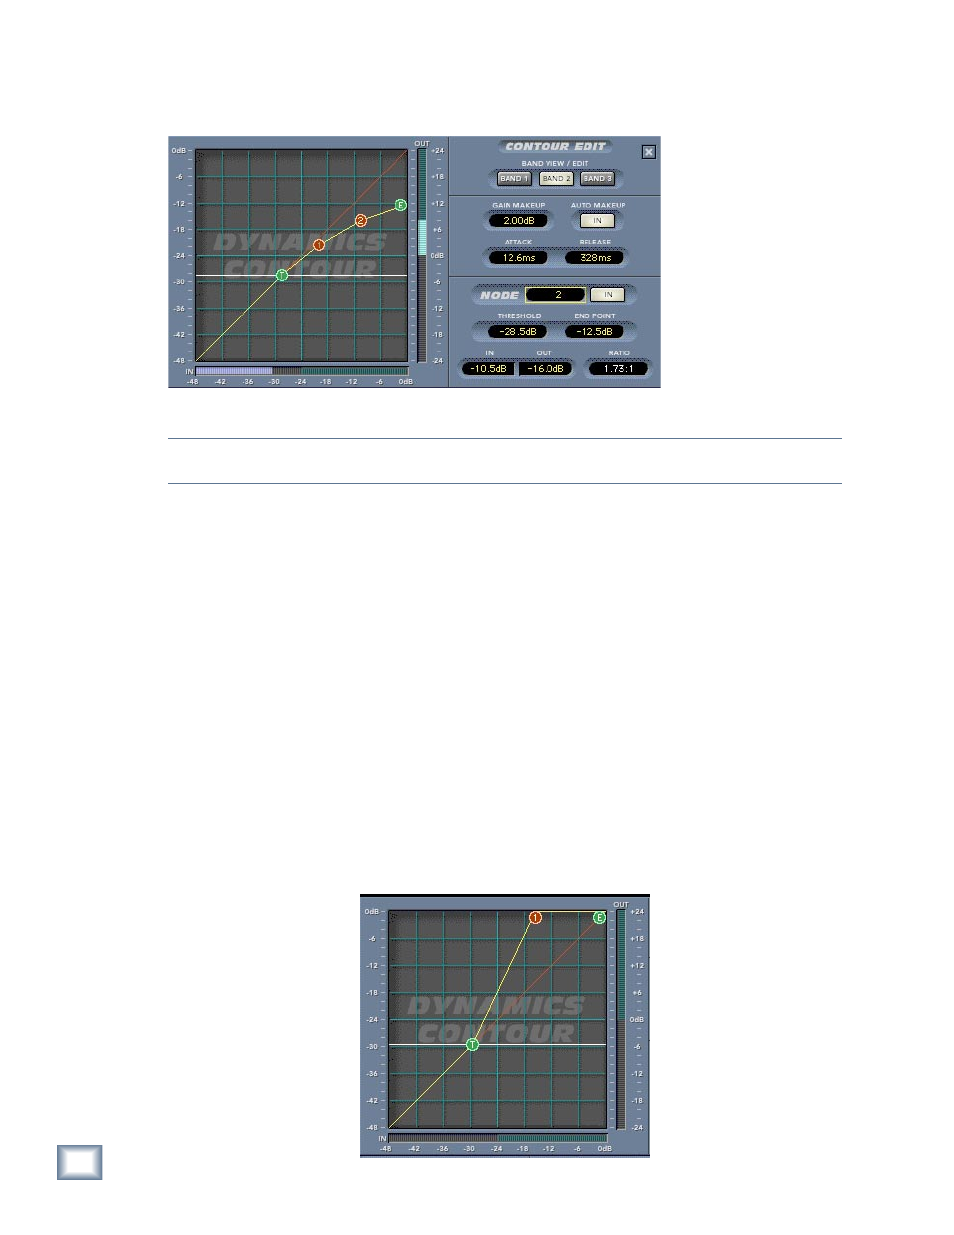
Contour edit screen – MACKIE FinalMix VST User Manual
Page 14

User’s Guide
14
User’s Guide
15
Contour Edit Screen
Contour Edit screen
Note: The Dynamics Contour Edit screen is accessed by double-clicking on any of the three bands found at the
bottom of the main Final Mix screen.
Overview
The Contour Edit Screen allows you to have very powerful control over the heart of Final
Mix. Double-clicking on any of the three dynamics overview screens brings up this more de-
tailed screen. The overview screens are found at the bottom of the main screen. The graph
you see when first accessing this screen represents the dynamics contour for the currently
selected band. This graph shows the band input level (on the horizontal) vs. what the output
level will be (on the vertical) after passing through the dynamics processor.
The threshold is shown as the white line with the “T” node attached. The graph also shows
the contour’s moveable end point (designated by the green node, labeled “E”). The end point
represents a selected band’s maximum output level. The traditional Compression Ratio is af-
fected by both of these parameters. One of the very powerful features of Final Mix is that you
can set up your contour to have different compression ratios for different input levels. This
is achieved by using multiple nodes. The figure above shows 2 extra nodes – the red balls
labeled 1 and 2. These nodes are being used, in this case, to essentially draw a knee for the
compressor curve. This gives a nice smooth transition from applying minimal compression at
low input levels, to much higher compression at higher levels.
The red line that crosses the graph diagonally represents unity gain (i.e., the signal is unaf-
fected by the dynamics processor). Contours which are steeper than this, as illustrated below
by the segment between T and 1, represent expansion.
Expansion section
