En – 17 – MITSUBISHI ELECTRIC SD200U User Manual
Page 17
EN – 17
ENGLISH
CLAMP
POSITION
opt.
XGA60
SIGNAL
SIGNAL - USER
0
CLAMP WIDTH
0
VERT.SYNC
AUTO
SHUTTER (U)
0
SHUTTER (L)
0
SHUTTER (LS)
0
SHUTTER (RS)
0
CLAMP
CLAMP
CLAMP
CLAMP
?
HORIZ.POSITION
opt.
XGA60
SIGNAL
R G B
R G B
VERT.POSITION
TRACKING
FINE SYNC
COMPUTER
INPUT
HOLD
ANAMORPHIC
USER
0
0
0
0
RGB
OFF
ON
OK
CINEMA MODE .. When ON is selected, the film mode will be automatically activated when a film source signal
is inputted. When OFF is selected, the film mode will not be activated.
VIDEO SIGNAL ... When AUTO is selected, the appropriate video format is automatically selected depending
on the input signal. If the image isn’t displayed correctly, select the desired video format
manually.
LANGUAGE ....... Use to select the language used in the menus. (
/ English / Español / Deutsch / Français
/ Italiano /
)
RESET ALL ........ Use to reset the MENU settings (except LANGUAGE).
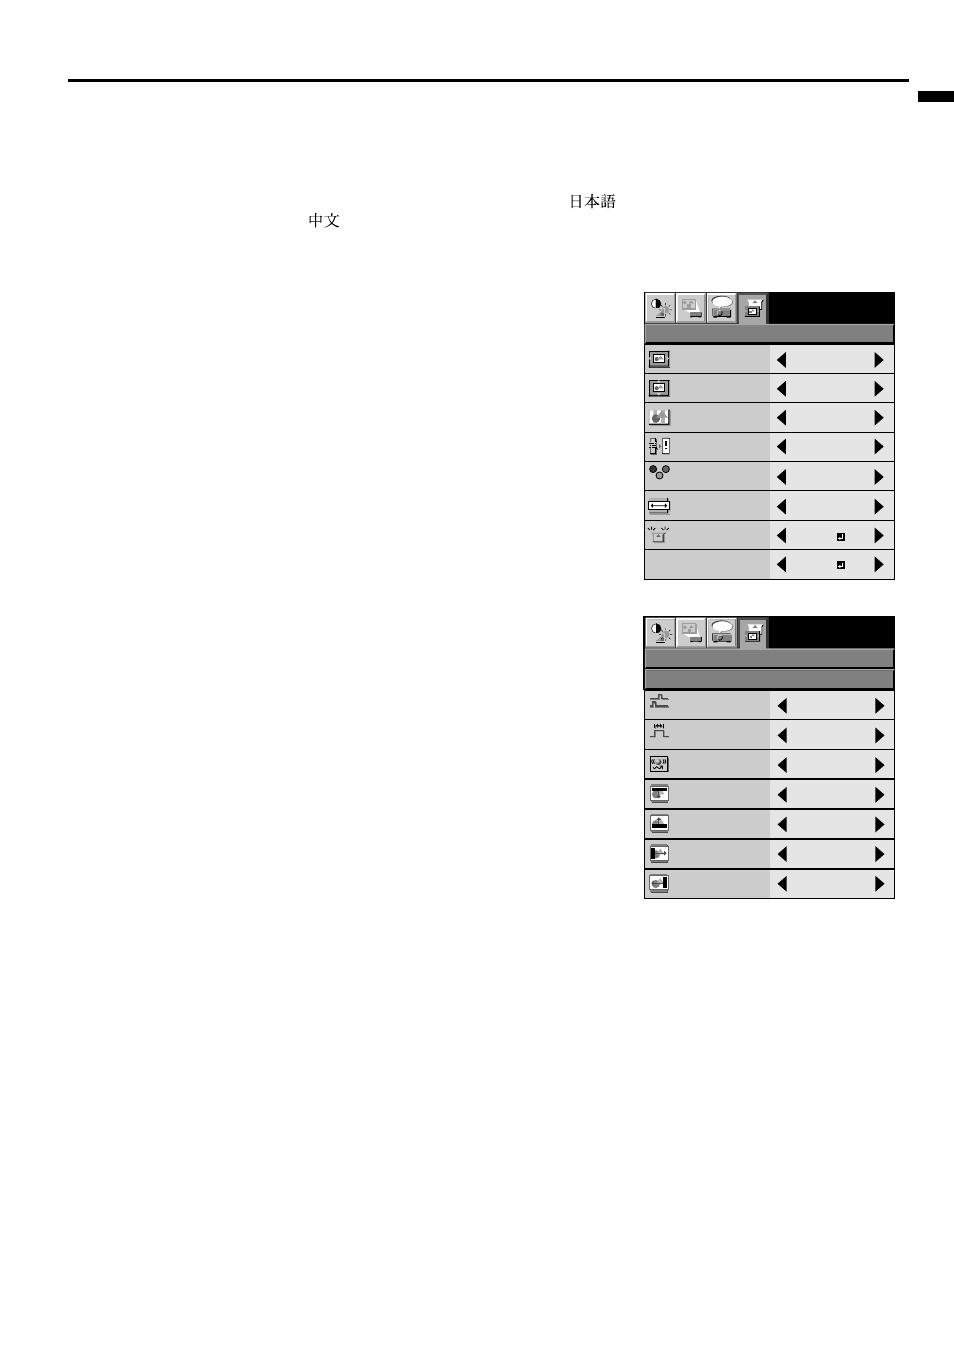
4 SIGNAL
HORIZ. POSITION .... Use to adjust the horizontal position of the image.
VERT. POSITION ..... Use to adjust the vertical position of the image.
TRACKING ......... Use to avoid image noise such as wide stripes.
FINE SYNC. ....... Use to synchronize the projector with PC input signals
so that the image is not blurred.
COMPUTER INPUT ...... This will be set automatically to match the input signal
to component video (YC
B
C
R
/YP
B
P
R
) or RGB. This can be
overridden as required.
ANAMORPHIC ... Select ON when playing DVD discs containing data of
widescreen images.
HOLD .................. Adjusts the image when flagging occurs near the top of
the screen.
5 SIGNAL - USER (Normally, there is no need for adjustments.)
CLAMP POSITION/
CLAMP WIDTH ......... If you use something similar, the brighter colors of the
projected image may become blurred. In this case,
adjust CLAMP POSITION or CLAMP WIDTH.
VERT. SYNC ...... Use to adjust the image when its motion does not run
smoothly. Select AUTO for normal setting.
SHUTTER(U) ..... Use to adjust the image when the noise etc. appears on
top part of image.
SHUTTER(L) ...... Use to adjust the image when the noise etc. appears on
bottom part of image.
SHUTTER(LS) .... Use to adjust the image when the noise etc. appears on
left side of image.
SHUTTER(RS) ... Use to adjust the image when the noise etc. appears on
right side of image.