Preparing the projector for operation – MITSUBISHI ELECTRIC SD200U User Manual
Page 12
EN – 12
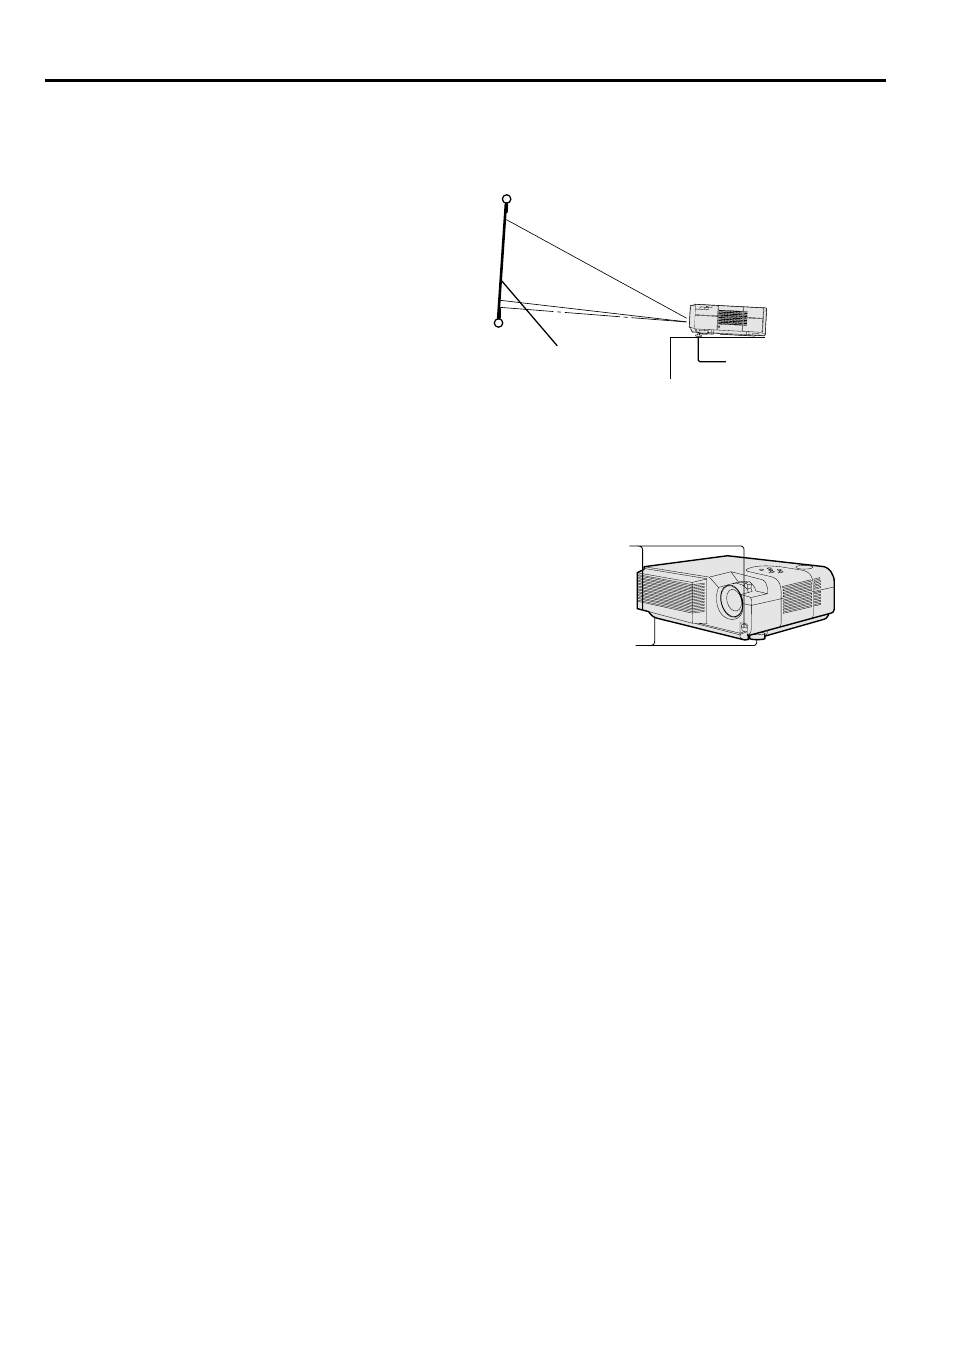
Front adjustment feet
Screen
Preparing the projector for operation
Getting ready for projection
1. Connect the power cord provided to the projector.
2. Connect the power cord to the wall power outlet.
3. Remove the lens cap.
Warning:
• Do not look directly into the lens when projector is
“ON”.
• The lens cap is for protecting the lens. If you leave
the power on with the cap on, the cap may be warped.
Please remove the lens cap when you turn the power
on.
• This projector is equipped with the power cords for
both U.S. and Europe. Use the appropriate power
cord for your country.
• A three-pin grounding type power plug is used with
the projector. Do not remove the grounding pin on
the power plug. If you are unable to insert the plug
into the outlet, contact your electrician to replace
your A/C outlet.
• The supplied power cord for U.S. is used for 120V
only. Never connect to any outlet or power supply
having a different voltage or frequency. If you
connect to the power supply having a different
voltage, please use the appropriate power cord.
• Use 100-240V AC 50/60Hz correct voltage other-
wise it may lead to fire or electric shock.
• Do not place any objects on the power cord, and keep
the projector away from heat sources to avoid break-
ing the power cord. A broken power cord can cause
fire or electric shock.
• Do not revise or alter the power cord otherwise it
may cause fire or electric shock.
Contact your dealer if the cord is broken.
Caution:
• Plug in firmly and unplug by holding the plug, not
by pulling the cable out.
• Do not plug in or out with wet hands. It may cause
an electric shock.
Adjusting the angle of projection
For the best result, project onto a flat screen with a 90
degree angle to the floor. If necessary, tilt the projector
by adjusting the adjustment feet on the bottom of the
projector.
1. Lift the projector to an appropriate angle.
2. Press the foot adjustment buttons, and the front
adjustment feet will slide out to their appropriate
positions.
3. Release the foot adjustment buttons to fix the feet
in those positions.
4. Turn the feet for fine adjustment.
• The projection angle can be adjusted by turning
the rear adjustment feet.
After using the projector
5. Put the front adjustment feet back into the projector.
Important:
• When the screen or projector is not placed flatly,
the projected image becomes distorted to shape a
trapezoid. When the image shape isn’t corrected
even after adjusting the projector and the screen,
adjust the widths of the top and bottom of the
image to be equal by pressing the KEYSTONE +
or - button. When adjusting by the remote control,
press the KEYSTONE button to display the
“KEYSTONE CORRECTION” menu first, and
adjust the widths by pressing the + or - button.
• Screen on a flat wall with a 90˚ angle to the floor.
• Align projector to produce a full screen display as
illustrated on page 9.
• The distance from the projector to the screen must
be compatible with screen size chart on page 9.
Note the distance from the screen chart.
Front adjustment
feet
Foot adjustment
buttons