0 attach, Bbv, sbv series natural vent gas fireplaces, 0 attach – Monessen Hearth B-VENT SBV500 User Manual
Page 13: 0 comb
62D4036
13
BBV, SBV Series Natural Vent Gas Fireplaces
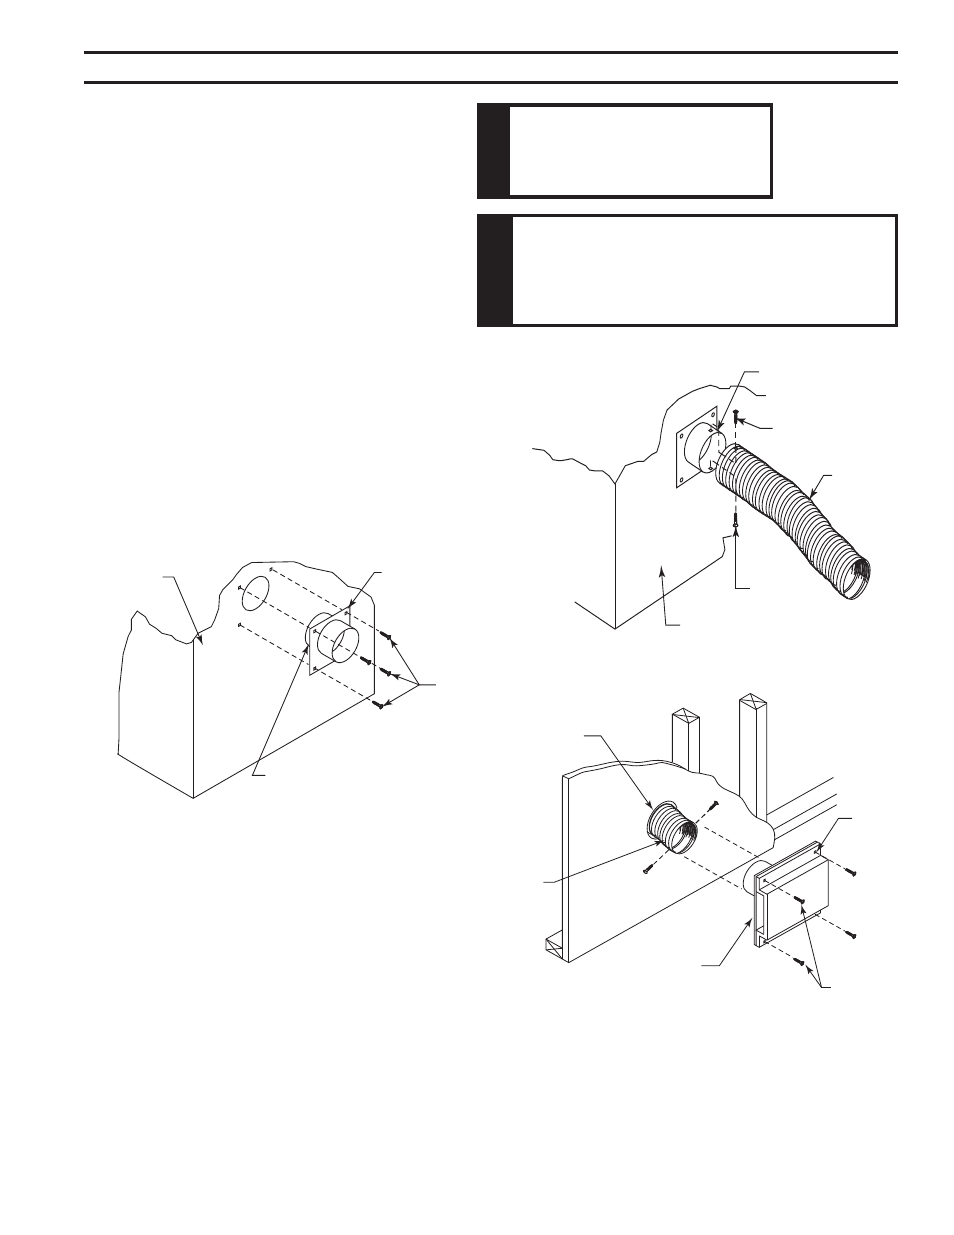
COMBUSTION AIR ASSEMBLY
MODEL OAC-4 COMBUSTION AIR ASSEM-
BLY
1. Remove the cover plate from the 4” outlet opening
location on the left outside of the fireplace.
2. Place starting collar (4”) into hole on left side of fire-
place. Fireplace shortest side of air starting collar
through fireplace outer wrap. Fasten starting collar in
place with four (4) sheet metal screws provided. Fig-
ure 11
NOTE: The air starting collar extends through the
fireplace outer wrap. When the air starting collar is
securely attached, it will form a seal against the fire-
place wall.
3. Cut a 6” diameter opening for model OAC-4 in the
outside wall covering where the outside vent is to be
located. Figure 13
4. Select and cut a piece of duct long enough to attach
to the fireplace and stick out at least 3” beyond the
face of the wall to which the OAC-4 inlet air vent will
be attached. Cut duct with a standard pocket knife.
Figure 12
W
ARNING
DO NOT remove the cover
if the outside air will not be
connected.
W
ARNING
Do not use a combustible duct. Always use
UL Listed Class 0 or 1 duct material. If nec-
essary to splice duct, use Model 403 duct
connector to splice duct sections.
&0
ATTACH
Left Side of
Fireplace
OAC-4
Starting
Collar
Sheet Metal
Screws
Shorter End of Air
Starting Collar
FP2023
Figure 11 -
Attach Outside Air Starting Collar to Left Side of
Fireplace
&0
ATTACH
Air Starting Collar
Screws
Screws
Duct
Left Side of
Fireplace
FP2024
Figure 12 -
Attach Outside duct to Starting Collar
&0
COMB
6” Diameter
Hole
Duct Ex-
tending 3”
Min.
AK-4 Inlet Air
Vent
Nail
Hole
Screws
FP2025
Figure 13 -
Combustion Air Assembly for Model No. OAC-4
5. If using insulating duct, push the insulation back from
one end of the duct approximately 2”. Figure 13
6. Slip the exposed end of the duct over the starting col-
lar on the fireplace.
7. Using the sheet metal screws provided, secure the
duct end to the collar attached to the fireplace.
8. Nail or screw the combustion air assembly to the sur-
face of the wall.