A) cl ose door tr a vel limit, Pr ogr amming limits & for ce – Genie INTELLIG 3024 User Manual
Page 6
©2010 The Genie Company
01/27/2010
6
P
R
O
G
R
A
M
S
ET
—
+
5 SECS
SET
TING &
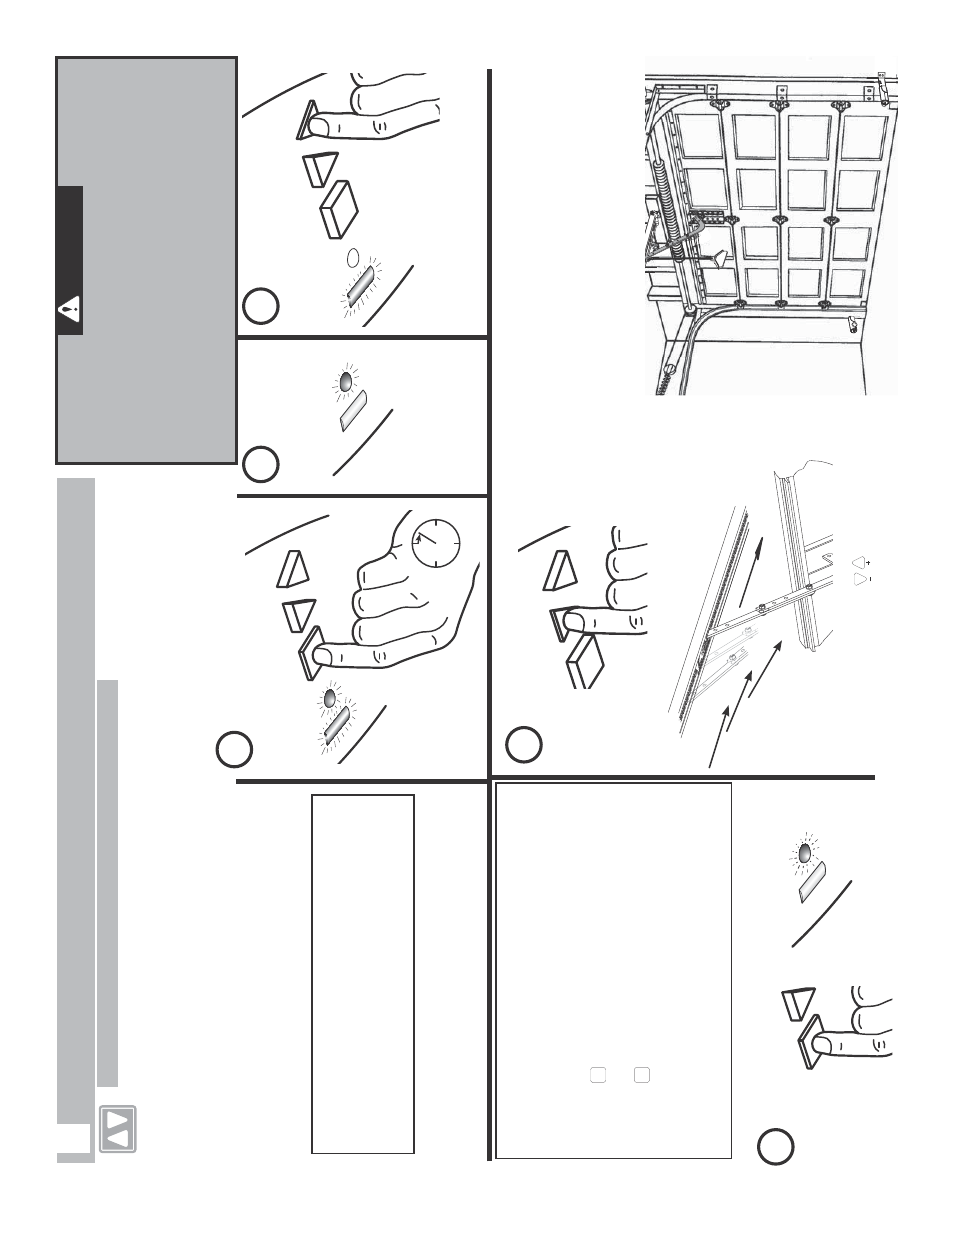
TESTING LIMITS AND FOR
CE
T
he OPEN (UP) and CL
OSE (DOWN)
D
o
or Limit positions
ar
e c
ontr
olled b
y mak
ing
adjustments using the panel locat
ed on the bott
om of the po
w
er head
. Begin with
Step 1 and continue through Step 10.
Doo
r
Fo
rc
e
is set during the final Open/Close
c
y
cle of these st
eps
.
T
he po
w
er head will aut
omatically set door speed at slo
w if the
distanc
e betw
een limits is less than 6 f
eet.
A) CL
OSE DOOR
TR
A
VEL LIMIT
NO
TE:
Y
ou can star
t and st
op door
mo
v
ement using either
butt
ons until
d
o
o
r i
s i
n
c
o
rr
e
c
t
open
or closed
position.
W
a
tch door mo
v
e
PR
OGR
AMMING LIMITS & FOR
CE
(C
ontinuing from Installation P
oster
if pro
vided)
1
G
R
A
M
S
E
—
+
PRESS and HOLD
5
P
R
O
G
R
A
M
S
ET
—
+
PRESS and HOLD
SEE BO
TH
Blue LEDs
come ON
SEE r
ound
Blue LED
come ON
P
R
O
G
R
A
M
S
ET
—
SEE r
ound Blue
LED flashing
RELEASE
1
2
3
4
NO
TE:
If one or both LEDs c
ome ON RED at this
time;
Limits pr
ogr
amming menu was not ent
er
ed
pr
operly
.
Y
ou must exit pr
ogr
amming and r
estar
t.
To exit this mode:
A.
P
ress
PROGRAM
S
ET
and r
elease
B.
P
ause
C.
P
ress
PROGRAM
S
ET
and r
elease
D.
P
ause
E.
Begin with St
ep 1 on this page
. Restar
ting at
S
te
p
1
w
il
l r
e
se
t
RED
LEDs t
o
BL
UE
.
PRESS and RELEASE
W
ARNING
•
Mak
e sur
e door
w
a
y is in vie
w and clear of obstacles
and people to a
v
oid injur
y or damage to pr
oper
ty
.
•
DO NO
T oper
a
te this unit fr
om w
all c
onsole bef
or
e
LIMIT
S and FORCE ar
e set
. S
e
v
er
e damage to the
opener can
occur
.
•
Bullet MUST be engaged to carriage BEFORE setting
limits
. S
ee Installa
tion P
oster (if pr
o
vided) or r
ef
er to
pages 12 and 18.
Please not
e that ther
e is a 30 sec
ond timeout
betw
een each
pr
ogr
amming st
ep
.
A pr
ogr
amming timeout during these st
eps has
occur
ed when
tw
o RED flashing LEDs
appear
.
In the ev
ent of a timeout please r
estar
t at St
ep 1.
NOT
CE
O
R
C
M
UC
D
U
O
N
N H
D
T
ra
v
el door to FULL CL
OSED position
RELEASE
PRESS and
RELEASE
SEE long Blue
LED c
ome ON
If RED LED c
omes ON - ST
OP and
exit pr
ogr
amming
.