V-belt tensioning/replacement, V-belt tensioning/ replacement notice – Grizzly G0453PX User Manual
Page 41
-35-
Model g0453z/g0454z (Mfg. 1/09+)
v-Belt Tensioning/
Replacement
NOTICE
After the first 16 hours of use, the v-belts
will stretch and seat into the pulley grooves.
The v-belts must be properly re-tensioned
after this period to avoid severely reducing
their useful life.
three cogged V-belts transfer power from the
motor to the cutterhead, and then to the infeed
and outfeed rollers through the gearbox and drive
chains. to ensure efficient transfer of power to
these systems, make sure the V-belts are always
properly tensioned and in good condition.
if a V-belt is worn, cracked, or damaged, replace
all three V-belts at the same time to ensure belt
tension is even among the belts, reducing the risk
of premature wear on any one belt.
Tools Needed
Qty
phillips screwdriver ........................................... 1
Wrench 19mm ................................................... 1
To tension/replace the v-belts:
1. disConnECt pLAnEr FroM poWEr!
v-belts and pulleys will be hot after opera-
tion. Allow them to cool before handling
them.
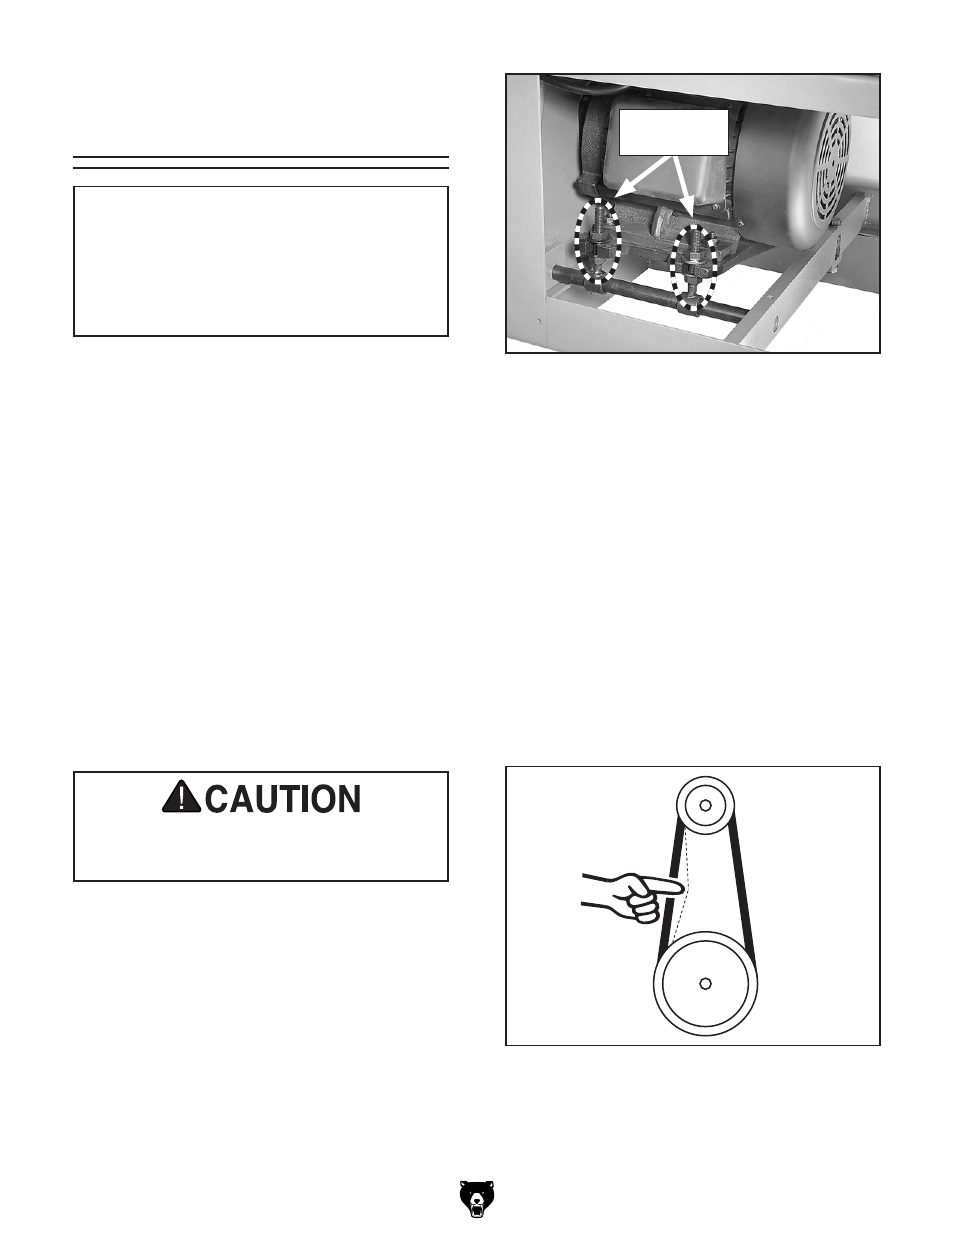
figure 32. Front cabinet cover removed to
expose the motor.
Motor Mount
hex nuts
4. if the V-belts need to be replaced, raise the
motor to release the belt tension (refer to the
next step for instructions), roll them off the
pulleys, then replace them as a matched set
of three.
5. to adjust the V-belt tension, loosen the top
motor mount hex nuts (see
figure 32), then
adjust the bottom hex nuts to raise or lower
the motor.
Note: The V-belts are correctly tensioned
when there is approximately
3
⁄
4
" deflection
when moderate pressure is applied to them
midway between the pulleys, as illustrated in
Figure 33.
Cutterhead
Pulley
Approximately
3
⁄
4
" Deflection
Motor
Pulley
figure 33. Correct amount of belt deflection.
6. When the V-belts are correctly tensioned,
make sure the motor mount hex nuts are
tight, then replace the cabinet cover and the
belt cover.
2. remove the V-belt cover from the left side of
the machine to expose the belts.
Note: A collection of black belt dust at the
bottom of the belt cover is normal during the
life of the belts.
3. remove the front cabinet panel to access the
motor, as shown in
figure 32.