X forms adjust, C d 39, Format – Genicom EasyCoder 3400e User Manual
Page 76
Chapter 6— Using Test and Service Mode
C d 39
Helvetica CondensedHelvetica
64
EasyCoder 3400e Bar Code Label Printer User’s Manual
*FORMAT*
*FORMAT*
3XXXU.049
➤
➤
-X
Y
➤
+X
+Y
➤
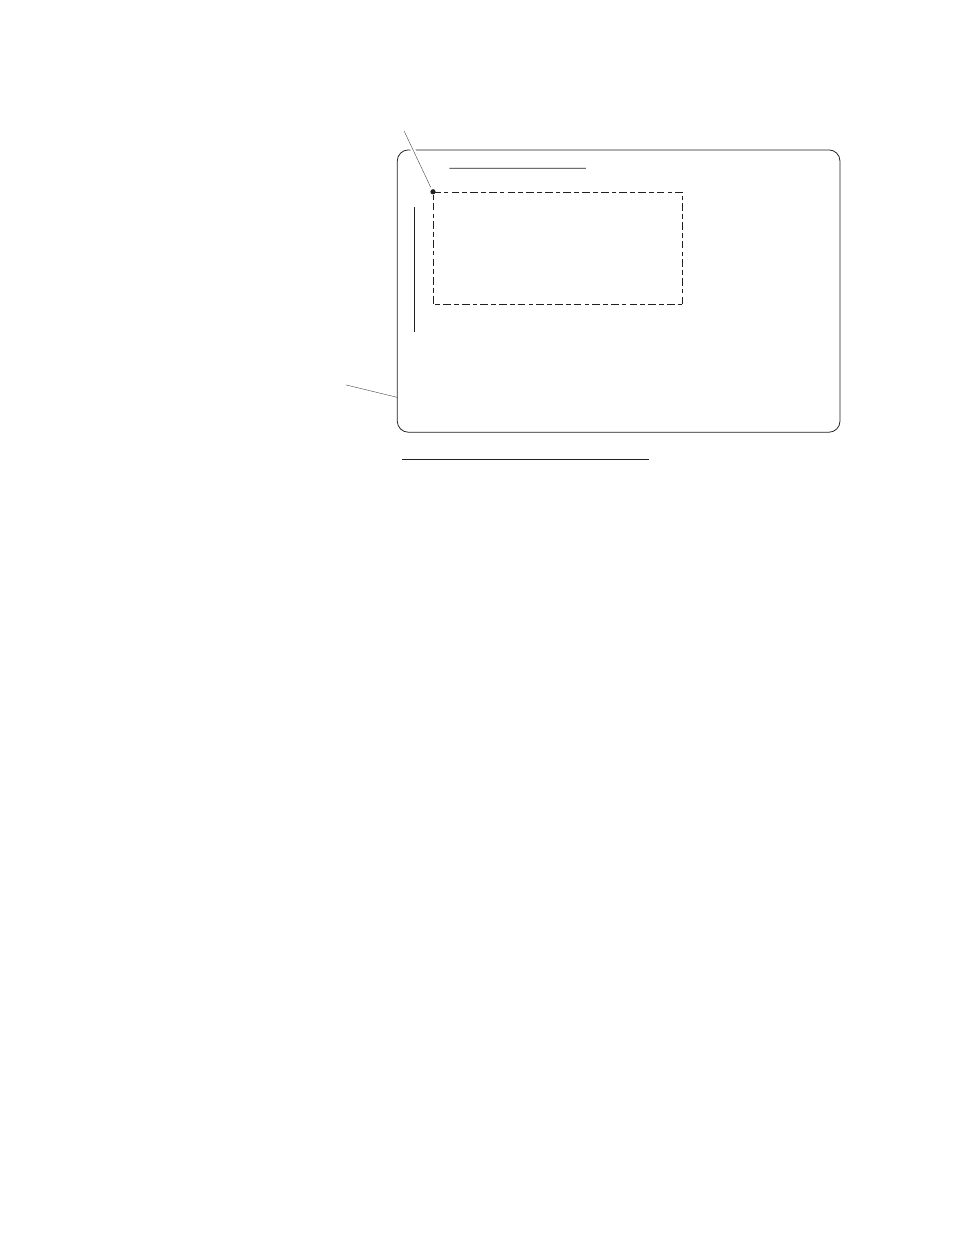
Direction of media from printer
Origin (Ш,Ш)
Leading
Edge
Default X and Y origins: This illustration shows the default X and Y origins. You can
control the default X origin (top of form) with PrintSet or with the Test and Service DIP
switches. You can control the default Y origin with the DIP switches only.
The default X origin is .25 centimeters (0.10 inch) (20 dot increments)
from the edge of the label. You can move the X origin forward or back 30
dot increments. The default Y origin is .13 centimeters (0.05 inch) (10 dot
increments) from the leading edge of the label. Each dot increment is 5
mil (0.005 inch).
X Forms Adjust
When you move the X origin forward, the printer moves the top of form
away from the edge before printing the label information. When you move
the X origin backward, the printer moves the top of form closer to the
edge before printing the label information.
To set the X forms adjust
1
Turn the On/Off switch to the off position.
2
Press and hold the Feed/Pause button while turning on the printer.
The printer prints out the hardware configuration label and then enters
Data Line Print mode.
3
In the top bank of the Test and Service DIP switches, turn on switches
1, 2, 3, and 4. See the next illustration.
To move the X origin forward, turn off switch 5.
To move the X origin backward, turn on switch 5.