English, Technical reference - 77 – GIGABYTE AMD Socket 754 Processor Motherboard GA-K8NS Pro User Manual
Page 77
Technical Reference
- 77 -
English
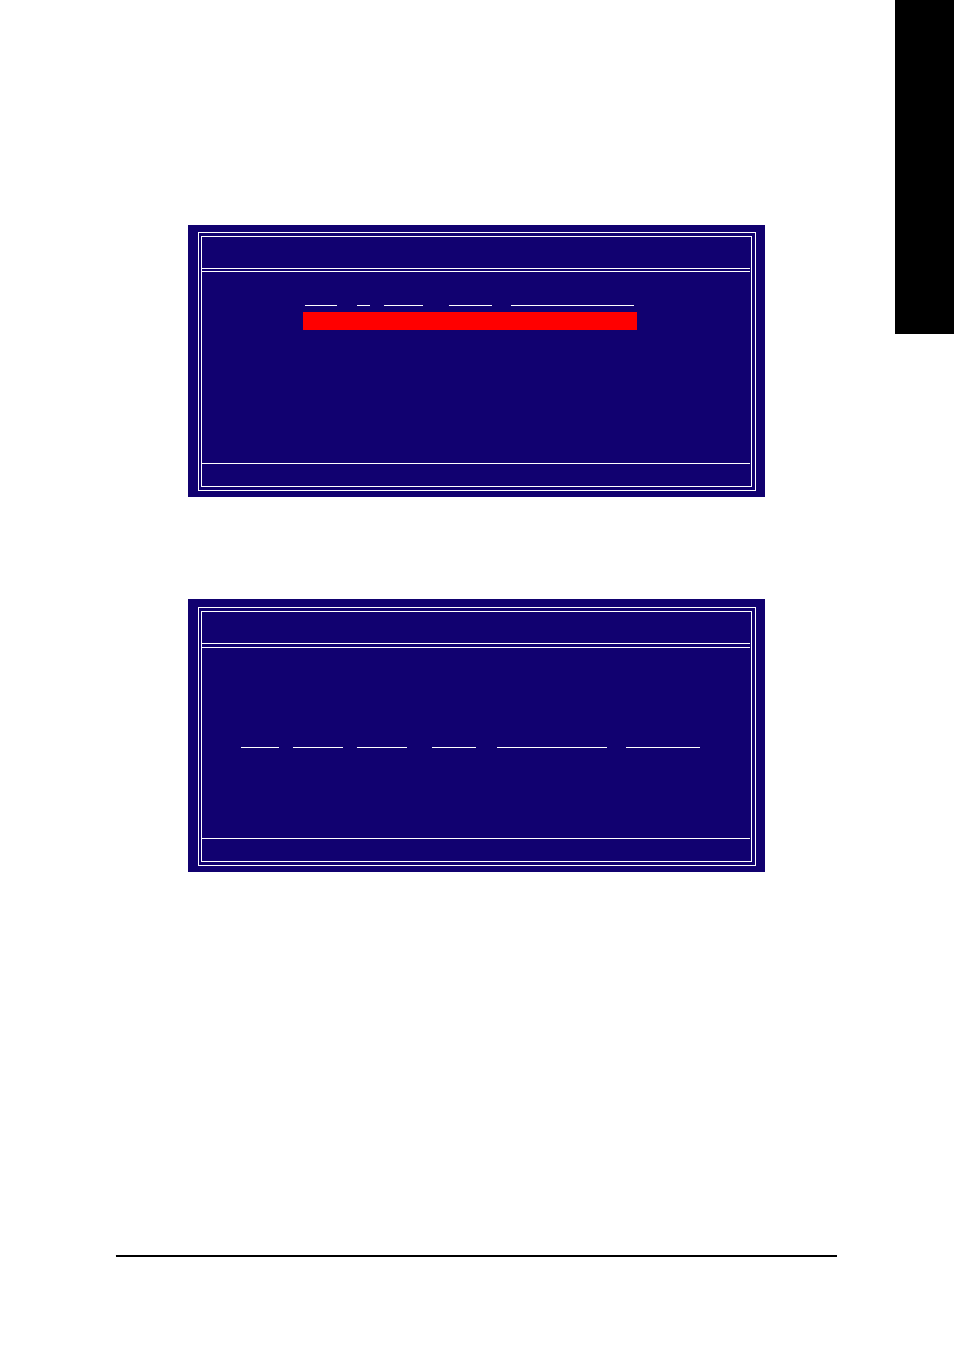
Press Y if you want to wipe out all the data from the RAID array, otherwise press N. You must choose
Yes if the drives were previously used as RAID drives. The Array List window appears, where you
can review the RAID arrays that you have set up.
You can select a disk array as boot device if you want to boot operating system from an array. Use the
arrow keys to select the array, then press B to specify the array as bootable.
N
N
N
N
NV
V
V
V
VDIA
DIA
DIA
DIA
DIA RAID
RAID
RAID
RAID
RAID Utility Feb 13 2004
Utility Feb 13 2004
Utility Feb 13 2004
Utility Feb 13 2004
Utility Feb 13 2004
- Array List -
- Array List -
- Array List -
- Array List -
- Array List -
[Ctrl-X] Exit [
[Ctrl-X] Exit [
[Ctrl-X] Exit [
[Ctrl-X] Exit [
[Ctrl-X] Exit [
KL
KL
KL
KL
KL ] Select [B] Set Boot [N] New Array [ENTER] Detail
] Select [B] Set Boot [N] New Array [ENTER] Detail
] Select [B] Set Boot [N] New Array [ENTER] Detail
] Select [B] Set Boot [N] New Array [ENTER] Detail
] Select [B] Set Boot [N] New Array [ENTER] Detail
Boot
Boot
Boot
Boot
Boot
Id
Id
Id
Id
Id Status
Status
Status
Status
Status
V
V
V
V
Vendor
endor
endor
endor
endor
Array Model Name
Array Model Name
Array Model Name
Array Model Name
Array Model Name
BBS
BBS
BBS
BBS
BBS
22222
Health
Health
Health
Health
Health
N
N
N
N
NVIDIA
VIDIA
VIDIA
VIDIA
VIDIA MIRROR 111.79G
MIRROR 111.79G
MIRROR 111.79G
MIRROR 111.79G
MIRROR 111.79G
Press Enter to view and verify details. The Array Detail screen appears.
The Array Detail screen shows various information about the array that you selected, such as Striping
Block used, RAID Mode, Striping Width, Disk Model Name, and disk capacity.
If you want to mark this disk as empty and wipe out all its contents, press C.
At the prompt, press Y to wipe out all the data, otherwise press N.
Press Enter again to go back to the previous screen and then press Ctrl + X to exit the RAID setup.
Now that the RAID setup has been configured from the RAID BIOS, the next step is to configure and load
drivers under Windows.
Array 2 :
Array 2 :
Array 2 :
Array 2 :
Array 2 : N
N
N
N
NVIDIA
VIDIA
VIDIA
VIDIA
VIDIA MIRROR 1
MIRROR 1
MIRROR 1
MIRROR 1
MIRROR 1111111.79G
1.79G
1.79G
1.79G
1.79G
- Array Detail -
- Array Detail -
- Array Detail -
- Array Detail -
- Array Detail -
[R] Rebuild [D] Delete [C] Clear Disk [ENTER] Return
[R] Rebuild [D] Delete [C] Clear Disk [ENTER] Return
[R] Rebuild [D] Delete [C] Clear Disk [ENTER] Return
[R] Rebuild [D] Delete [C] Clear Disk [ENTER] Return
[R] Rebuild [D] Delete [C] Clear Disk [ENTER] Return
Adapt
Adapt
Adapt
Adapt
Adapt
Cha
Cha
Cha
Cha
Channel
nnel
nnel
nnel
nnel
M/S
M/S
M/S
M/S
M/S
Index
Index
Index
Index
Index
Disk Model Name
Disk Model Name
Disk Model Name
Disk Model Name
Disk Model Name
Capacity
Capacity
Capacity
Capacity
Capacity
11111
00000
M a s t e r
M a s t e r
M a s t e r
M a s t e r
M a s t e r
00000
ST3120026AS
ST3120026AS
ST3120026AS
ST3120026AS
ST3120026AS
111.79GB
111.79GB
111.79GB
111.79GB
111.79GB
11111
11111
M a s t e r
M a s t e r
M a s t e r
M a s t e r
M a s t e r
11111
ST3120026AS
ST3120026AS
ST3120026AS
ST3120026AS
ST3120026AS
111.79GB
111.79GB
111.79GB
111.79GB
111.79GB
RAID Mode: Mirroring
RAID Mode: Mirroring
RAID Mode: Mirroring
RAID Mode: Mirroring
RAID Mode: Mirroring
Striping Width : 1
Striping Width : 1
Striping Width : 1
Striping Width : 1
Striping Width : 1
Striping Block 32K
Striping Block 32K
Striping Block 32K
Striping Block 32K
Striping Block 32K