Global Machinery Company SPJ2HM User Manual
Page 10
10
Position 1. LOW – Minimal pendulum action for cutting
most metal.
Position 2. MEDIUM – Medium pendulum action for
cutting plastics, and hardwoods.
Position 3. FAST – Maximum pendulum action for the
highest orbital action and faster cutting in plywood and
soft woods.
Scrolling control
Note.
The scrolling feature allows the blade to be rotated
360° for maximum blade control when cutting curves and
intricate work.
Ensure you use a blade
specifically intended for curve
cutting (eg. scroll cutting blade).
Do not place excess force when
turning the blade as it may break.
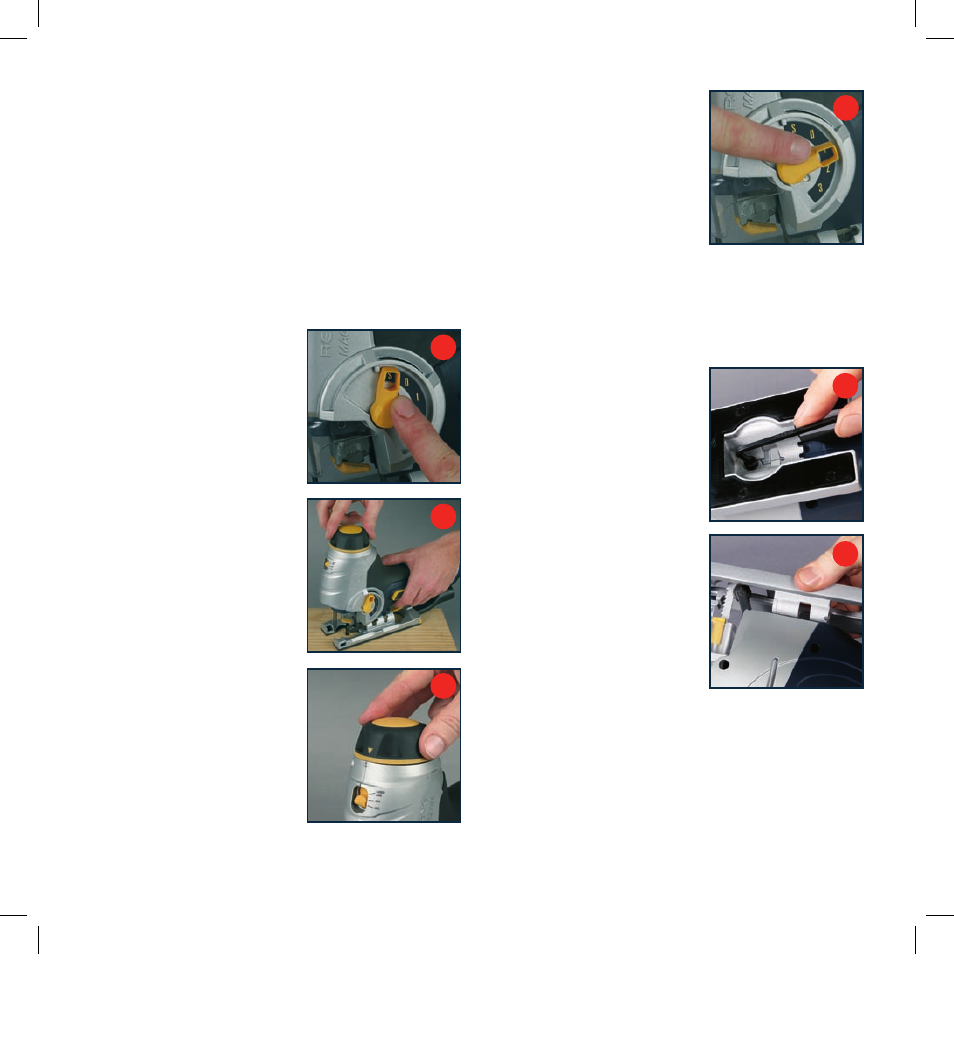
Set the pendulum lever (5) to
Position “S” (fig M).
Note.
The scrolling feature
will not operate if the lever is
positioned at 0,1,2 or 3.
During operation place one hand
firmly on the hand grip, place
your other hand on the scrolling
control knob (4) and rotate it
- using it to guide the blade along
your cutting line (fig N).
To disengage the scroll function,
to enable standard or pendulum
action cutting, rotate the scrolling
control knob (4) back to the
forward position (with the arrows
on the scrolling control and
jigsaw housing aligned) (fig O).
The pendulum lever (5) can
now be moved to the required
position for straight, standard or
pendulum cutting (fig P).
Angle adjustment
Note.
The jigsaw shoe can
be angled to enable bevel or
chamfer cuts. There are preset
bevel settings at 0° and 45° for
quick adjustment.
Always ensure the tool is switched off and the plug
is removed before carrying out any adjustments or
maintenance procedures.
With the jigsaw upside down
on a solid surface loosen the
hex screw located on the
underside of the tool using hex
key (26) (fig Q).
Move the shoe plate slightly
back. It can now be tilted to
the required angle (between
0° and 45°) as indicated on
angle scale (16) (fig R).
With the shoe plate inclined at
45° left or right, or at 0°, the
plate can be locked at one of
these angles by sliding the
shoe plate forwards so that the
indentation in the bridge of the
sole plate fits over the bevel
locating pin (19).
To secure the sole plate at a particular angle, retighten the
hex screw.
M
N
O
P
Q
R