Step 4, mount template, Step 5, install support frame, Installation instructions – GE MONOGRAM ZV1050 User Manual
Page 11: Step 4 mount template, Step 5 install support frame
11
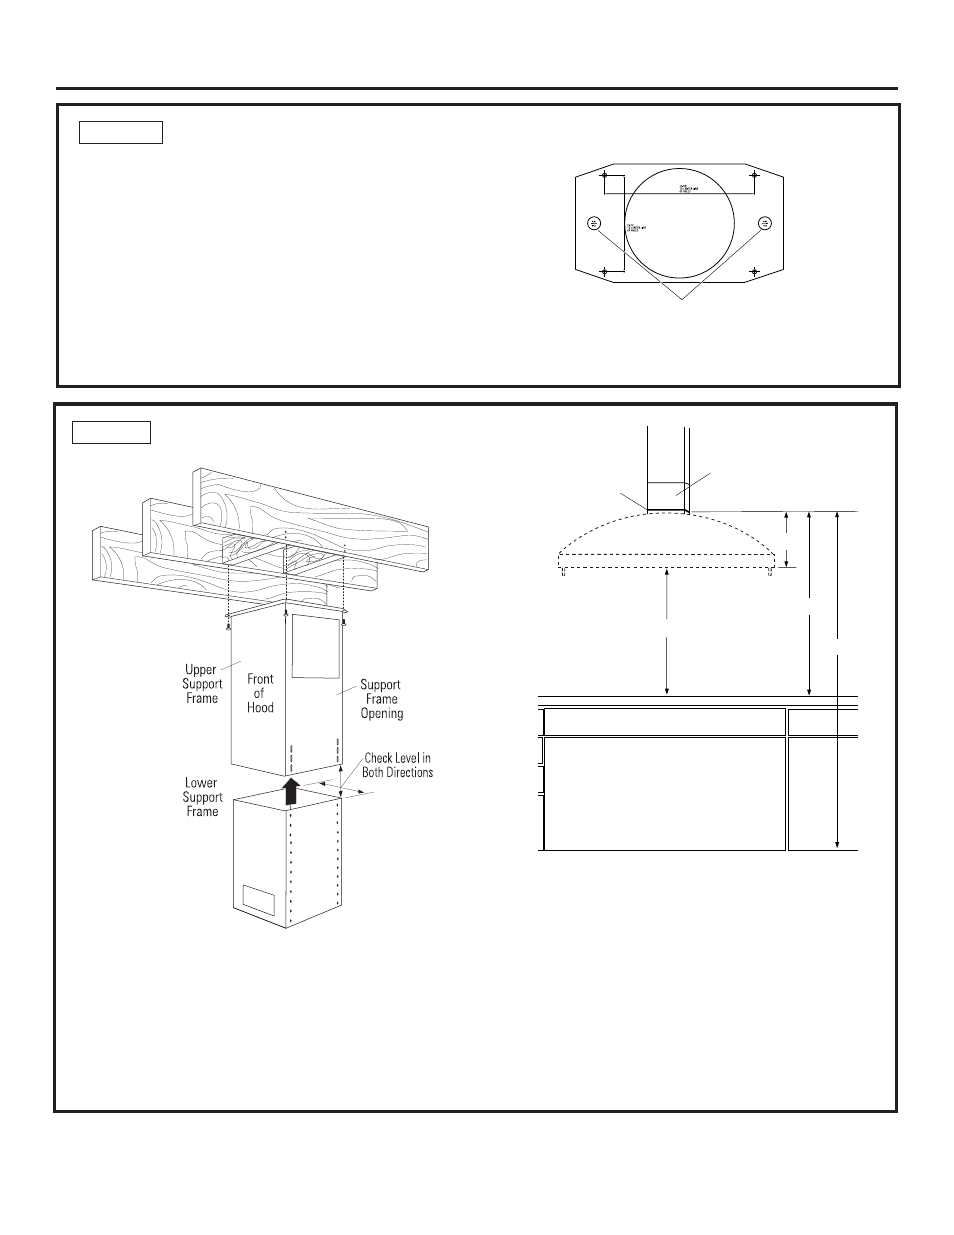
STEP 4 MOUNT TEMPLATE
• Align the template with the marks on the ceiling and
tape in place.
– Be sure the template is oriented correctly, with the
front of the hood.
• Use a plumb bob to be sure the mounting holes will
provide parallel alignment with the countertop below.
• Center-punch all hole locations.
• Drill pilot holes in the 4 screw locations. Use a 5/32"
bit and drill approximately 1-1/2" deep.
• Cut the 8-1/4" duct opening and approximately 1" wire
access hole.
Installation Instructions
STEP 5 INSTALL SUPPORT FRAME
Install upper support frame
• Secure the upper support frame to the ceiling joists
and cross-framing with the 4 lag screws provided.
For maximum rigidity and strength, the screws must
be driven into the center of the joists and/or cross-
framing.
Check to be sure the support frame is level, vertically
and horizontally.
Install lower support frame
• Insert lower support frame (or accessory support
frame, ZX1059SFSS or ZX10510SFSS) into the upper
support frame and loosely secure with 8 screws and
washers (4 on the front and 4 on the back sides).
• Adjust the lower support frame up or down to the
desired height above the countertop. Tighten screws.
IMPORTANT: Again, check to be sure the support
is level in both directions. There is no way to level
the hood after the hood is secured to the frame.
538Dia19
30" Recommended
10"
40"
Countertop
Hood
Mounting
Flange
Lower Support
76"
538Dia31
Wire Access Holes