Model x-34 owner’s manual – Fostex X-34 User Manual
Page 14
14
Model X-34 Owner’s Manual
Basic Recording - 2 (Recording with the rear panel MIC IN jack)
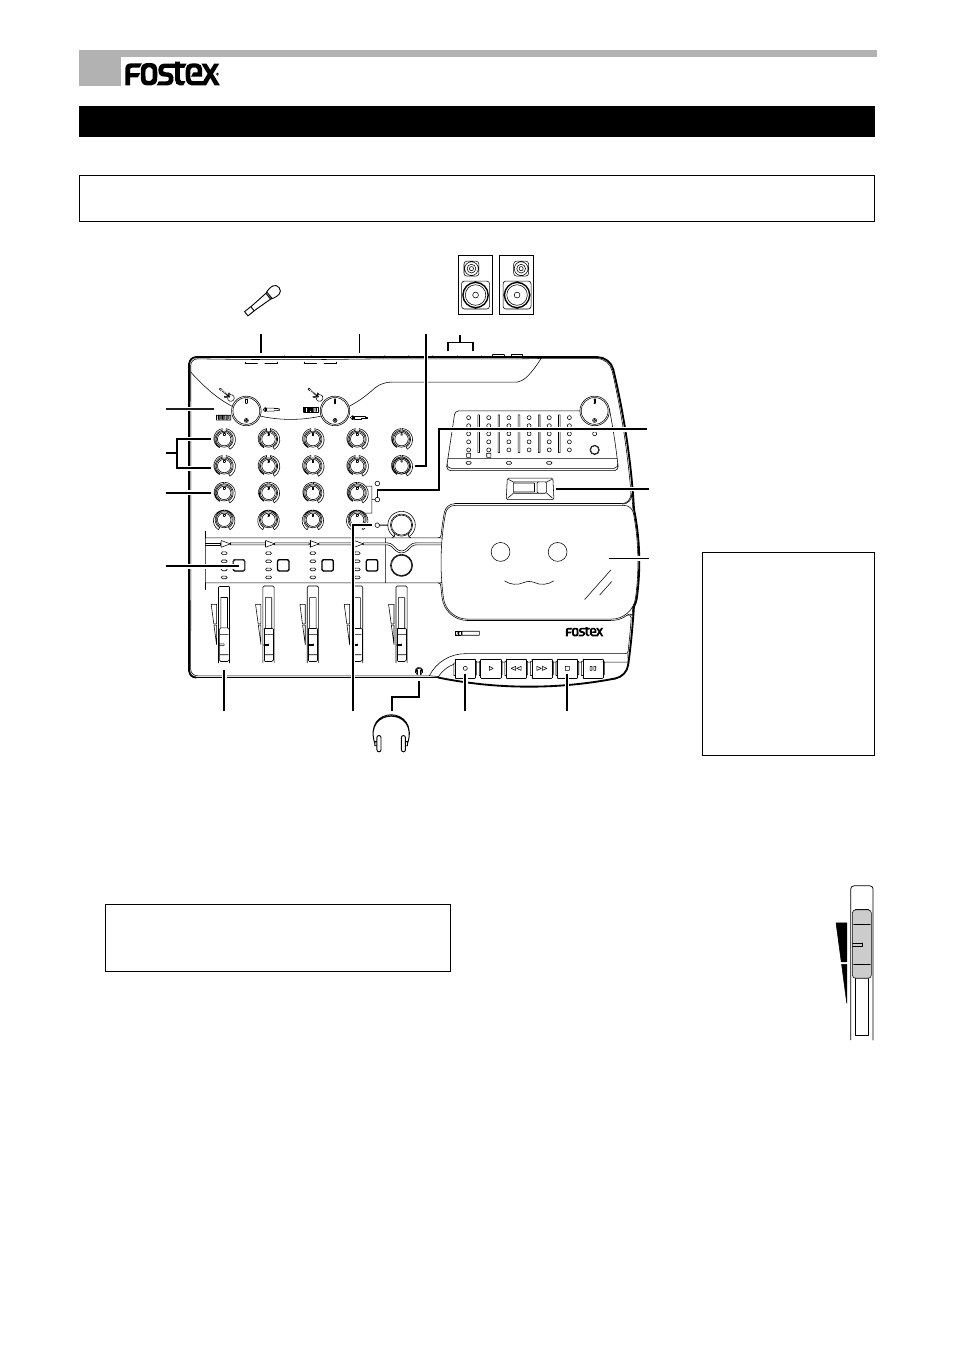
This section describes how to record a vocal on track 1 by plugging a microphone into the rear panel MIC IN jack 1/3.
* Before proceeding to the next step, remember to reset the X-34 to its “initial settings.” (See page 9.)
Also, make sure that the Track Down indicator is turned off.
0
0
0
LINE OUT
R
L
MONITOR OUT
R
L
AUX RTN
R
L/MONO
AUX SEND
2/4
1/3
MIC IN
TRIM 2/4
TRIM 1/3
RESET
–
+
WIDE PITCH
4
3
2
1
R
L
FIX
NORMAL
POWER
REC
NR
-
+
10
5
0
3
6
-
10
5
0
3
+
6
PAUSE
STOP
FF
REC
PLAY
REW
X-34
multitracker
DOLBY B NR
10
0
10
0
MONITOR
AUX RTN
MON MIX
AUX
+
-
0
+
-
0
R
L
10
0
+
-
0
+
-
0
R
L
10
0
+
-
0
+
-
0
R
L
10
0
+
-
0
+
-
0
R
L
10
0
AUX
EQ HI
EQ LO
MON MIX/
PAN
1
2
3
4
1
2
3
4
1
2
3
4
REC TRK
REC TRK
REC TRK
4
3
2
REC TRK
1
2
3
4
1
LINE IN/INSERT
1
2
3
4
MASTER
Down
Track
Bounce
Auto
11
7
12
2
10
9
6
5
6
4
8
3
1
9
Monitor speakers
Headphones
The MON MIX indicator lights up.
1. Plug a mic into the rear panel MIC IN jack 1/3
(1/4" or XLR).
2. Make sure that the Track Down indicator is
turned off.
When Track Down is “ON” , the REC TRK switches are
disabled.
3. Switch ON the Dolby B noise reduction switch.
4. If this is a new song, load a cassette in the
transport and advance the tape to recording
start position as previously described.
5. Reset the counter to [000] by pressing the
RESET button.
6. Place track 1 in REC READY mode by pressing
REC TRK switch 1.
Record track indicator 1 lights up in red.
The signal from MIC IN jack 1/3 is also routed to
channel 3.
If you also select track 3 by pressing the REC TRK
switch on channel 3, the same signal can be recorded
to tracks 1 and 3.
7. Raise the channel 1 input/playback level
fader to the position shown right.
8. Adjust the recording level with the Trim
1 / 3 k n o b w h i l e t a l k i n g i n t o t h e
microphone so that segments 0 - 3 on
the level meter light up.
9. The headphone and monitor volume can
be adjusted using the MONITOR knob
and the channel 1 MON MIX/AUX knob.
10. Use the EQ knobs on channel 1 to adjust the
tone.
11. After you adjust the recording level and tone,
start recording by pressing the REC button.
(The PLAY button also depresses.)
1
If the Auto Bounce button
is switched on and off
while any one REC TRK
s w i t c h i s s e t t o R E C
READY state, the selected
REC TRK switch will be
canceled. In this case,
reselect the recording
track using with the REC
TRK switch.