Model x-34 owner’s manual – Fostex X-34 User Manual
Page 12
12
Model X-34 Owner’s Manual
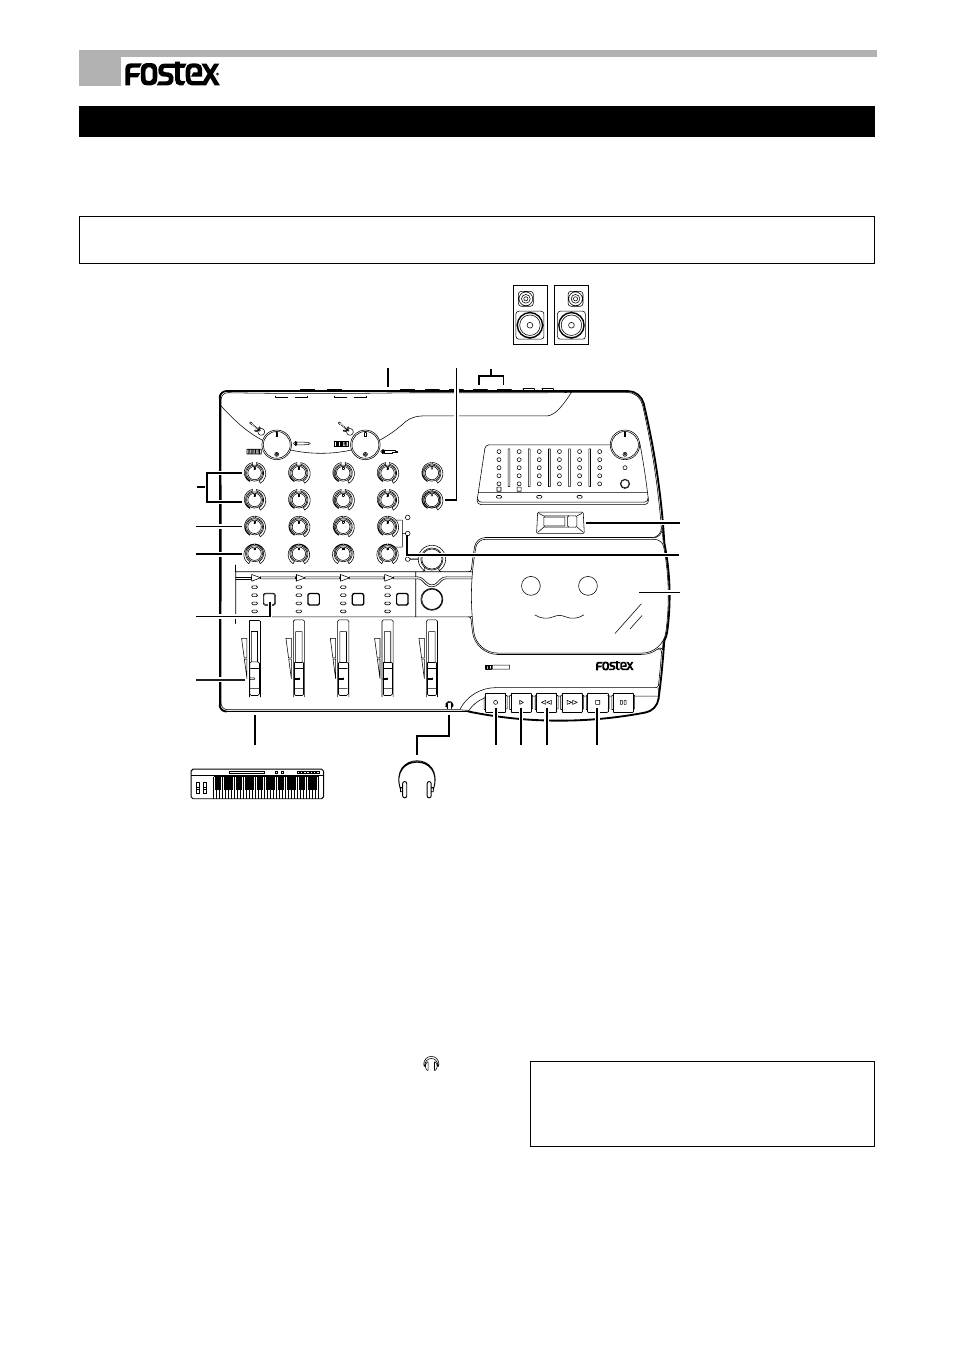
Basic Recording - 1 (Recording from the front panel LINE IN/INSERT jack)
First, let’s connect your musical instrument and try recording on a specific track.
In the following example, a synthesizer will be recorded on track 1. This and other explanations assume an AC adapter
is connected to the X-34 and the X-34 is powered on.
* Before proceeding to the next step, set the X-34 to its “initial settings” as explained on page 9.
Also, make sure that the Track Down indicator is turned off.
0
0
0
LINE OUT
R
L
MONITOR OUT
R
L
AUX RTN
R
L/MONO
AUX SEND
2/4
1/3
MIC IN
TRIM 2/4
TRIM 1/3
RESET
–
+
WIDE PITCH
4
3
2
1
R
L
FIX
NORMAL
POWER
REC
NR
-
+
10
5
0
3
6
-
10
5
0
3
+
6
PAUSE
STOP
FF
REC
PLAY
REW
X-34
multitracker
DOLBY B NR
10
0
10
0
MONITOR
AUX RTN
MON MIX
AUX
+
-
0
+
-
0
R
L
10
0
+
-
0
+
-
0
R
L
10
0
+
-
0
+
-
0
R
L
10
0
+
-
0
+
-
0
R
L
10
0
AUX
EQ HI
EQ LO
MON MIX/
PAN
1
2
3
4
1
2
3
4
1
2
3
4
REC TRK
REC TRK
REC TRK
4
3
2
REC TRK
1
2
3
4
1
LINE IN/INSERT
1
2
3
4
MASTER
Down
Track
Bounce
Auto
12
2,8
5 15
13
3
10
9
11
7,14
8
6
1
4
9
3
Monitor speakers
Headphones
Keyboard
The MON MIX
indicator lights up.
7
1. Lift the cassette tray lid and load the cassette
into the cassette tray.
If a previously-recorded tape is being used, check
that the rear side erasure prevention tab has not been
broken off.
If it is, cover the hole with a piece of scotchtape.
2. Use an instrument cable to connect the
synthesizer output to the front panel LINE IN/
INSERT jack 1.
3. Plug the headphones into the PHONES (
)
jack on the front panel, or connect the monitor
speaker system to the MONITOR OUT jack on
the rear panel.
4
Switch ON the Dolby B noise reduction switch.
5. Press the PLAY button to advance the tape a
few seconds.
This will wind past the leader at the head of the
recording tape. If a used tape is not completely
rewound, press the REW button to wind to the
beginning and repeat this step.
6. After you wind past the leader tape, press the
RESET button to set the counter to [000].
7. Press the REC TRK switch 1 once to place track
1 in REC READY mode.
The record track indicator 1 will light up in red, and
the MON MIX indicator will light up.
You can, of course, record the sound source connected
to LINE IN/INSERT jack 1 to any track other than track 1
using REC TRK switch 1 to select the desired track.