Reverb level setting, Reverb time setting, Pre-delay time setting – Fostex VM04 User Manual
Page 21: High dump setting, Press the effect parameter key, Turn the data encoder clockwise, Caution, Press the effect parameter key once again, Vm04 owner’s manual
21
VM04 Owner’s manual
0
6
12
24
OL
1
2
3
4
L
R
1
2
3
4
MIN
L
R
MAX
VIEW
48
EQ
PAN
LO
HI
EFF
SCENE NO.
LEVEL
CH
MASTER
0
6
12
24
OL
1
2
3
4
L
R
1
2
3
4
MIN
L
R
MAX
VIEW
48
EQ
PAN
LO
HI
EFF
SCENE NO.
LEVEL
CH
MASTER
0
6
12
24
OL
1
2
3
4
L
R
1
2
3
4
MIN
L
R
MAX
VIEW
48
EQ
PAN
LO
HI
EFF
SCENE NO.
LEVEL
CH
MASTER
0
6
12
24
OL
1
2
3
4
L
R
1
2
3
4
MIN
L
R
MAX
VIEW
48
EQ
PAN
LO
HI
EFF
SCENE NO.
LEVEL
CH
MASTER
To show you how the EFFECT PARAMETER KEY functions we will use “Hall Rev 1” as an example.
The “Hall Rev 1” has the following five parameter settings:
1. Reverb Level
2. Reverb Time
3. Pre-Delay Time
4. High Dump
5. Early Reflection Balance
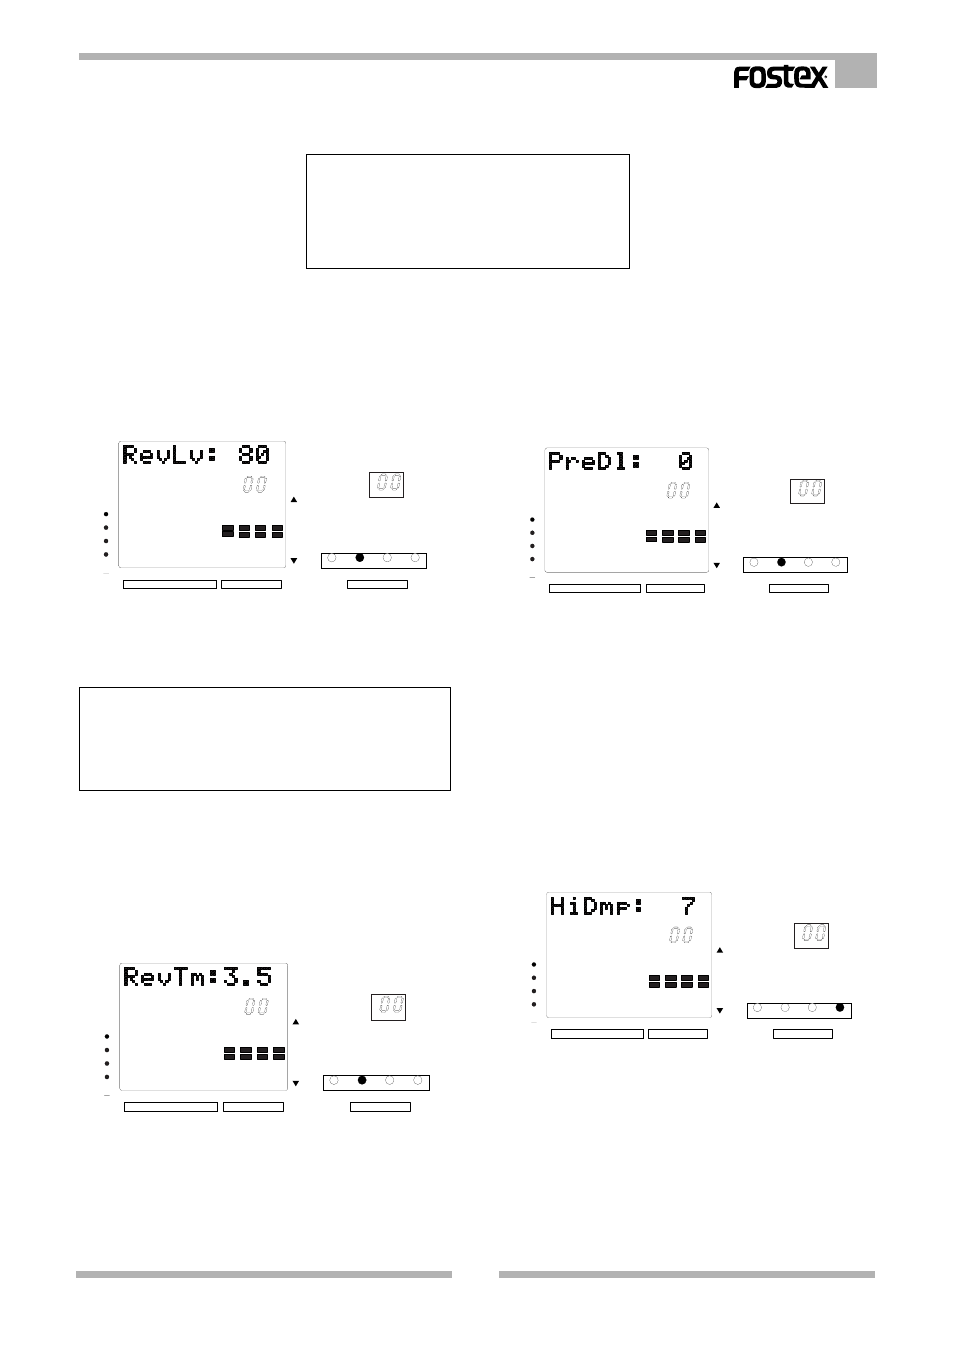
1. Reverb Level setting
Press the EFFECT PARAMETER key.
The key will light up and the character section will
read “RevLv: 80”. This means you can now adjust
the Reverb Level. Its current setting will be 80 which
is the default setting of the “Hall Rev 1”.
Turn the DATA ENCODER clockwise.
The sound effect will become louder on the actual
audio bigger on the display. The adjustment range
is from 00 to 99.
Caution
The EFFECT SEND Level adjustment discussed in Item 6.4.
adjusts the signal level being sent from the INPUT Channel
to the Effect. The level set in this EFFECT PARAMETER is
like the Input Level adjustment for an independent effect unit.
2. Reverb Time setting
Press the EFFECT PARAMETER key once again.
The character section will read “RevTm:3.5”. This
means you can now adjust the Reverb Time. Its
current setting will be 3.5 second which is the
default setting of the “Hall Rev 1”.
Turn the DATA ENCODER clockwise.
The reverb time value will increase on the display
and also the reverb sound on actual audio will
become longer. The adjustment range is from 0.1
Sec to 9.9 Sec.
3. Pre-Delay Time setting
Press the EFFECT PARAMETER key once again.
The character section will read “PreDl:0” . This
means you can now adjust the Pre Delay Time. Its
current setting will be 0 mSec. which is the default
setting of the “Hall Rev 1”.
Turn the DATA ENCODER clockwise.
The Pre Delay time value will increase on the
display and the time between the source sound
and Reverb sound will become longer.
The adjustment range is from 0 mSec to 150 mSec.
4. High Dump setting
Press the EFFECT PARAMETER key once again.
The character section will read “HiDmp:7” . This
means you can now adjust the High Dump. Its
current setting is 7 which is the default setting of
the “Hall Rev 1”.
Turn the DATA ENCODER clockwise.
The High Dump value will increase on the display
and so will the high frequency region of the reverb
sound. The adjustment range is from 0 to 10. When
the High Dump setting is 10, the high and low
frequency contents of the reverb will decay at the
same time.