Assembly – Fisher-Price M3864 User Manual
Page 14
14
ASSEMBLY
M3864pr-0920
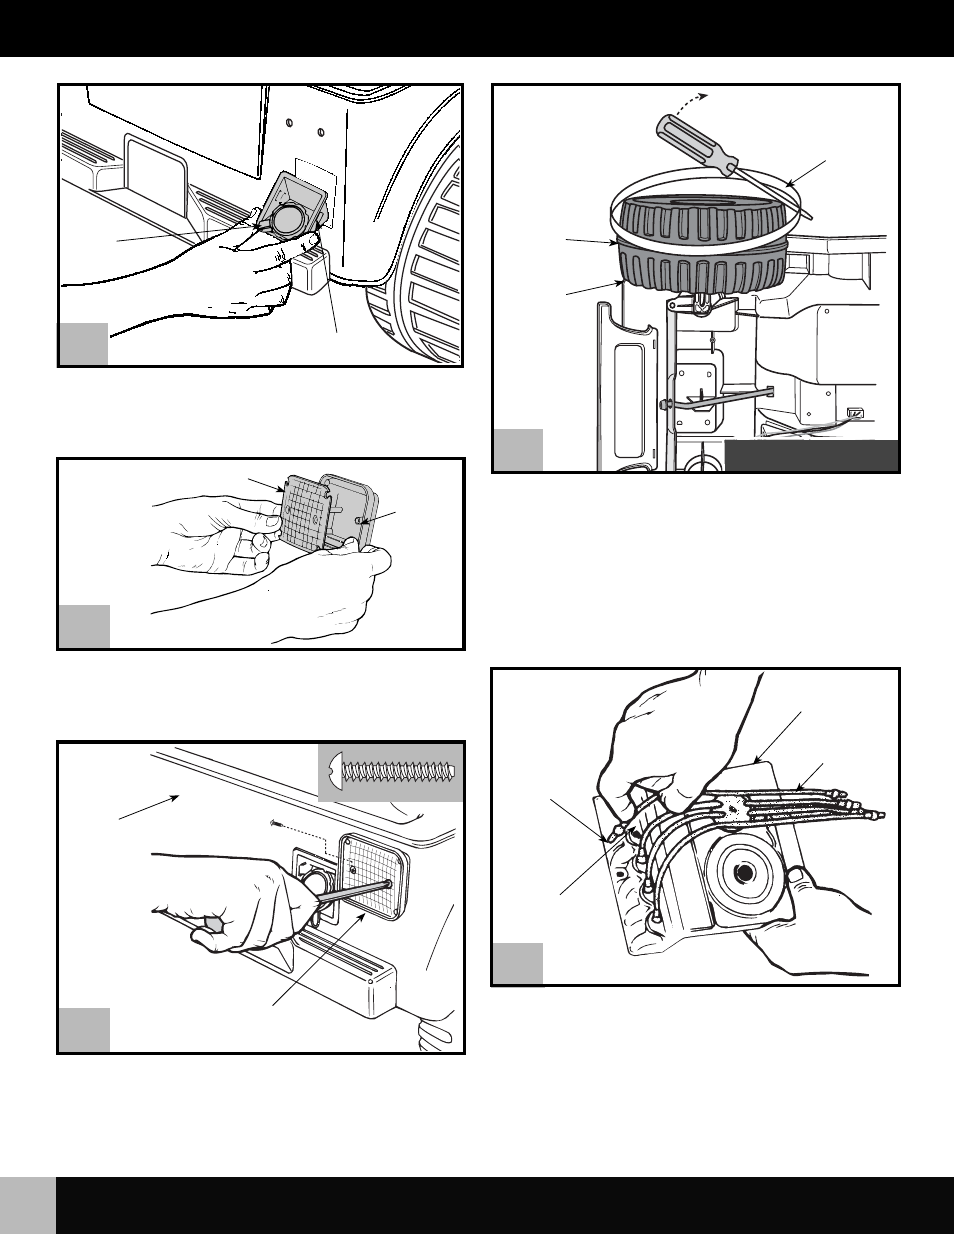
• Face the back of the vehicle.
• With the cap tether pointing down, insert and “snap” the cap assembly
into the square opening in the rear of the vehicle.
21
22
23
24
• Using safety scissors, separate the taillight lenses and taillight housings
from the plastic connectors. Dispose of the plastic connectors properly.
• Fit a taillight lens in a taillight housing.
• Face the back of the vehicle.
• Align the holes in the taillight with the holes in the vehicle body.
• Insert two #8 x 1" screws into the holes in the taillight and tighten.
• Repeat steps 22 and 23 to assemble the other taillight lens and taillight
housing to the vehicle.
Rear of
Vehicle Body
• Turn the vehicle on its side.
• Fit a traction band around a wheel.
• Slide a slotted screwdriver under the traction band to push the traction
band onto the ridge in the center of the wheel.
Hint: If the traction band is difficult to fit around the wheel, you may
want to soak it in warm water to soften it slightly.
• Repeat this procedure to assemble a traction band to each wheel.
• Turn the vehicle upright.
Traction
Band
Wheel
Ridge
Taillight
BOTTOM VIEW
Cap Assembly
Tether
• “Snap” the center of the spark plug wire set onto the battery retainer
(engine cover).
• Fit each of the spark plug wire ends into the holes on the sides of the
battery retainer (engine cover).
IMPORTANT! You must install your Power Wheels
®
battery in your
vehicle before assembling the battery retainer (engine cover) under
the hood. Please refer to “Battery Installation” on page 16 for
detailed instructions.
25
Taillight Lens
Taillight
Housing
Spark Plug
Wire Set
Spark Plug
Wire End
Hole
Battery Retainer
(Engine Cover)