Furuno FAX-30 User Manual
Page 41
2. FAX OPERATION: NAVNET
2-19
5. Rotate the [ENTER] knob to choose STATION and press the EDIT soft key. If
the ZONE chosen at step 4 is “1 NORTHWEST PACIFIC,” for example, the
STATION options are as below.
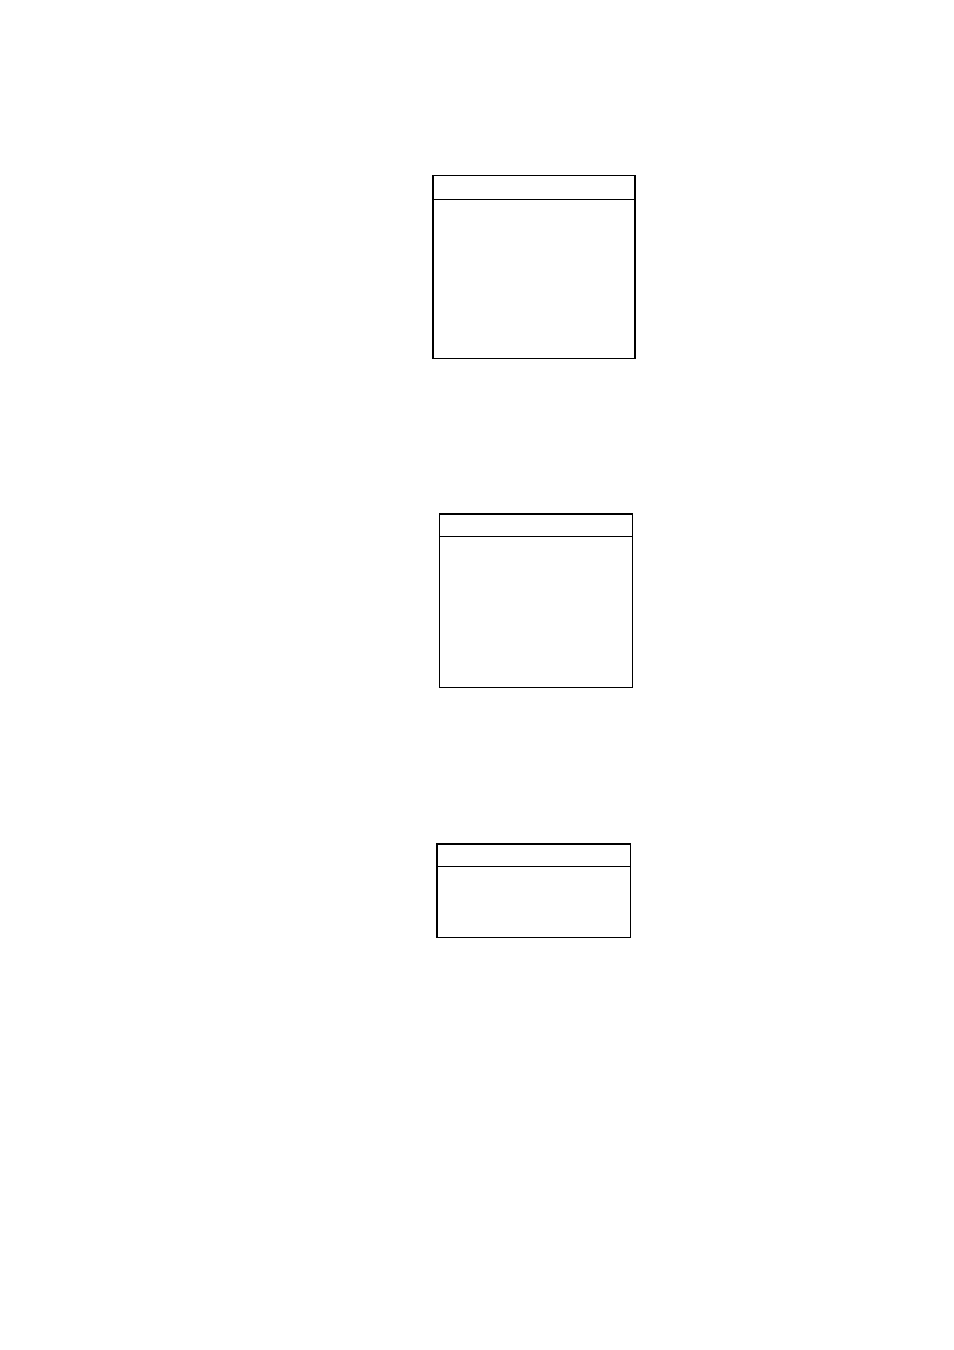
STATION
▲
¡
¡
¡
¡
¡
¡
¡
▼
¤
0
JMH /TOKYO 1
1
JMJ /TOKYO 2
2
JJC /KYODO 9MG
3
JFA /CHUO GYOGYOU
4
3SD /BEIJING
5
BAF /BEIJING
6
BDF /SHANGHAI
7
BMF /TAIPEI
Station options (Example: stations of northwest pacific)
6. Rotate the [ENTER] knob to choose a station and press the ENTER soft key.
7. Rotate the [ENTER] knob to choose CHANNEL and press the EDIT soft key.
If the station chosen at step 8 is “0 JMH/TOKYO No.1,” for example, the
CHANNEL options are as below.
CHANNEL
▲
¤
¡
¡
¡
¡
¡
¡
¡
▼
AUTO
0
03622.5 kHz
1
04902.0 kHz
2
07305.0 kHz
3
09970.0 kHz
4
13597.0 kHz
5
18220.0 kHz
6
23522.9 kHz
Channel options (Example: JMH/Tokyo)
8. Rotate the [ENTER] knob to choose a channel and press the ENTER soft
key.
9. Rotate the [ENTER] knob to choose REVERSE IMAGE and press the EDIT
soft key.
REVERSE IMAGE
▲
¡
▼
¤
NORMAL
REVERSE
Reverse image options
10. The normal facsimile image format has black text on a white background.
Some stations, however, print white characters on a black background. This
information is programmed into the memory thus you need not designate
image format. However, if you are entering frequency data of a newly
established station whose image format is reverse of the normal image,
rotate the [ENTER] knob to choose REVERSE. Press the ENTER soft key
after making your selection.