Furuno FR-2155 User Manual
Page 25
2-3
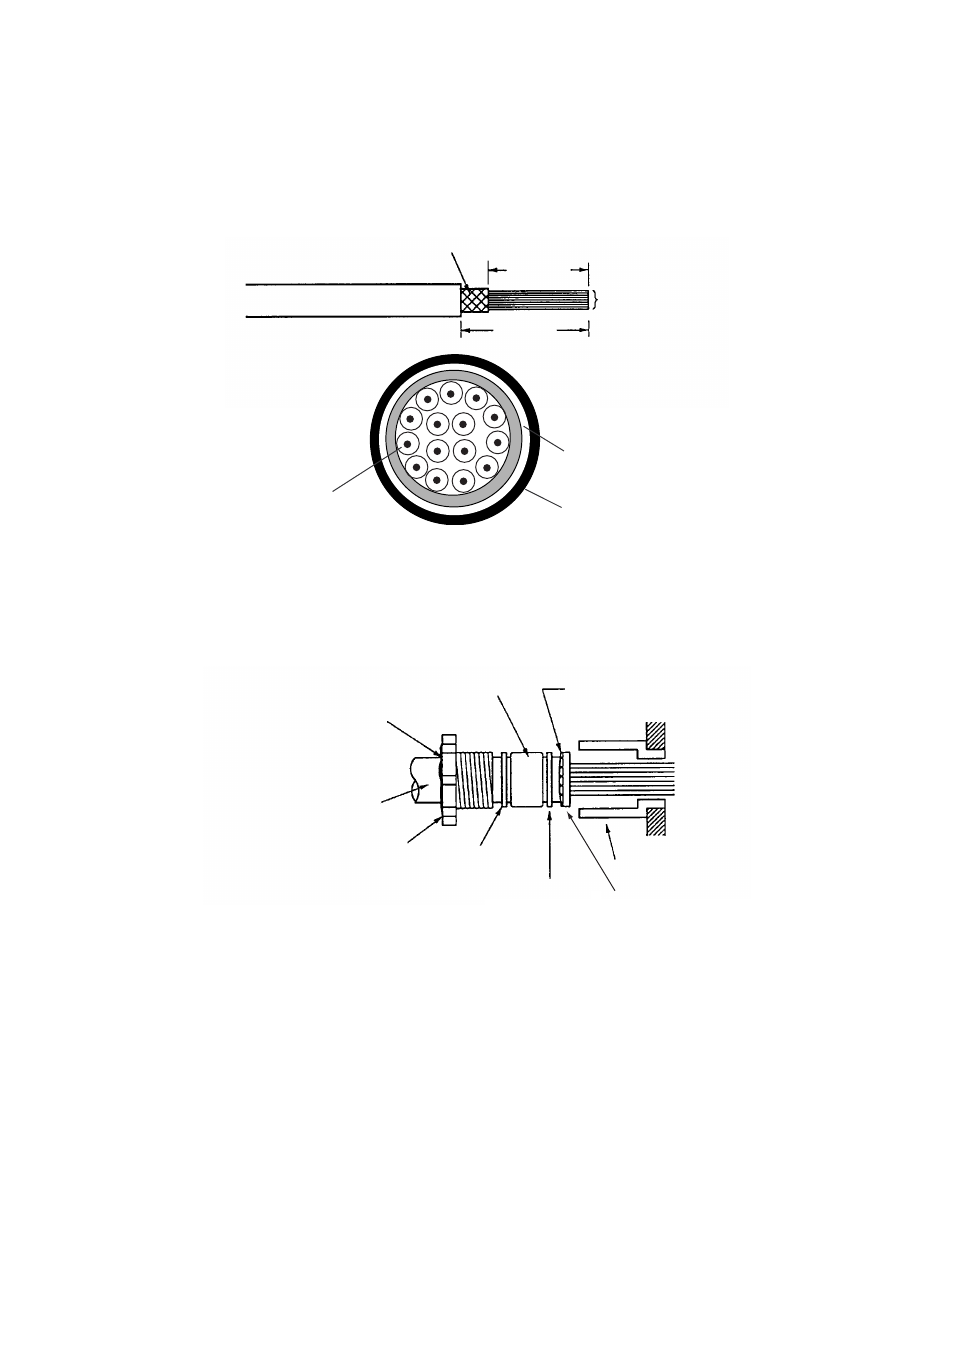
Fabricating signal cable 250V-MPYCY-16 (JIS cable)
1. Unfasten the clamping gland from the upper cable gland, and remove the
gasket and flat washers.
2. Shorten the cable as appropriate. Remove the vinyl sheath by 600 mm. Re-
move the armor by 590 mm.
Armor
790 mm
800 mm
Conductors
,,,,,,,,,,,,,
,,,,,,,,,,,,,
,,,,,,,,,,,,,
,,,,,,,,,,,,,
,,,,,,,,,,,,,
,,,,,,,,,,,,,
,,,,,,,,,,,,,
,,,,,,,,,,,,,
,,,,,,,,,,,,,
,,,,,,,,,,,,,
,,,,,,,,,,,,,
,,,,,,,,,,,,,
,,,,,,,,,,,,,
Armor
Vinyl sheath
Core
φ
= 1.25 mm
2
Figure 2-5 Fabrication of signal cable 250V-MPYCY-16
3. Slide the clamping gland, washers and gasket on the power cable. Fold back
the armor by 5 mm, then put it between washer and cable gland body as
below.
Armor (folded back)
Gasket
Seal with putty
after tightening.
Vinyl sheath
Clamping gland
Flat
washer
Cable gland
Flat
washer
Flat
washer
Figure 2-6 Passing clamping gland, washers and gasket on the signal cable
4. Determine the length of the cores considering their location on STB-2 and
STB-3. Trim conductors as necessary.
5. Ground the armor by inserting it through the two flat washers near the cable
gland.
6. Remove the sheath of each core by 6 mm. Fix crimp-on lugs (FV1.25-4, blue,
ø4) to each conductor. Make sure each connection is secure both electrically
and mechanically.