Assembly, How to install the seat, How to assemble the steering wheel – Hayter Mowers Heritage Tractor Code143P 30-Dec User Manual
Page 14
ASSEMBLY
14
F−98857
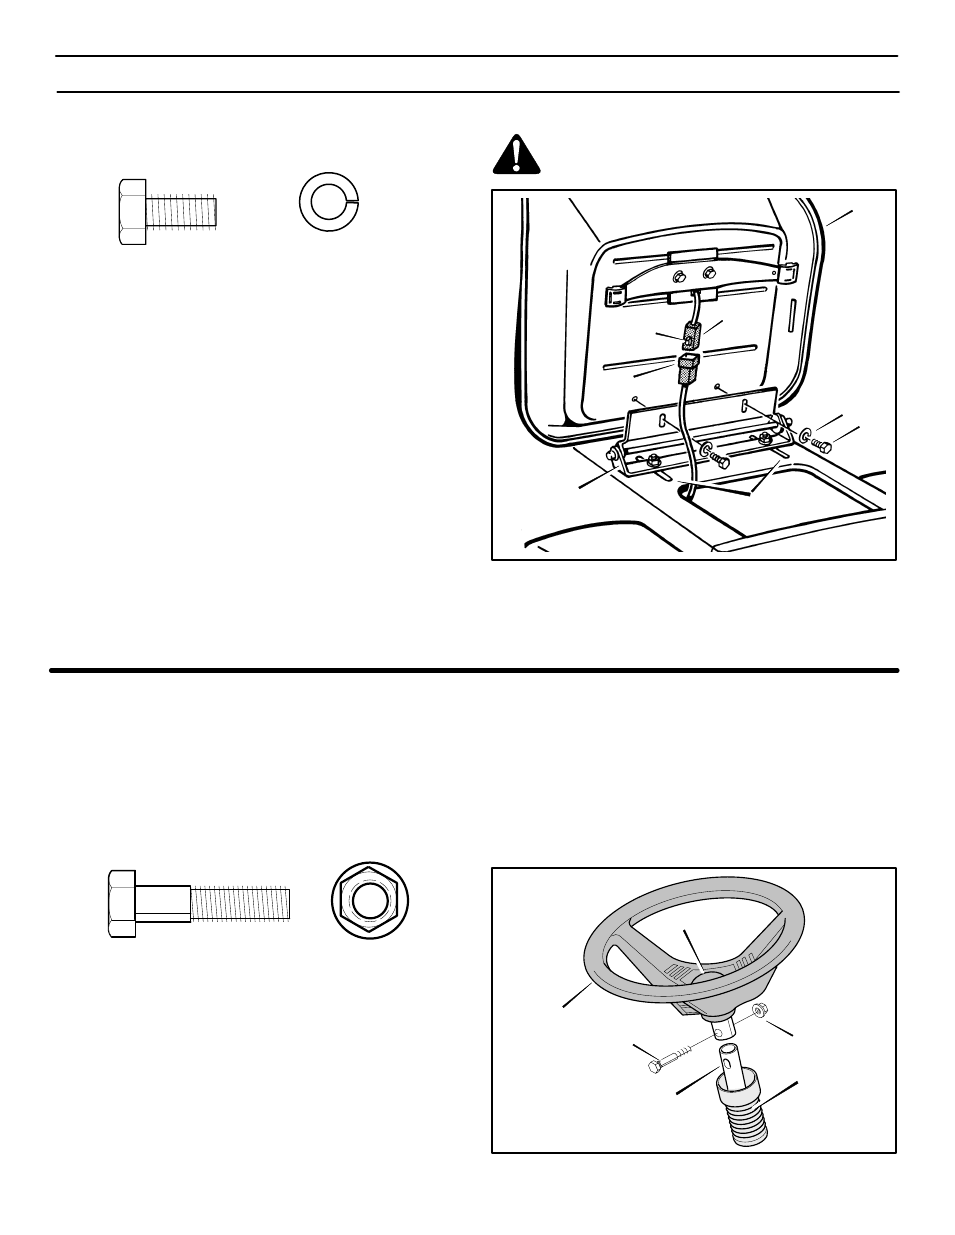
HOW TO INSTALL THE SEAT
Use the fasteners shown below to install the seat. The fasteners are
shown at full size.
(A)
1x45
(B)
18x16
1. Carefully remove the protective sleeve and the plastic bag from
the seat. Do not damage the wire attached to the bottom of the
seat.
2. Align the holes in the seat hinge to the holes in the seat
(Figure 7). Fasten the seat to the seat hinge with the fasteners
as shown. Tighten the fasteners.
3. Check the operating position of the seat. If the seat needs to
be adjusted, loosen the hex nuts on the seat hinge. Slide the
seat forward or backward along the seat adjusting holes as
shown. To keep the seat straight, align the rear edge of the seat
hinge with the marks on the top of the console. Tighten the hex
nuts.
4. Fasten the connector to the wire harness. Make sure the tab
on the connector locks into the wire harness.
WARNING: For correct and safe operation of the unit,
fasten the connector to the wire harness. If the
connector is not attached, the engine will not start.
Seat
Seat Hinge
Seat Adjusting
Holes
Wire Harness
B
A
Figure 7
Tab
Connector
HOW TO ASSEMBLE THE STEERING WHEEL
Use the fasteners shown below to install the steering wheel. The
fasteners are shown at full size.
(A)
1x66
ОО
ОО
(B)
15x118
1. Make sure the front wheels point forward.
2. Some models have an optional bellows. Slide the bellows
over the steering post. Make sure the collar of the bellows is
on top (Figure 8).
3. Attach the steering wheel to the steering post with the fasten-
ers. Tighten the fasteners.
4. Some models have an optional decal in the parts bag. Attach
the decal to the center of the steering wheel as shown.
A
B
Steering Wheel
Figure 8
Steering Post
Bellows
Decal (Optional)
(Optional)