Assembly, How to install the front wheels, How to assemble the lift lever – Hayter Mowers Heritage Tractor Code143P 30-Dec User Manual
Page 12
ASSEMBLY
12
F−98857
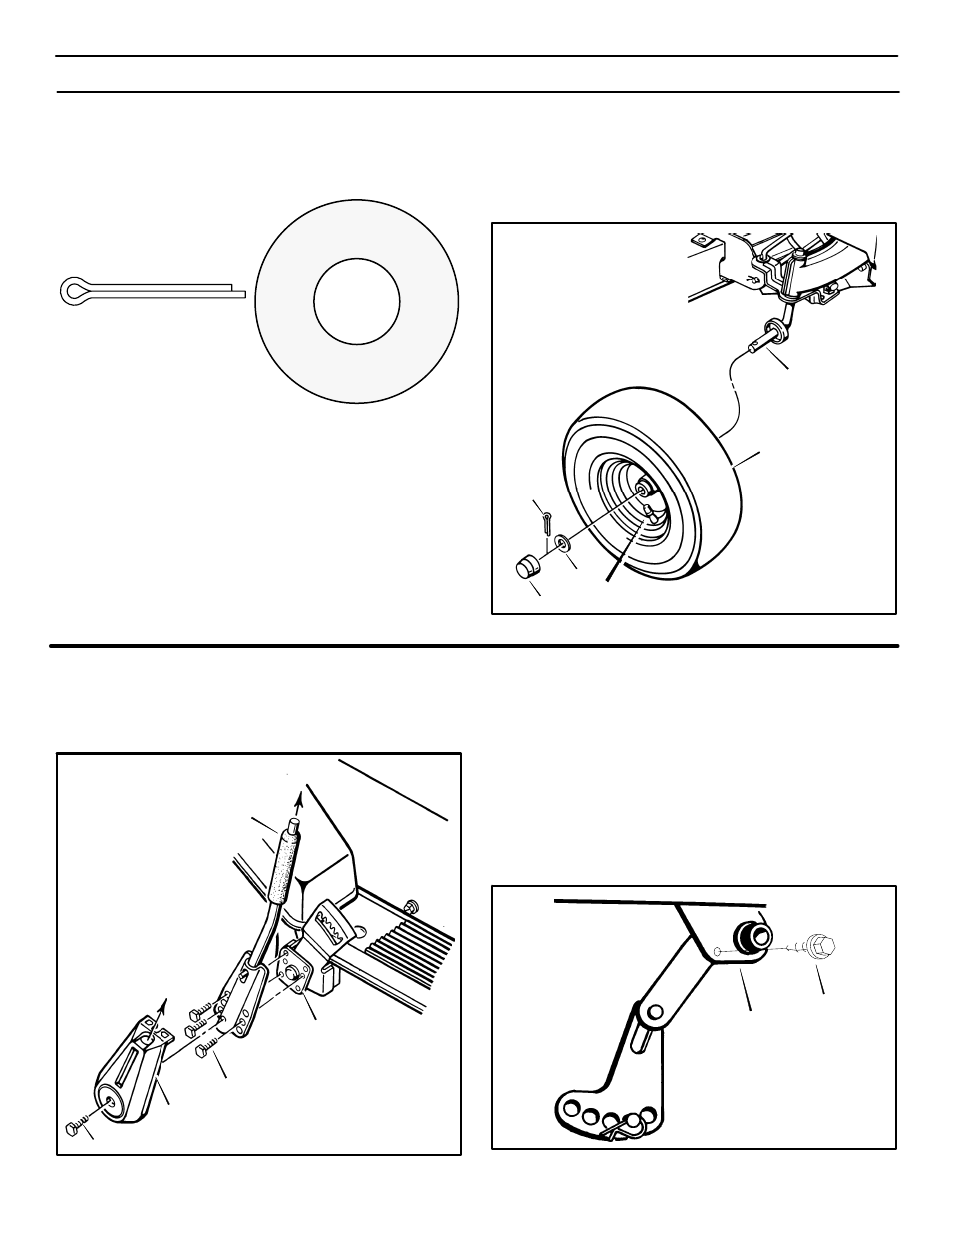
HOW TO INSTALL THE FRONT WHEELS
Use a knife and cut the four sides of the container. Install the front
wheels in the container. Use the fasteners shown below to install
the front wheels. The fasteners are shown at full size.
(A)
30x49
(B)
17x195
NOTE: Use a piece of wood about 4 feet (1.25 meters) long to
raise the front of the tractor. If a piece of wood cannot be found,
get another person to help lift the tractor. Be careful, do not let
the tractor fall.
1. Raise the front of the tractor. Set a support (block of wood) un-
der the tractor.
2. Make sure the valve stem is to the outside of the tractor. Slide
the front wheel on the spindle.
3. Fasten each front wheel with the fasteners (Figure 1). Bend
the ends of the cotter pin apart to keep the front wheel on the
spindle.
4. After the front wheels are installed, lift the tractor from the sup-
port. Roll the tractor off of the container.
5. If your tractor has hub caps, install the hub caps. Make sure the
washers hold the hub caps in place.
Figure 1
Front Wheel
Valve Stem
A
B
Hub Cap
Spindle
HOW TO ASSEMBLE THE LIFT LEVER
1. If the lift lever has the cover (Figure 2), remove the screw from
the cover. Slide the cover up the lift lever.
Figure 2
Lift Lever
Mounting Bracket
Screw
Cover
Screw
2. Remove the three screws from the mounting bracket.
3. Align the holes in the lift lever with the same holes the screws
were removed from in the mounting bracket.
4. Fasten the lift lever with the three screws.
5. Assemble the cover to the lift lever.
6. For shipment, some models have a stop screw in the lifter as-
sembly (Figure 3). The stop screw stops the mower housing
from moving to the lowest position. For a low cut, remove and
discard the stop screw.
Figure 3
Stop Screw
Lifter Assembly