Using the tv’s features, Setting up y our tv, Setting the clock – Hitachi 50HDA39 User Manual
Page 29: Selecting the video input source, Labeling the video input sources
Setting up y
our
TV
29
Setting the clock
You must set the clock before you can program the ON timer.
To set the clock:
1. Press TV to select the TV mode.
2. Press MENU, then press or to display the SETUP menu.
3. Press
▲ or ▼ to highlight CLOCK SET, then press .
4. Press
or
to set the MONTH, then press
▼.
5. Set the DAY, YEAR and TIME as in step 4.
After setting the clock, the date and time function starts
automatically.
6. Press EXIT to return to the normal screen.
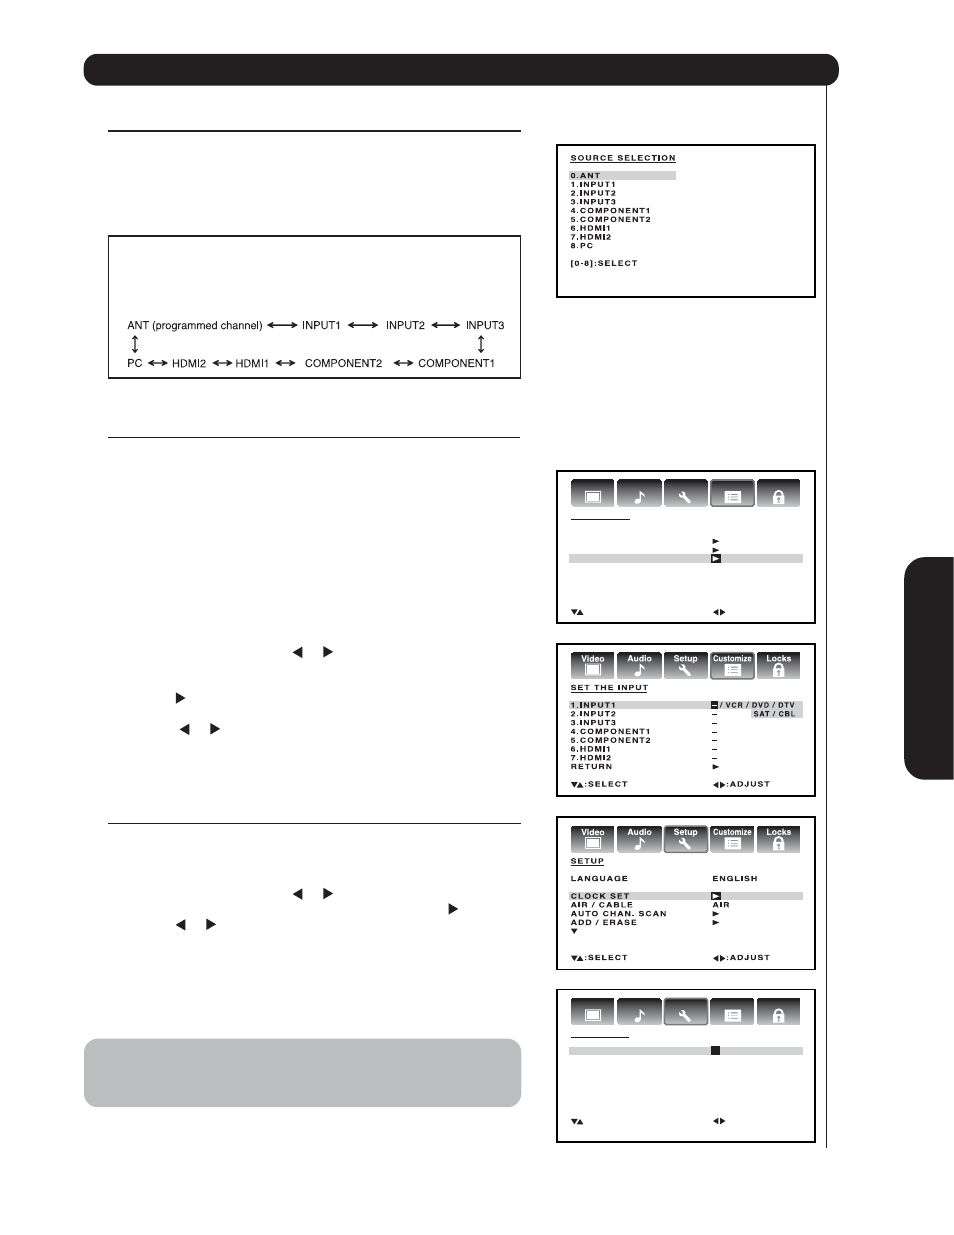
Selecting the video input source
Press INPUTS to view a signal from another device connected to
your TV, such as a VCR or DVD player. You can select ANT,
INPUT1, INPUT2, INPUT3 COMPONENT1, COMPONENT2,
HDMI1, HDMI2 or PC, depending on which input jacks you used to
connect your devices (see “Connecting your TV” on page 7.)
Pressing INPUTS on the remote control
displays the current signal source (press
INPUTS again or 0-8 to change)
You also can use the CH
▲/▼ buttons to select the video input
source. In addition to cycling through your programmed channels
(page 23), the CH
▲/▼ buttons will also cycle through the video
input sources, in the order illustrated below.
Labeling the video input sources
The video label feature allows you to label each input source for
your TV from the following preset list of labels:
–
: Uses the default label name
VCR
: Video cassette recorder
DVD
: DVD video
DTV
: Digital TV set-top box
SAT
: Satellite box
CBL
: Cable box
HD
: HDMI device
To label the video input sources:
1. Press TV to select the TV mode.
2. Press MENU, then press or to display the CUSTOMIZE
menu.
3. Press
▲ or ▼ to highlight SET THE INPUT.
4. Press to display the SET THE INPUT menu.
5. Press
▲ or ▼ to highlight the video source you want to label.
6. Press or to select the desired label for that input source.
7. Press EXIT to return to normal viewing.
Note:
After a power failure or disconnection of the power, the clock
settings will be lost.
Audio
Customize
Locks
Setup
Video
C U S T O M I Z E
O N T I M E R
O F F
FAV O R I T E C H
C H L A B E L
S E T T H E I N P U T
: S E L E C T
: A D J U S T
Using the TV’s Features
Audio
Customize
Locks
Setup
Video
C L O C K S E T
M O N T H
1
D AY
1 ( S U N )
Y E A R
2 0 0 6
T I M E
1 2 : 0 0 A M
: S E L E C T
: A D J U S T
E N T E R : S E T
E X I T: E N D