Qw q w, Preparing the installation – Bose Professional FreeSpace 3 Series II Acoustimass Subwoofer Module (Black) User Manual
Page 8
8
•
English
FreeSpace 3 Loudspeaker System
•
Installation Guide
PRO.BOSE.COM
Setup
Installing the Tile Bridge
1.
Place the tile bridge across the ceiling grid. If necessary, adjust the tile bridge so the rails rest on the ceiling grid.
2. Replace the tile in the ceiling.
q
w
Preparing the Installation
Loudspeaker Placement
Note:
Installation in close proximity to cooking surfaces where the loudspeaker may be directly exposed to cooking oils, steam, vapor, or
high heat such as in commercial cooking environments may decrease the performance or reliability of the loudspeaker.
Using a Safety Cable
Some regional construction codes require the use of a secondary method of securing loudspeakers to support structures to provide
additional safety. Choose a mounting position, method, and hardware consistent with local building codes and regulations.
Bose recommends using a safety wire or a safety cable as a secondary securing mechanism for the Series II Acoustimass bass module
and Flush-mount Satellites. Follow the manufacturer’s instructions for any secondary securing mechanism implemented.
Each loudspeaker model has one or more possible attachment points:
Series II Acoustimass Bass Module
Remove an M6 screw from the rear cover plate, and attach a safety cable to that screw hole.
Flush-mount Satellites
Attach a safety cable to the opening in the metal tab on the rear cover plate.
Preparing the Ceiling & Accessories
Before installing a bass module or satellite loudspeakers, follow the instructions to prepare the ceiling and any accessories you will use in
the installation. See
Installation Options
(Page 5) for a list of required or optional accessories for each loudspeaker model.
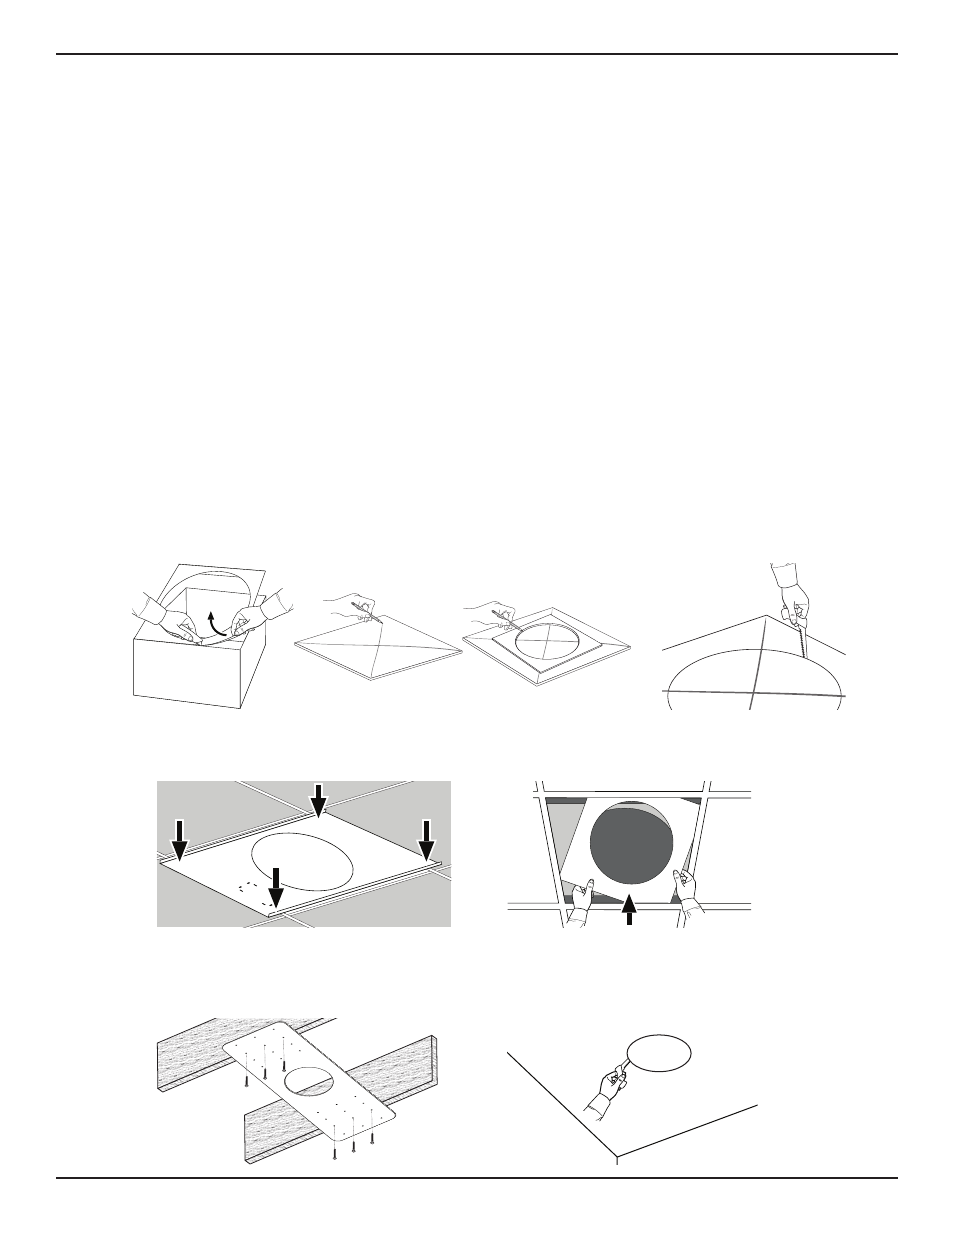
Preparing Acoustic Ceiling Tile
Cutting the Ceiling Tile
1.
Remove the tile and use the template to trace a loudspeaker hole onto the tile. To center the template on the tile, draw an
X
by
connecting the corners diagonally and center the template using the crossing point.
2. Cut a hole into the tile.
Preparing Hard Ceiling Using a Rough-in Pan (New Construction)
1.
Attach rough-in pan to the ceiling furring or wood studs. The rough-in pan includes multiple pre-drilled holes to accommodate
different stud spacing, loudspeaker orientations, and loudspeaker placements.
2. After the ceiling is finished, cut a hole in the finished ceiling, using the rough-in pan as a guide.
q
w
q
w