Irritrol PCW Control User Manual
Page 23
PCW Control
S
Installation
21
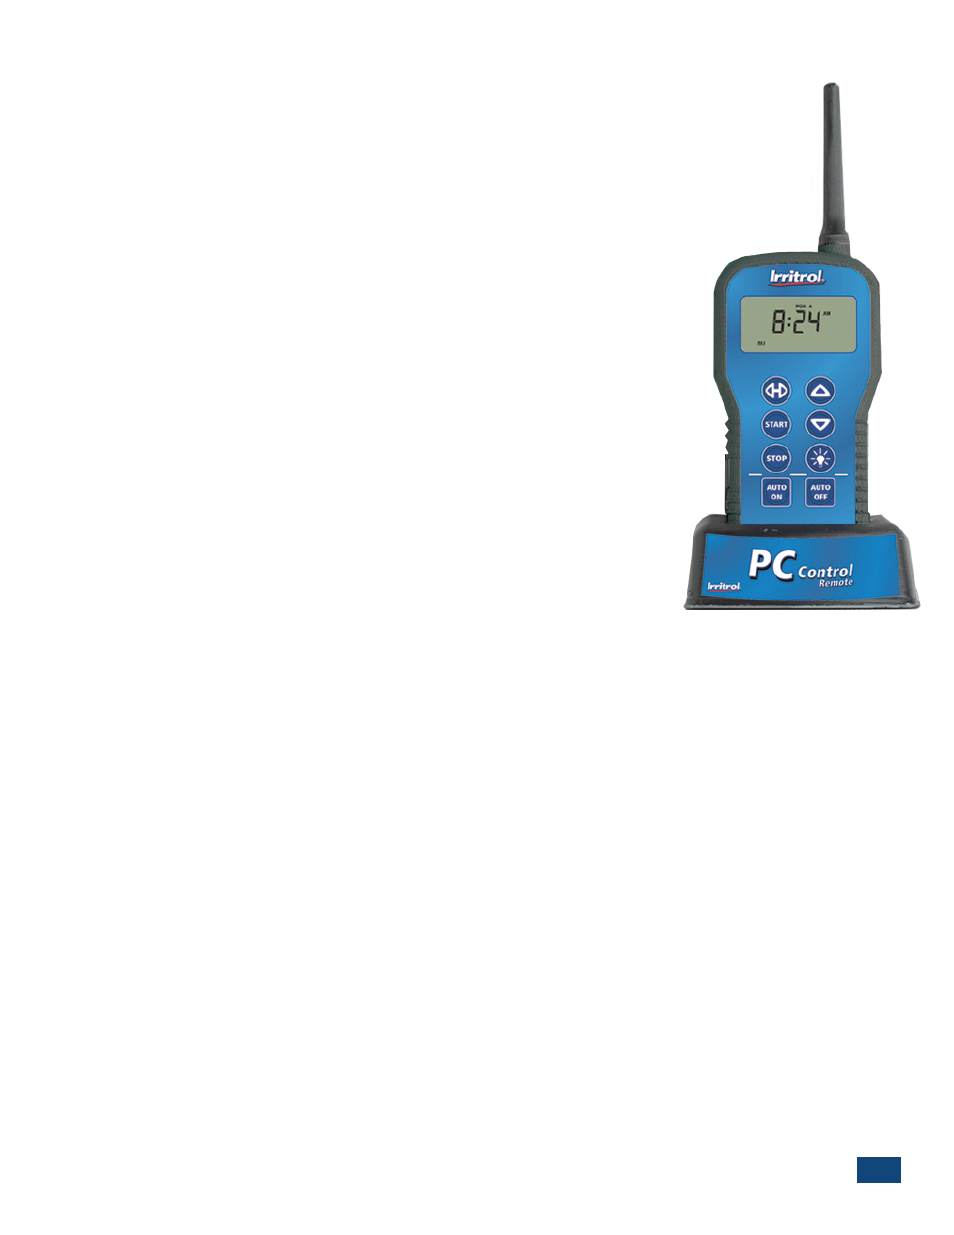
Chapter 3 – Hardware Features: PC-Remote and Controller Operations
The system’s handheld remote (Figure 3.1) is the primary way to manually send
commands to the irrigation controller. The remote has several uses
and features.
1. When connected to the computer, the remote relays the schedule changes and
manual commands, wirelessly, to the Controller.
2. When handheld and disconnected from the computer, the device can
remotely perform the following:
a. Turn any zone or station ON or OFF (irrigation or lighting zones)
b. Turn the entire system to automatic mode or to system OFF mode
c. Turn on all landscape lighting zones (up to three zones maximum
at a time)
d. Indicate Rain OFF mode because of a wet rain sensor (rain cloud icon)
e. Indicate signal strength with the antenna icon
f. To preserve battery life, the remote turns itself off after a few seconds
of button inactivity (or just hold down STOP until “OFF” appears).
To use the remote, unplug the cord’s USB mini-connector from the side
of the handheld unit and reinsert the captive plug to help prevent
water entry.
1. Wake up the remote by pressing any button for one second. All
elements of the display will illuminate for a moment and the then
“AUTO” should be displayed (if the controller it found with the
same PIN is in automatic mode) or “OFF” for off mode.
2. Turn any station ON by selecting it with the UP or DOWN button
and pressing START. Press STOP to stop the station. To advance or change from one running sta-
tion or zone to start another, use the UP or DOWN arrow button to move from the current station
and select a new station number. The previous station or zone will turn off and the selected sta-
tion will start. Remote or Manual starts override a wet rain sensor and irrigate.
3. A remotely started station has a 10- minute default run time. To change the run, press the SHUT-
TLE button (arrows pointing both right and left) to start the “10 Min” blinking and then reset the
time from 1 to 59 minutes (in 1-minute increments) or from 1 to 4 hours (in 0.1-hour increments).
The operating countdown starts immediately for the selected station.
4. A lightning bolt icon in the display indicates a short circuit on one of the zones. The shorted zone
light will be blinking on the front of the Controller. The cause of the short must be corrected, then
run the station remotely or manually to clear the short indicator.
5. To turn on all landscape lighting zones (3 stations max.) wake the remote and let it find the con-
troller and then press the light bulb button. The lighting zones will turn on for a default time of 1
hour or pressing the light bulb button again will shut them off.
6. To set the remote’s PIN, wake the remote and then hold down the two, top buttons for 3 seconds
simultaneously. Four digits will appear. Use the UP or DOWN arrow button to set the first digit in
the PIN. Then use the shuttle button to move to the next digit to the right. Repeat the steps to set
the rest of the 4-digit PIN. Then press START. When the remote finds the Controller with the same
PIN, “PIN OK” will appear in the display, then “AUTO” or “OFF” depending upon the Controller’s
mode.
Figure 3.1