Irritrol PCW Control User Manual
Page 20
18
PCW Control
S
Installation
Note: The PCW Control program offers a variety of seasonal adjustment options that can be applied
globally to the Site and/or Schedule and/or individually to each zone. The percent adjustment for
seasonal changes are for systems not using Scheduling Advisor. Refer to Appendix 2– Advanced
Adjustment Features for detailed information
regarding Seasonal Adjustment options.
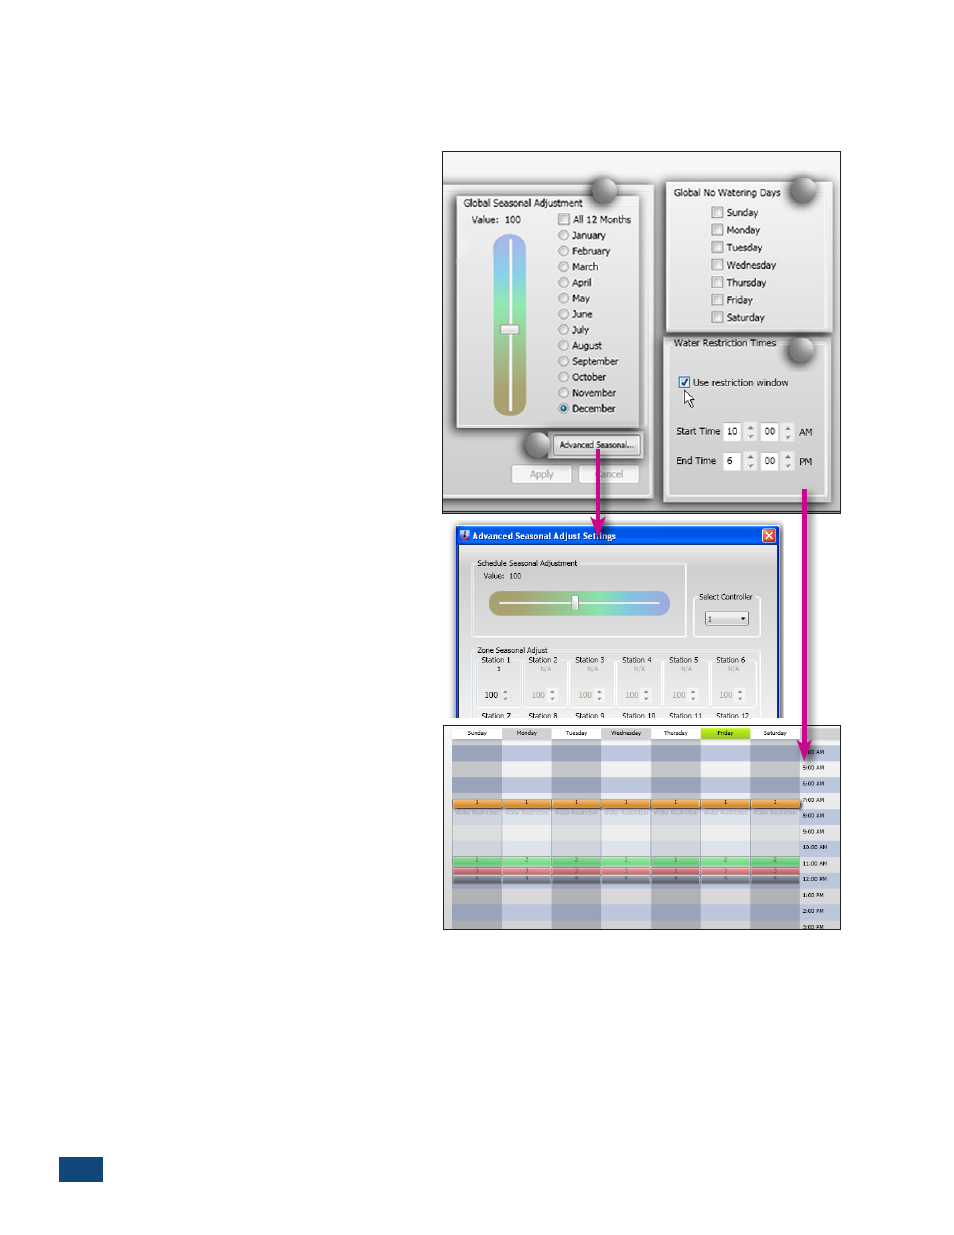
(6) Global Seasonal Adjustment is used to
apply a seasonal adjustment % factor globally to
any Schedule opened within the Site.
A % adjustment value, ranging from 100%
(unadjusted value) up to 200% or down to 10%
in 5% increments, can be applied globally to all
months of the year or to each month individually
as preferred. For individual months, select the
month’s radio button, then adjust the slider to
the % value as preferred. (Figure 2.29)
Each month selected will retain its corre-
sponding adjustment % value after the selec-
tions have been applied, saved and sent to the
controller.
Note: When the All 12 Months option is selected,
the adjustment value will change to 10% (by
default) for all months. Be sure to set the adjust-
ment slider to the preferred % value.
(7) Advanced Seasonal Adjustments enable
seasonal adjustment factors to be applied to
specified controllers (in multiple-controller
applications), to all zones or individual zones
within a schedule.
Note: A seasonal % value adjustment applied to
a zone within the Zone Properties configuration
menu will be reflected in the Advanced Season
Adjust Settings menu and vice-versa.
(8) Global No-Watering Days – Enables indi-
vidual days of the week to be restricted from
operation for any schedule opened within
the site to comply with local water restrictions.
(9) Water Restriction Time – Enables a specific
window of time to be established that will
restrict all automatic watering operation. By
selecting the Use Restriction Window option,
the restriction window Start Time and End Time
can be established.
Note: When setting the Start Time and End Time, make sure the appropriate AM/PM reference is
displayed.
7
6
8
9
Figure 2.29