Acquilite administration overview – Obvius A7801 User Manual
Page 9
Step 2 - Attach the Laptop to the AcquiLite or to the LAN. If the Laptop is to be attached to an existing LAN, use a standard
(direct) ethernet patch cable. If the Laptop is to be attached directly to the AcquiLite as shown in the second figure, use an
ethernet "Crossover" cable.
If the Laptop is to be attached to an existing LAN, obtain a static IP address (or use DHCP addressing) from the network
administrator.
Static IP Address for the laptop
DHCP
Direct Connection to Laptop
Specify an IP address
IP address: ___.___.___.___
Netmask: ___.___.___.___
Obtain an IP address automatically.
(All other required settings are assigned
by the DHCP server)
IP Address: 192.168.40.1
Netmask: 255.255.255.0
(AcquiLite factory default settings)
Step 3 - Configure the laptop IP address using the following steps. Note: Only MS Windows is detailed below, however you
can use any OS/Browser you wish such as MacOS or Linux. Details on network setup for non-windows operating systems is
beyond the scope of this document however.
A. From the Windows start menu, select the "Settings/Control Panel" option. Double click the network icon in the
displayed window.
Note: If you are using Windows 2000 or Windows XP, select the 'Local Area' connection icon in the network
folder, then click the "Properties" button.
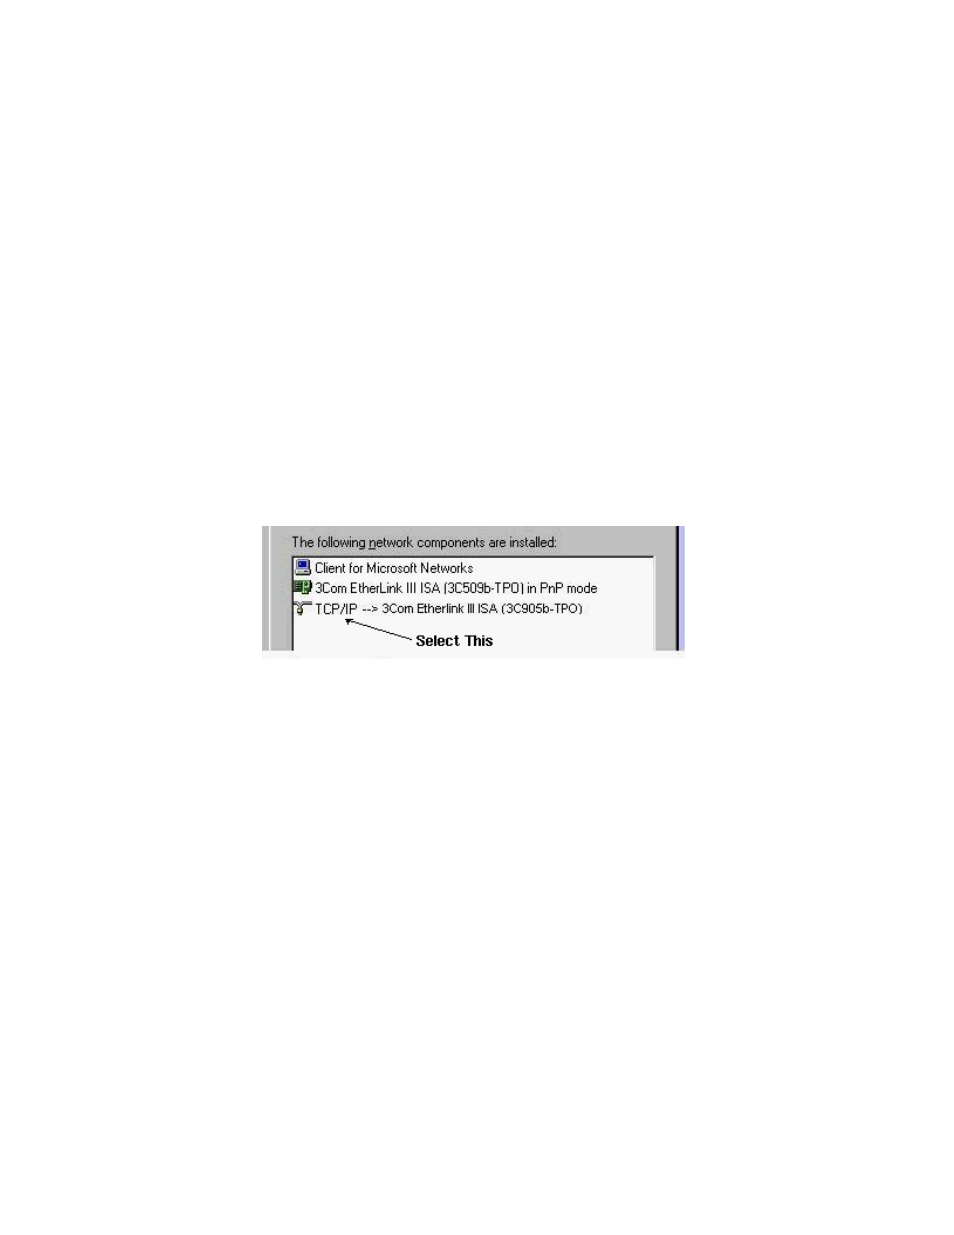
B. In the network setup dialog, there should be a list of items including adapters, clients and protocols. Locate the
protocol labeled "TCP/IP".
Note: If you have multiple ethernet cards, you may have multiple lines labeled "TCP/IP --> ethernet card". Locate
the ethernet card that corresponds to the physical connection to the AcquiLite and then select the TCP/IP option that
is linked with that ethernet card.
C. Double click the TCP/IP option you selected in step B above. An example is shown in figure 8 above. Set the IP
and Netmask from figure 7 (laptop network address worksheet) above. It would be helpful to make note of your
previous settings in this dialog so you may set them back after you are done with the AcquiLite Configuration.
D. Close the TCP/IP settings dialog, and Network dialog. If you are using Windows 95, 98, or ME, you will be
required to reboot your computer.
AcquiLite Administration Overview
The AcquiLite should now be available on the local area network for you to access using a web browser such as Internet
Explorer or Netscape.
Step 1 - Use your web browser to connect to the AcquiLite by entering
http://192.168.40.44/setup/
Where 192.168.40.44 is the IP address displayed on the on the AcquiLite LCD display.
Step 2 - When prompted, use the following default login information
Login: admin
Password: admin
Step 3 - Your web browser should now display the AcquiLite configuration menu. To the left, a list of configuration options
are available. On the right, a specific configuration page will be shown. The first page is a welcome message with some
system status information. Proceed with the configuration of the AcquiLite using your web browser.
Page 9
A7801 AcquiLite – Data Acquisition Server