AquaCraft SuperVee 27R User Manual
Page 8
8
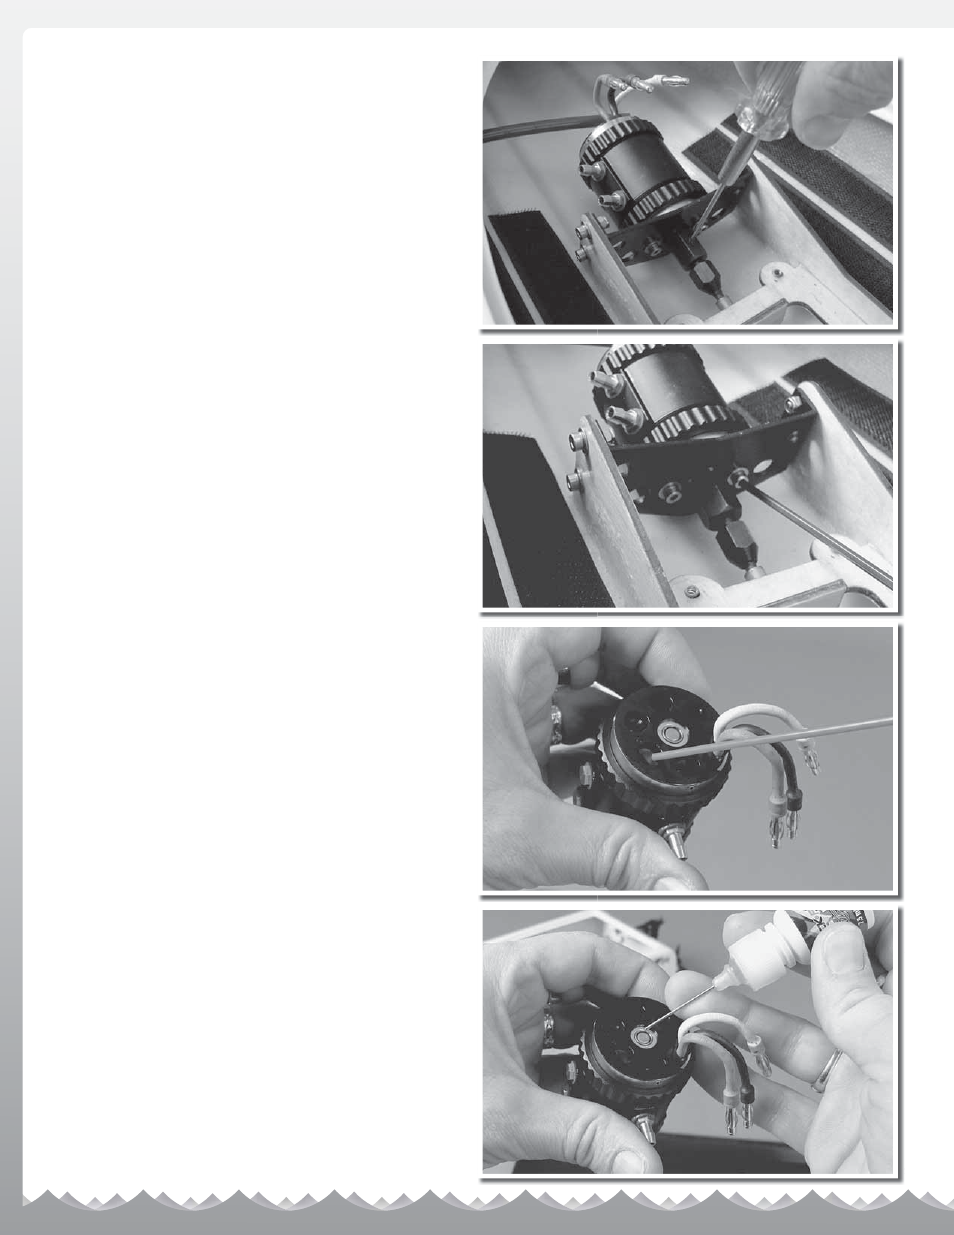
8. Use a 1.5mm hex wrench or hex driver to loosen the
set screw that holds the fl ex coupler to the motor shaft.
You don’t have to remove the set screw; just loosen it.
9. Using a 2.5mm wrench, loosen and
remove the two motor screws.
10. Remove the motor from the boat and spray the entire motor
with moisture displacer. Make sure to fully saturate the motor.
This is also a good time to spray the displacer through the water
jacket. Removing any water from there is equally important.
11. After you have the motor fl ushed out, re-oil
the motor bearings.Reinstall the components
by reversing the above procedure.
See also other documents in the category AquaCraft Water equipment:
- Air Force (15 pages)
- Alligator Tours (12 pages)
- Atlantic (8 pages)
- Atlantic II (8 pages)
- Bristol Bay (8 pages)
- Hammer (8 pages)
- King's Ransom (12 pages)
- Mini Alligator Tours (8 pages)
- Mini Rio (12 pages)
- Mini Thunder (12 pages)
- Mini Wildcat (12 pages)
- Miss Vegas (12 pages)
- Miss Seattle (8 pages)
- Miss Vegas Deuce (16 pages)
- Minimono (12 pages)
- Motley Crew (8 pages)
- Nitro Hammer (8 pages)
- P-27 Gunslinger (8 pages)
- Paradise (12 pages)
- Pro Fisherman (8 pages)
- Reef Racer (8 pages)
- Reef Racer 2 (8 pages)
- Reef Racer 2 Charger (2 pages)
- Rescue 17 (8 pages)
- Revolt 30 (12 pages)
- Rio 51 (24 pages)
- Rio 51Z (16 pages)
- Rio EP (16 pages)
- SuperVee 27 (11 pages)
- SuperVee 27 Nitro (12 pages)
- Top Speed 2 (20 pages)
- Top Speed 3 (24 pages)
- UL-1 Superior (12 pages)
- VS1 (20 pages)
- V24 One-Design (16 pages)
- Vela One Meter (16 pages)
- Wildcat (8 pages)
- 15 Marine Engine (4 pages)
- 18 Marine Engine (4 pages)
- 27 Rear Exhaust Airboat Engine (8 pages)
- 46 BB Marine Engine (6 pages)
- EP1 Electric Outboard Motor (4 pages)
- GrimRacer Precision Prop Balancer (4 pages)
- AQUB9540 Water Jacket Installation Procedure (4 pages)