AquaCraft Rio 51 User Manual
Page 6
❏
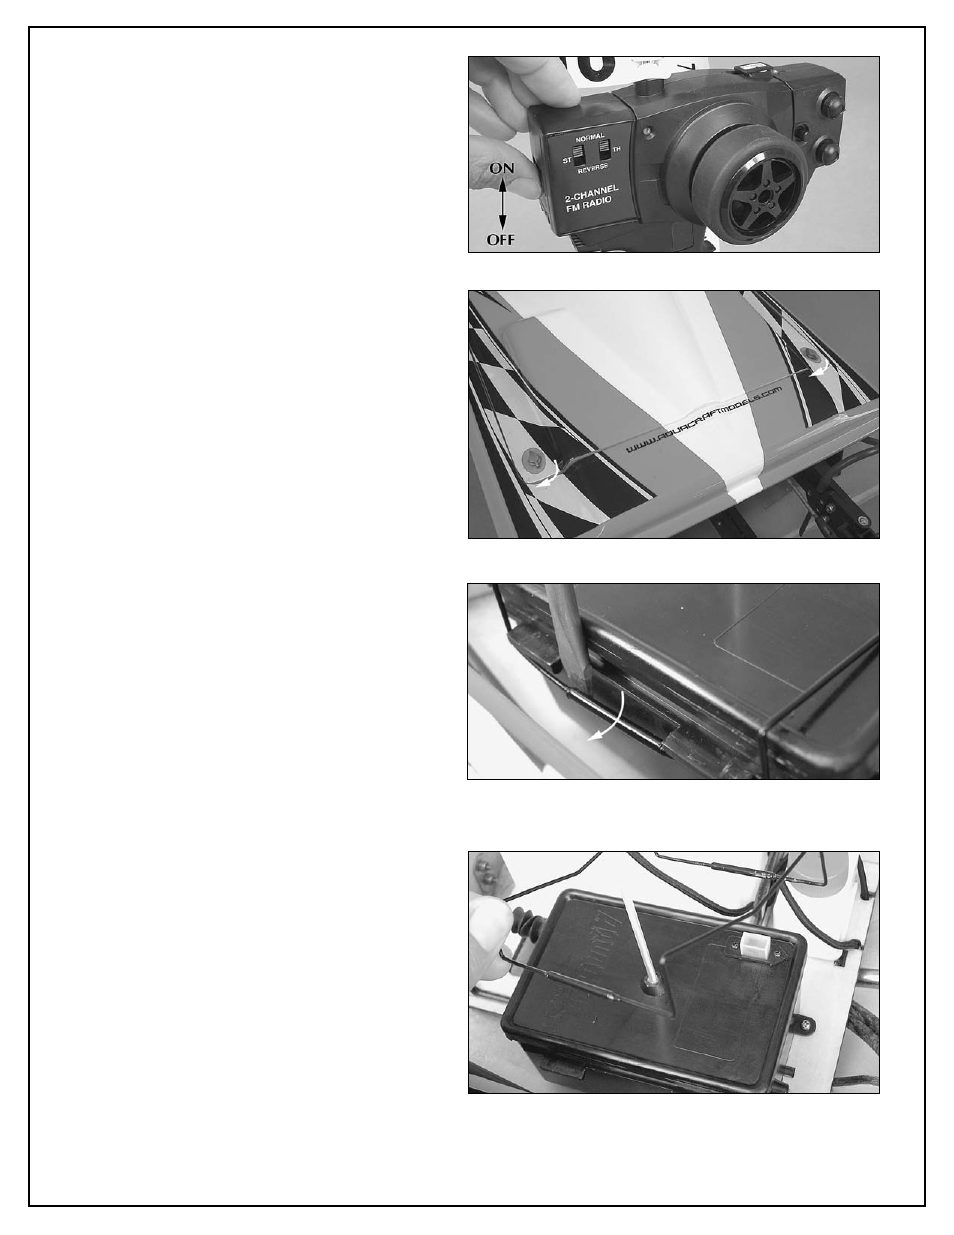
4. Turn the transmitter “ON” using the switch on the
transmitter’s left side. The battery level indicator light
(LED) should glow red. If the light is flashing, the batteries
are low and need to be replaced.
INSTALLING THE RX BATTERIES
❏ ❏
1. Locate the cowl locks at the rear of the hatch.
Turn the lock 1/4 turn to remove the hatch.
❏
2. Using a standard screwdriver, remove the wire
radio box lid retainer by gently prying the wire over
the holding tabs on the side of the box.
❏
3. Remove the box lid retainer and set to the side.
6
See also other documents in the category AquaCraft Water equipment:
- Air Force (15 pages)
- Alligator Tours (12 pages)
- Atlantic (8 pages)
- Atlantic II (8 pages)
- Bristol Bay (8 pages)
- Hammer (8 pages)
- King's Ransom (12 pages)
- Mini Alligator Tours (8 pages)
- Mini Rio (12 pages)
- Mini Thunder (12 pages)
- Mini Wildcat (12 pages)
- Miss Vegas (12 pages)
- Miss Seattle (8 pages)
- Miss Vegas Deuce (16 pages)
- Minimono (12 pages)
- Motley Crew (8 pages)
- Nitro Hammer (8 pages)
- P-27 Gunslinger (8 pages)
- Paradise (12 pages)
- Pro Fisherman (8 pages)
- Reef Racer (8 pages)
- Reef Racer 2 (8 pages)
- Reef Racer 2 Charger (2 pages)
- Rescue 17 (8 pages)
- Revolt 30 (12 pages)
- Rio 51Z (16 pages)
- Rio EP (16 pages)
- SuperVee 27 (11 pages)
- SuperVee 27R (16 pages)
- SuperVee 27 Nitro (12 pages)
- Top Speed 2 (20 pages)
- Top Speed 3 (24 pages)
- UL-1 Superior (12 pages)
- VS1 (20 pages)
- V24 One-Design (16 pages)
- Vela One Meter (16 pages)
- Wildcat (8 pages)
- 15 Marine Engine (4 pages)
- 18 Marine Engine (4 pages)
- 27 Rear Exhaust Airboat Engine (8 pages)
- 46 BB Marine Engine (6 pages)
- EP1 Electric Outboard Motor (4 pages)
- GrimRacer Precision Prop Balancer (4 pages)
- AQUB9540 Water Jacket Installation Procedure (4 pages)