Installation – Panasonic AW-PH650 User Manual
Page 18
Attention! The text in this document has been recognized automatically. To view the original document, you can use the "Original mode".
Installation
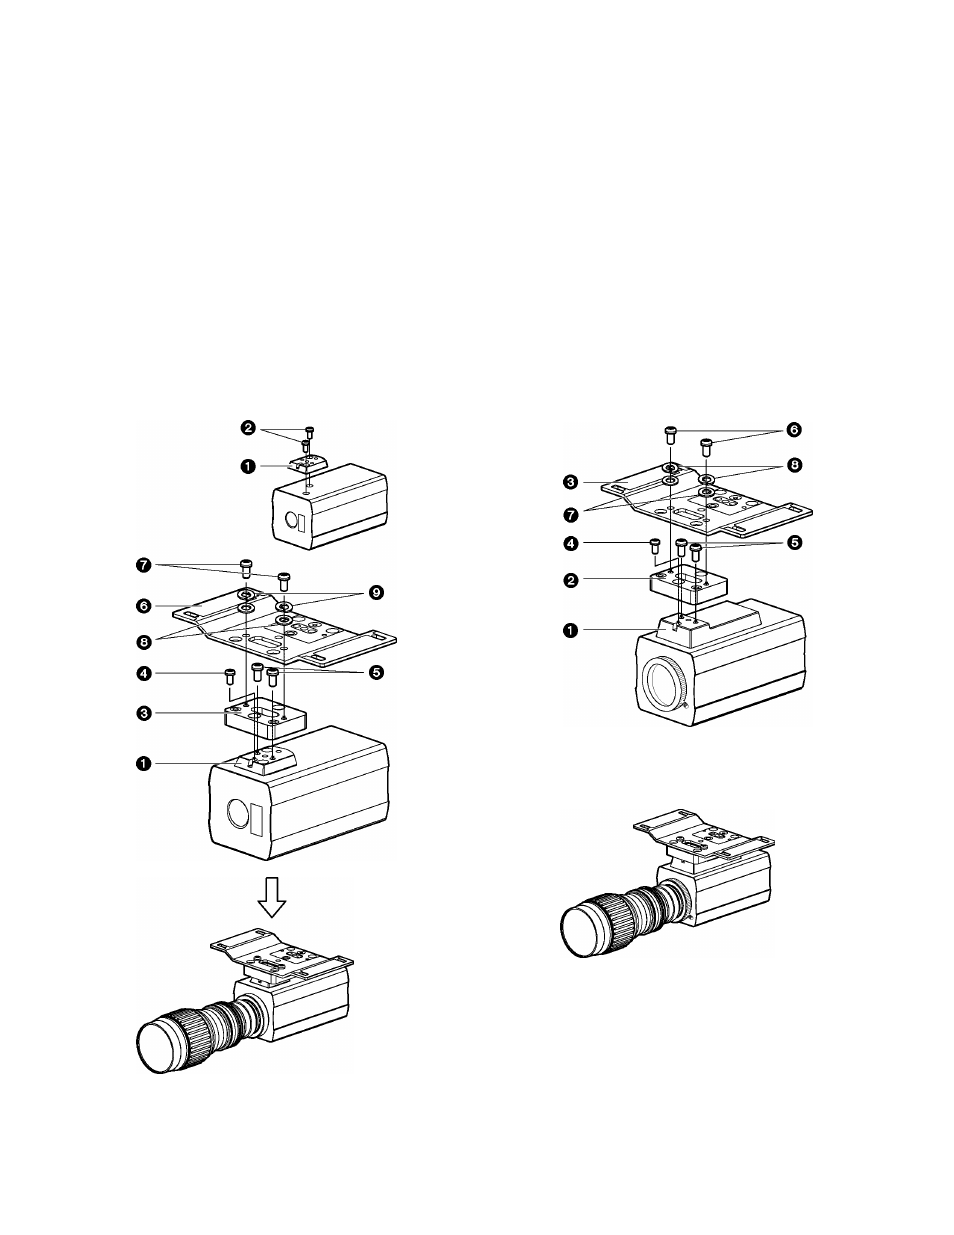
® Use the 2 screws © supplied with the camera to attach
the mounting adapter O (supplied with the camera) to
the top panel of the camera.
@ Attach the positioning screw O (supplied) to the camera
mounting spacer 0.
@ Use the 2 screws © (supplied) to attach the camera
mounting spacer 0 to the mounting adapter O (supplied
with camera) on the top panel of the camera.
@ Attach the camera mount © to the camera mounting
spacer 0 using the 2 screws ©, flat washers © and
spring washers © (supplied).
(Make sure that the two sides of the camera mount are
higher than the central area that is attached.)
® Attach the lens to the camera.
Remove the lens hood and zoom lever.
® Attach the positioning screw O (supplied) to the camera
mounting spacer ©.
@ Use the 2 screws © (supplied) to attach the camera
mounting spacer © to the fan mounting seat O on the
top panel of the camera.
@ Attach the camera mount 0 to the camera mounting
spacer © using the 2 screws ©, flat washers © and
spring washers © (supplied).
(Make sure that the two sides of the camera mount are
higher than the central area that is attached.)
@ Attach the lens to the camera.
Remove the lens hood and zoom lever.
The camera mount in the opposite direction from when the AW-E655 is used as the camera.
To ensure that none of the screws are loose, use a tool to tighten them up securely.
17(E)