Camera recording – Panasonic NV-J35 User Manual
Page 30
Attention! The text in this document has been recognized automatically. To view the original document, you can use the "Original mode".
CAMERA RECORDING
• If you leave the VTR in the pause mode for more
than 5 minutes, the VTR will stop automatically to
protect the tape and the video heads.
• Even if the video camera is equipped with video
recorder remote control functions, this VTR can not
be remote-controlled from the camera.
•Disconnect all cables from the Video Input and
Audio Input Sockets after finishing camera record
ing.
If they remain connected, it is impossible to record
TV programmes.
©
Preparation
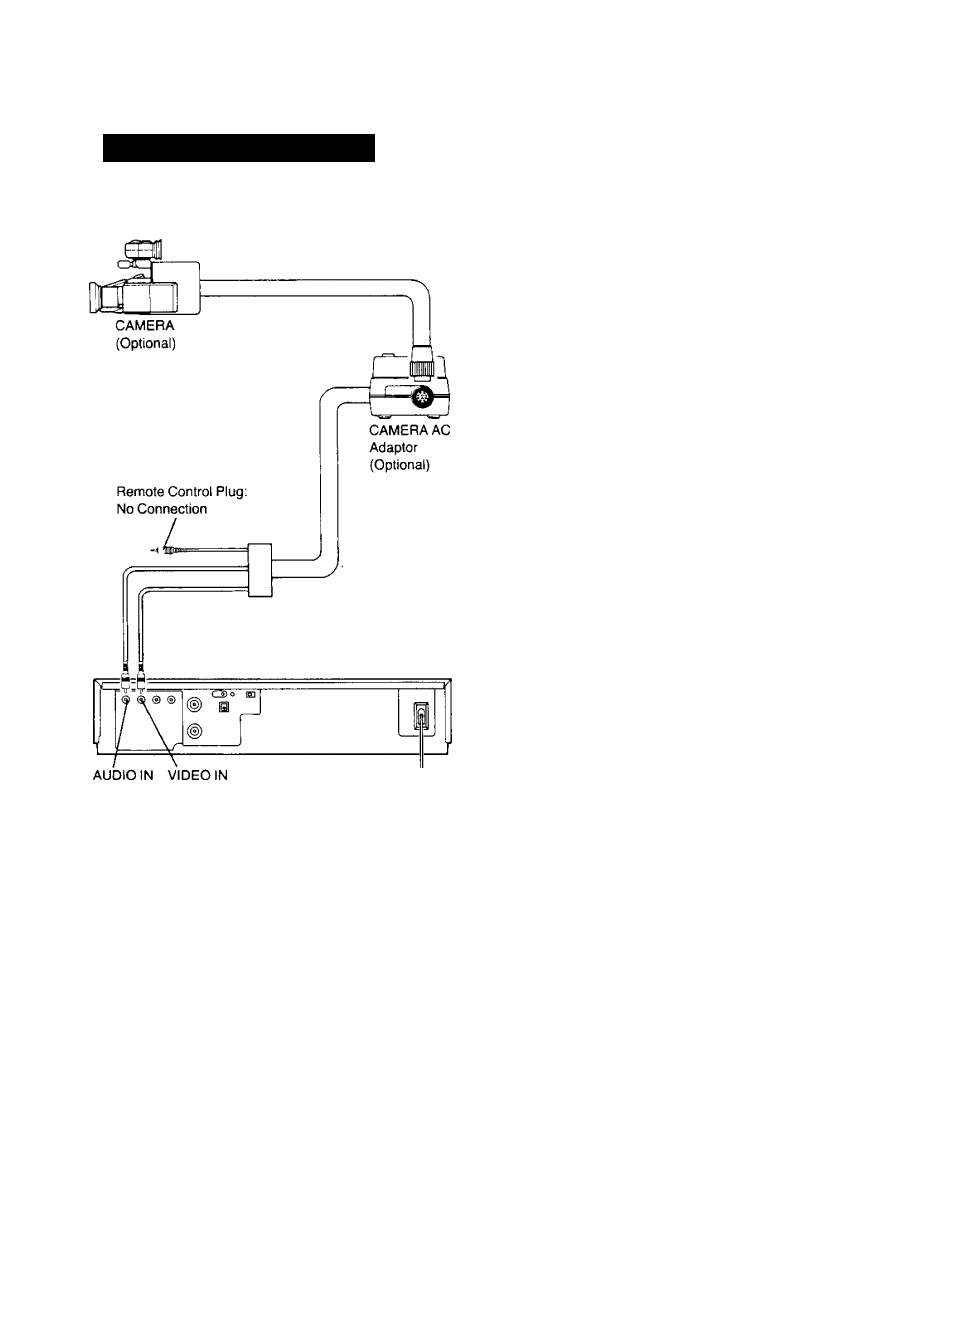
• Connect the Video Camera via the Camera AC Adaptor to
the VTR as shown in the illustration above.
• Insert a video cassette with the erasure prevention tab
intact.
When a video cassette is already inside the VTR, press
the VTR On/Off Switch to turn it on.
• Set the Tape Speed Selector to “SP” or “LP".
Q Turn the Camera AC Adaptor on and make the nec
essary adjustments on the camera.
Refer to the operating instructions of the camera you
are using.
^ Press the Record Button (•) on the VTR to start re
cording.
Avoid recording unwanted material:
Press the Pause/Still Button (II) on the VTR, and the re
cording will stop temporarily. To restart recording, press the
Pause/Still Button
( I I ) ,
again.
0 Press the Stop Button (■) on the VTR to stop the
recording.
(30)