Losi LOSB0109 User Manual
Page 6
6
INSTALLING ThE BATTERy PACk(S)
To install the battery pack, remove the battery hold-down strap by
removing the clip from the front mounting boss. Then, while lifting the
strap, pull forward in one motion.
After you have inserted the fully charged battery pack, reinstall the
battery hold-down strap.
The battery hold-down has a flat side while the other side has
strengthening ribs; the rib side should be face down to the battery.
Insert on an angle into the rear support, and then down on the front pin
and secure it with the previously removed clip.
LOSI LSR-3000 RADIO SySTEM
The XXX-SCT comes with the Losi LSR-3000 Radio System with
Spektrum
™
2.4GHz DSM
®
Technology. The system will not interfere
with radio systems operating on legacy frequencies such as 27MHz or
75MHz, neither will you experience any overlapping interference from
other 2.4GHz systems. The transmitter and receiver are bound together
from the factory to uniquely operate together.
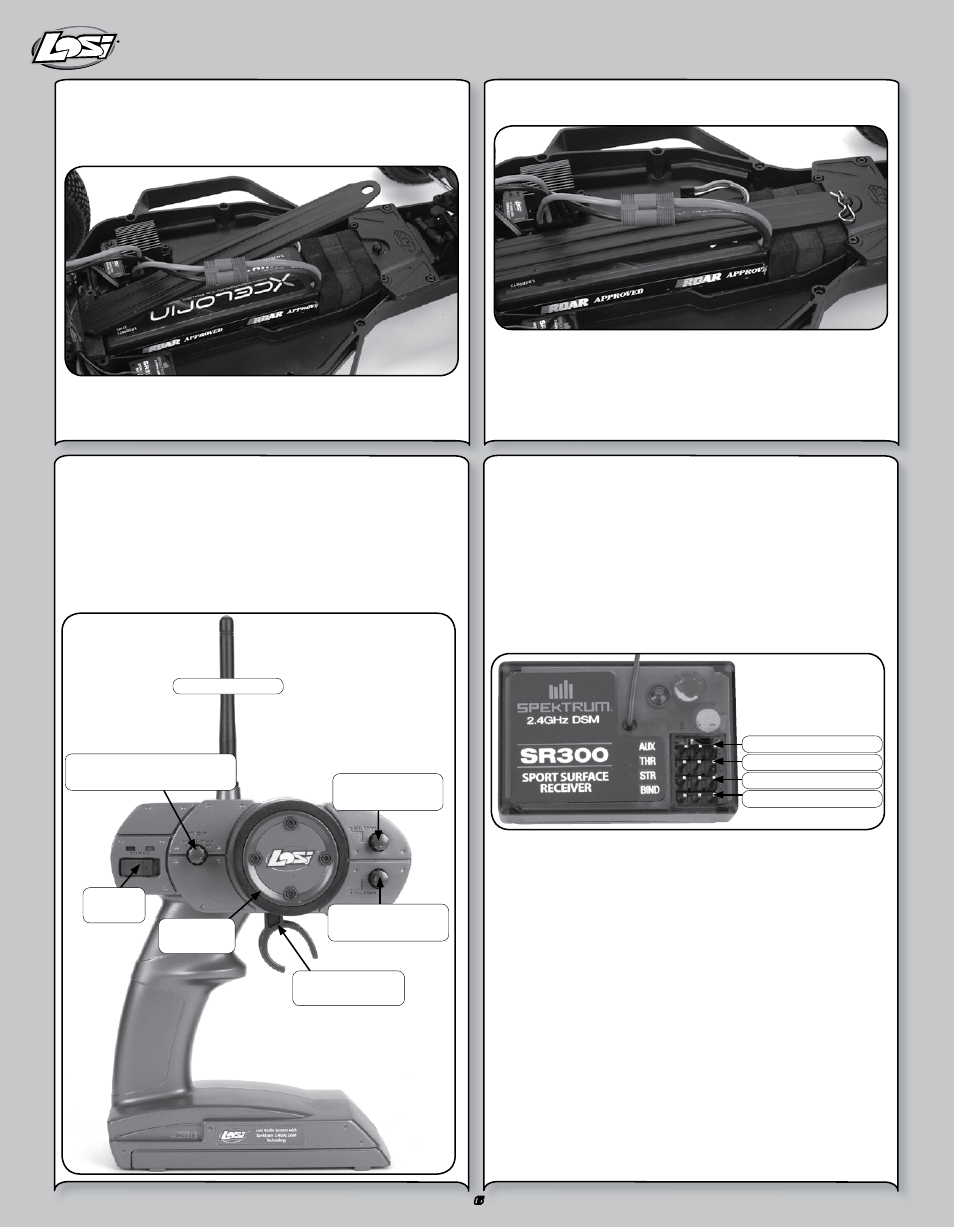
Operation and Adjustment
POWER
ON/OFF
DUAL RATE ADJUSTMENT
(ST. D/R)
ANTENNA
STEERING
WHEEL
STEERING TRIM
(ST. TRIM)
THROTTLE TRIM
(TH. TRIM)
THROTTLE/
BRAKE TRIGGER
Power Switch – Turns the transmitter On and Off.
•
Dual Rate – (ST.D/R) Adjusts how much the wheels can turn left/
•
right in equal proportion.
Steering Trim – (ST.TRIM) Adjusts the “Hands Off” direction of the
•
XXX-SCT.
Throttle Trim – (TH.TRIM) Fine adjustment for the throttle and
•
brake center.
Receiver
There is no adjustment required of the receiver. Please note the
different slots for connection.
AUXILIARY CHANNEL
THROTTLE CHANNEL
STEERING CHANNEL
BIND PORT
There is Bind, channel one, channel two and auxiliary slots.
The bind slot is used to bind the transmitter to the receiver. The bind
process teaches the transmitter the unique GUID ID of the receiver.
Although the transmitter and receiver come bound, below are the steps
to rebind your transmitter and receiver should the need arise.
Rebind Process
1. Ensure the transmitter and vehicle are both turned off.
2. Using the supplied Bind plug (which looks like a standard receiver
plug with a short wire loop installed), insert the Bind plug into the
receiver slot labeled BIND.
Note: You do not need to remove any other plugs to rebind.
3. With the bind plug installed, turn on the vehicle. Notice the receiver
LED is now blinking.
4. Turn on the transmitter. You will see a similar blinking LED under a
translucent cover.
5. Both the receiver and transmitter LEDs will stop blinking and be on
solid, indicating they are bound.